Hyundai Elantra: Airbag Module / Driver Airbag (DAB) Module and Clock Spring
Hyundai Elantra (CN7) 2021-2025 Service Manual / Restraint / Airbag Module / Driver Airbag (DAB) Module and Clock Spring
Description and operation
| Description |
| • | Driver Airbag (DAB) DAB is installed in the steering wheel, and electrically connected to the SRSCM via clock spring. It is deployed during frontal impact to protect the driver. |
| • | Clock Spring Clock spring delivers actuation signal, generated by the sensors installed in the front and right/left sides of a vehicle, to the inflator (gas generator) of the driver air bag module via internal cable. It also delivers actuation signal of the steering wheel remote control switch and horn to relevant systems via internal cable. |
|

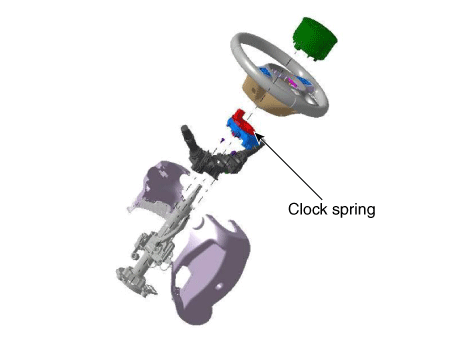
Components and components location
| Components |
[Normal type]
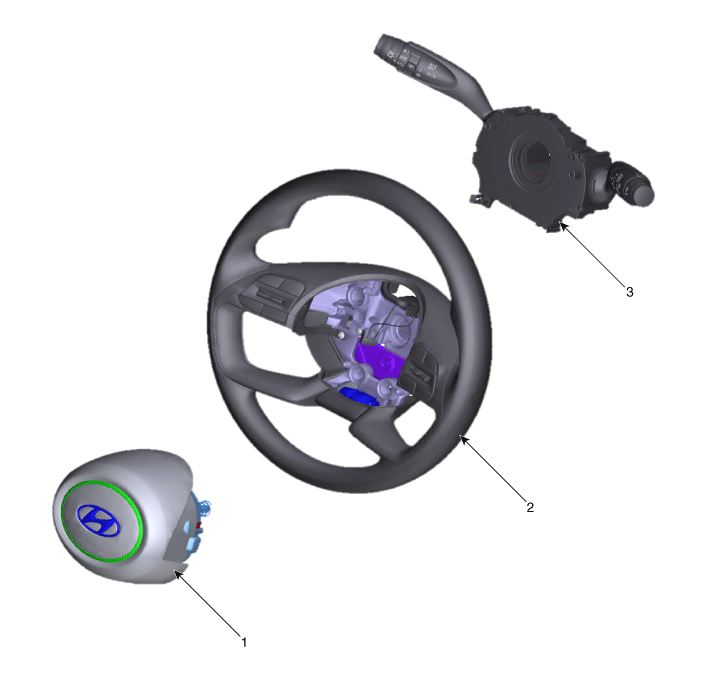
| 1. Driver Airbag (DAB) 2. Steering Wheel | 3. Clock spring assembly |
[N Line]
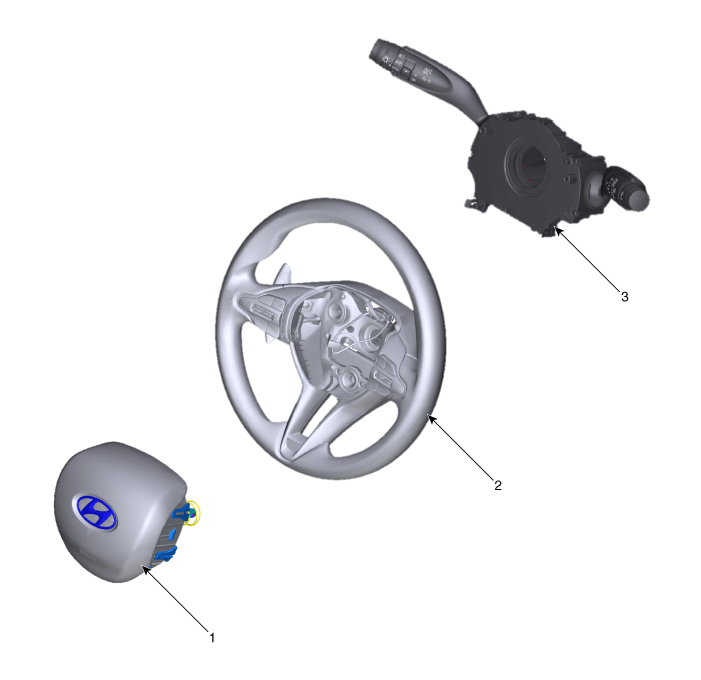
| 1. Driver Airbag (DAB) 2. Steering Wheel | 3. Clock spring assembly |
Repair procedures
| Inspection |
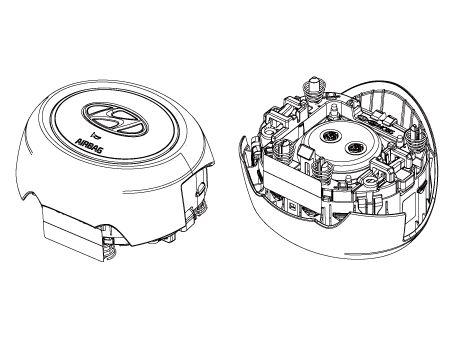
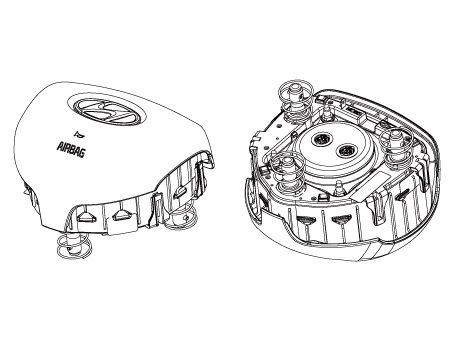
Driver Airbag (DAB)
|
| 1. | Check the airbag module for denting, cracking or deformation. |
| 2. | Check hooks and connectors for damage, terminals for deformities, and harness for binds. |
| 3. | Check airbag inflator case for dents, cracks or deformities. [Normal type]
[N Line]
|
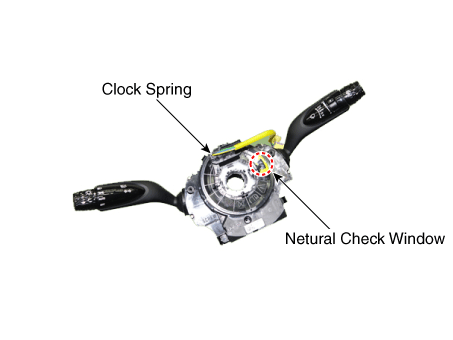
Clock Spring
| 1. | If any improper parts are found during inspection, replace the clock spring with a new one. |
| 2. | Check connectors and protective tube for damage, and terminals for deformities.
|
| Removal |
| 1. | Set the front tires straight-ahead.
|
| 2. | Disconnect the negative (-) battery terminal.
|

| 3. | Remove the driver airbag module.
[Normal type]
[N Line]
|
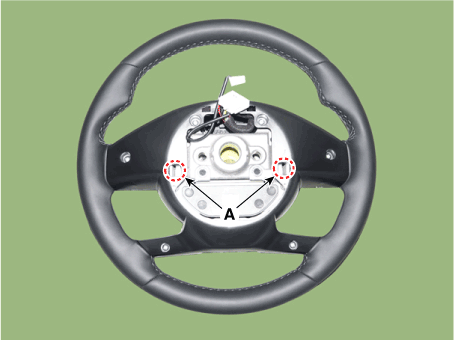
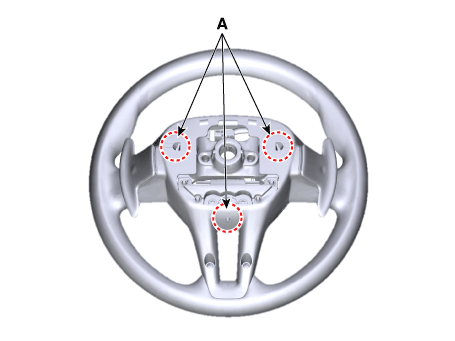

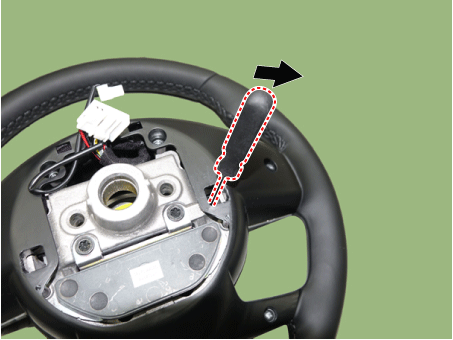
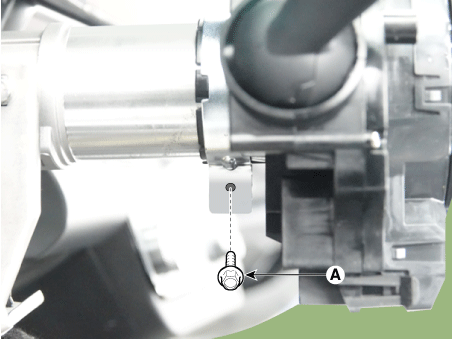
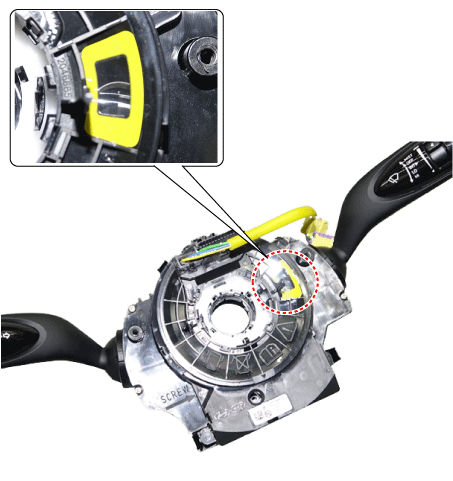
| 4. | Remove the airbag module from the steering wheel after disconnecting the module connector (A) and horn connector (B). [Normal type]
[N Line]
|
| 5. | Remove the steering wheel. (Refer to Steering System - "Steering Column and Shaft") |
| 6. | Loosen the steering wheel column shroud panel. (Refer to Body (Interior and Exterior) - "Steering Wheel Column Shroud Panel") |
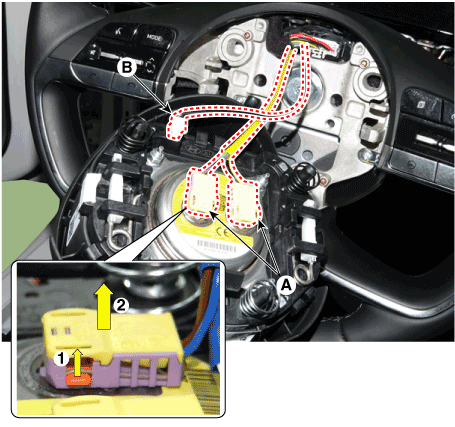
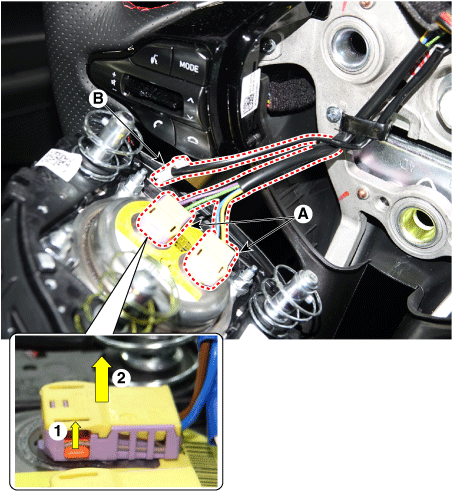
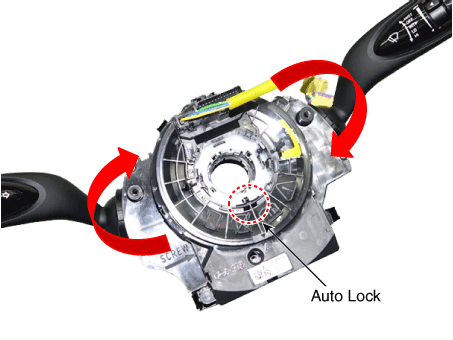
| 7. | Press the lock pin and then separate the connectors (A).
|
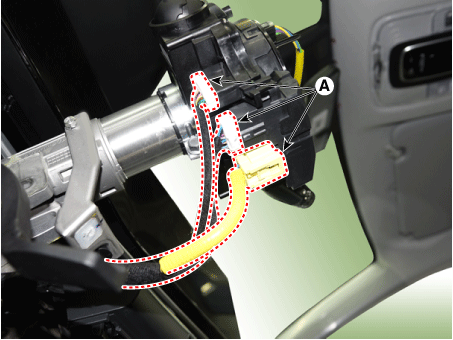
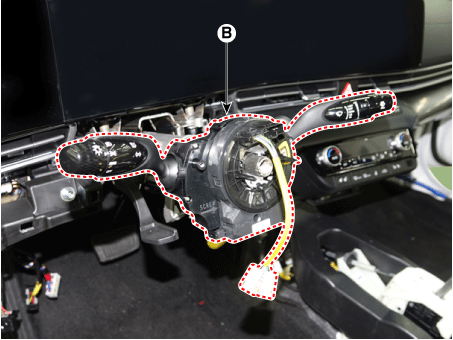
| 8. | Loosen the clamp mounting screw (A) and then remove the multifunction switch assembly (B).
|
| Installation |
| 1. | Set the front tires straight-ahead.
|
| 2. | Check if the battery (-) cable is disconnected.
|
| 3. | Factory setting for the clock spring is neutral.
|
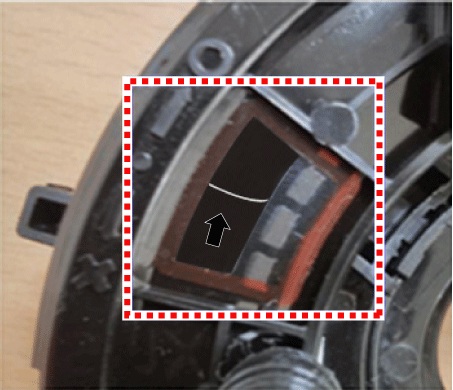
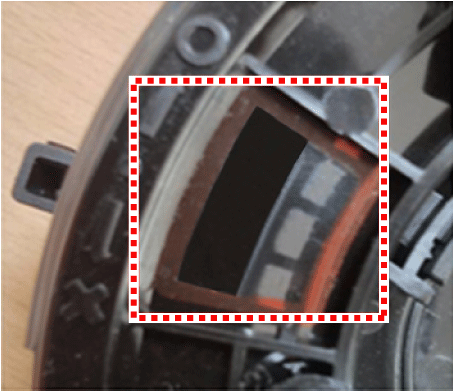
| 4. | Clock spring manual neutral setting procedure.
|
| 5. | Connect the clock spring wiring harness connector and horn wiring harness connector in the clock spring. |
| 6. | Insert steering column shroud and install the mounting screw. |
| 7. | Install the steering wheel. (Refer to Steering System - "Steering Wheel") |
| 8. | Install the airbag module. |
| 9. | Reconnect the battery negative (-) terminal. |
| 10. | After installing the airbag, confirm proper airbag system and horn operation.
|

 Passenger Airbag (PAB) Module
Description and operation
DescriptionThe passenger airbag (PAB) is installed inside the crash pad and protects the front passenger in the event of a frontal crash...
Other information:
Hyundai Elantra (CN7) 2021-2025 Owner's Manual: Winter Precautions
Use high quality ethylene glycol coolant Your vehicle is delivered with high quality ethylene glycol coolant in the cooling system. It is the only type of coolant that should be used because it helps prevent corrosion in the cooling system, lubricates the water pump and prevents freezing...
Hyundai Elantra (CN7) 2021-2025 Owner's Manual: Battery
WARNING To prevent SERIOUS INJURY or DEATH to you or bystanders, always follow these precautions when working near or handling the battery: If acid gets into your eyes, flush your eyes with clean water for at least 15 minutes and get immediate medical attention...
Categories
- Manuals Home
- 7th Gen Hyundai Elantra Owners Manual
- 7nd Gen Hyundai Elantra Service Manual
- Integrated Thermal Management Module (ITM)
- Control Cable
- Maintenance
- System operation
- Function settings
Rear center seat belt
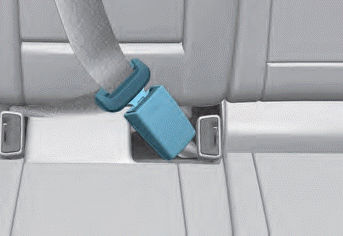
When using the rear center seat belt, the buckle with the “CENTER” mark must be used.
WARNING
Make sure that the seatback is locked in place when using the rear center seat belt.
If not, the seatback may move when there is a sudden stop or collision, which could result in serious injury.

Copyright © 2025 www.helantra7.com