Hyundai Elantra (CN7): Engine Control System / Fuel Pressure Control Valve (FPCV)
Description and operation
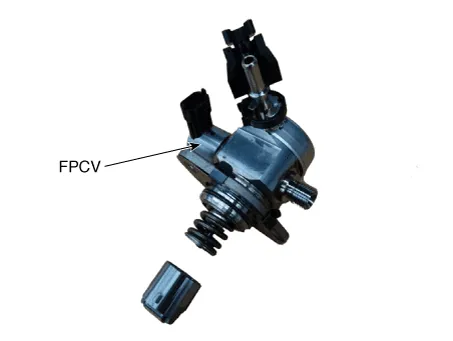
Installed on the high pressure fuel pump, the Fuel Pressure Regulator Valve controls the fuel amount flowing into the injectors in accordance with the ECM signal calculated based on various engine conditions.
Specifications
Item
|
Specification
|
Coil Resistance (Ω)
| 0.53 - 0.58 [20°C (68°F)]
|
Schematic diagrams
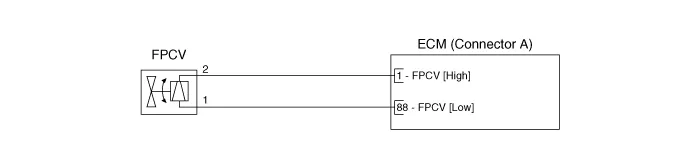
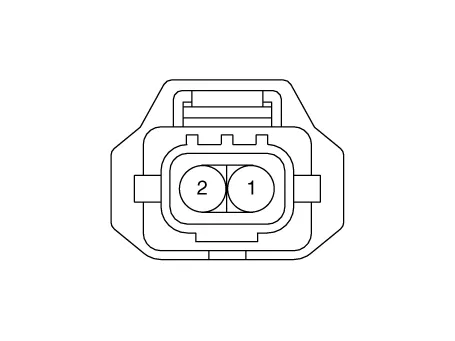
Harness Connector
Repair procedures
| 1. | Switch "OFF" the ignition and disconnect the negative (-) battery terminal. |
| 2. | Disconnect the fuel pressure regulator valve connector. |
| 3. | Measure resistance between the fuel pressure regulator valve terminals 1 and 2. |
| 4. | Check that the resistance is within the specification. Specification : 1.09 - 1.21Ω [20°C (68°F)] |
|
| •
| The fuel pressure regulator valve cannot be replaced as a unit. Replace it as high pressure fuel pump assembly. (Refer to Fuel Delivery System - "High Pressure Fuel Pump") |
|
| •
| The fuel pressure regulator valve cannot be replaced as a unit. Replace it as high pressure fuel pump assembly. (Refer to Fuel Delivery System - "High Pressure Fuel Pump") |
|
Description and operation
DescriptionCVVT (Continuous Variable Valve Timing) system advances or retards the valve opening and closing timing of the intake or the exhaust valve in accordance with the ECM control, calculated by the engine speed and the load.
Description and operation
DesrcriptionThe Electric Waste Gate Actuator(EWGA) is installed on the turbocharger. EWGA operates vain in west gate turbocharger and controls the compressed air by PWM signal of ECM.
Other information:
TroubleshootingWireless Power Charger System Troubleshooting Trouble status Inspection item Inspection Not chargedCheck the mobile phone status R-1Amber LED blinks OvercurrentR-2OverheatingR-2Foreign matterR-2R-1.
S

