
Hyundai Elantra (CN7): Sunroof / Sunroof Assembly
Hyundai Elantra (CN7) 2021-2026 Service Manual / Body (Interior and Exterior) / Sunroof / Sunroof Assembly
Components and components location
| Components Location |
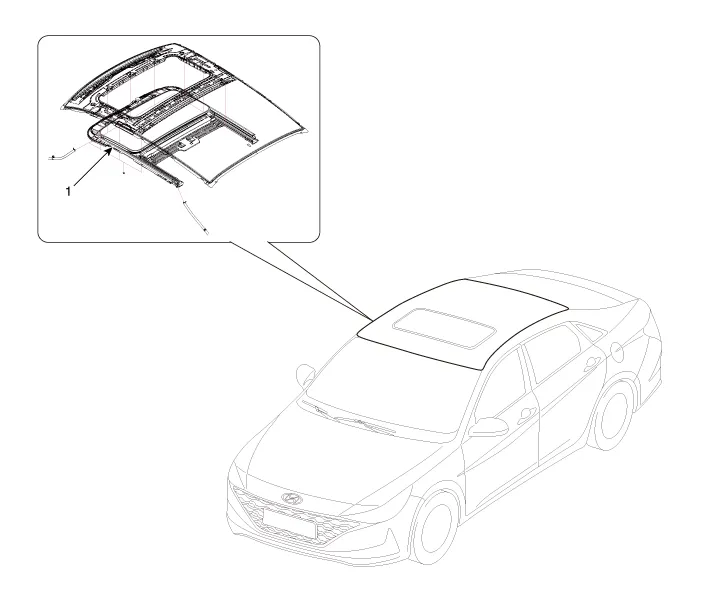
| 1. Sunroof assembly |
Repair procedures
| Replacement |
|

| 1. | Remove the roof trim. (Refer to Roof Trim - "Roof Trim Assembly") |
| 2. | Remove the sunroof glass. (Refer to Sunroof - "Sunroof Glass") |
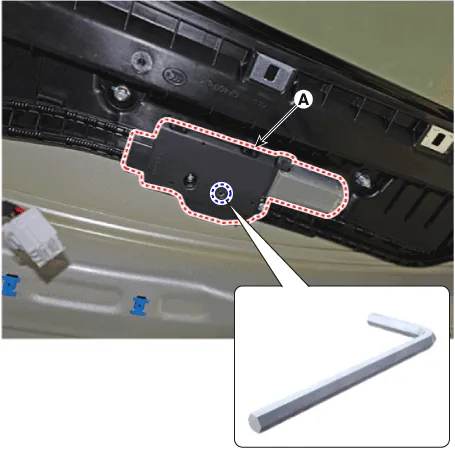
| 3. | Loosen the mounting screws and remove the sunroof motor (A).
|
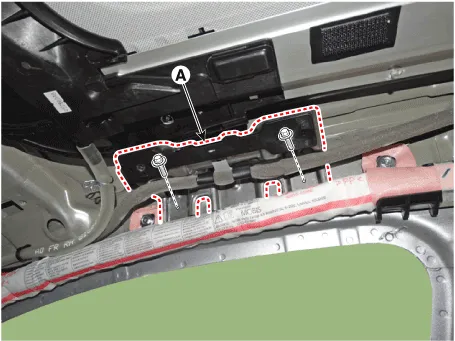
| 4. | After loosening the mounting bolts, then remove the assist handle bracket (A).
|
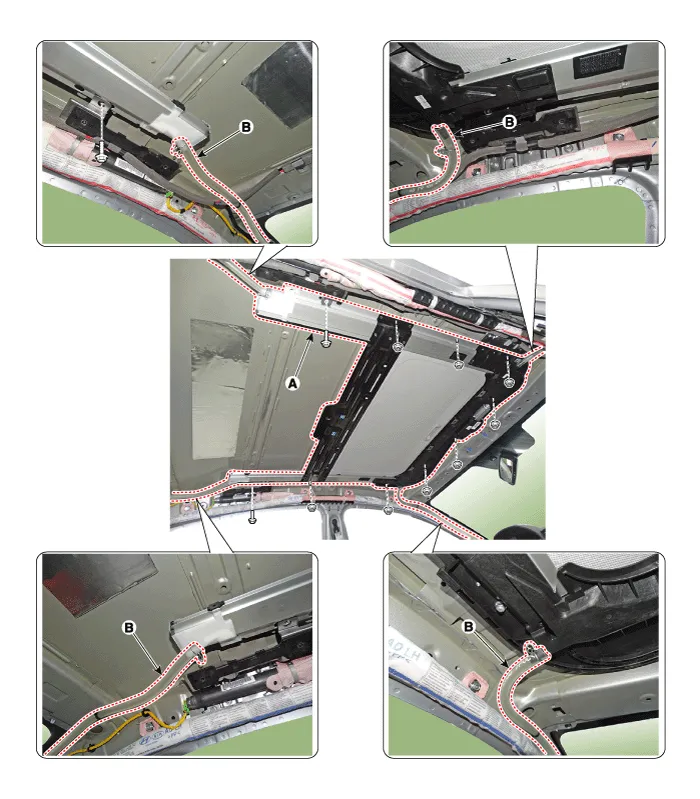
| 5. | Disconnect the drain tubes (B). |
| 6. | After loosening the mounding nuts and bolts, remove the sunroof assembly (A).
|
| 7. | To install, reverse the removal procedure.
|

Repair procedures Replacement1.Open the glass fully.2.Remove the mounting pins (C), from the frame (B), and then remove the deflector (A).3.To install, reverse the removal procedure.
Repair procedures Replacement1.Remove the sunroof assembly.(Refer to Sunroof - "Sunroof Assembly") 2.After loosening the mounting screws, remove the drip rail assembly (A).
Other information:
Hyundai Elantra (CN7) 2021-2026 Service Manual: Specification
S
Hyundai Elantra (CN7) 2021-2026 Service Manual: Troubleshooting
TroubleshootingDiagnosis with Diagnostic tool1.In the body electrical system, failure can be quickly diagnosed by using the vehicle diagnostic system (Diagnostic tool).The diagnostic system (Diagnostic tool) provides the following information.1)Fault Code Searching : Checking failure and code number (DTC)2)Data Analysis : Checking the system input/
Categories
- Manuals Home
- Hyundai Elantra Owners Manual
- Hyundai Elantra Service Manual
- Body (Interior and Exterior)
- Engine Mechanical System
- Maintenance
- New on site
- Most important about car

Copyright © 2026 www.helantra7.com - 0.0142