Hyundai Elantra (CN7): Sunroof / Sunroof Sunshade
Repair procedures
| Replacement |
| 1. | Remove the sunroof assembly. (Refer to Sunroof - "Sunroof Assembly") |
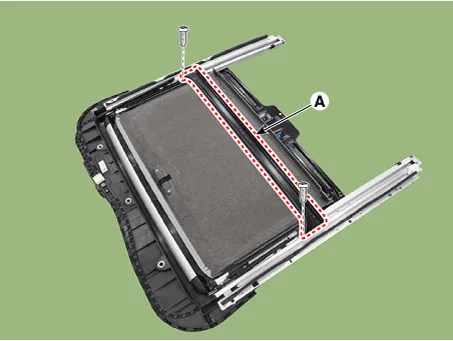
| 2. | After loosening the mounting screws, remove the drip rail assembly (A).
|
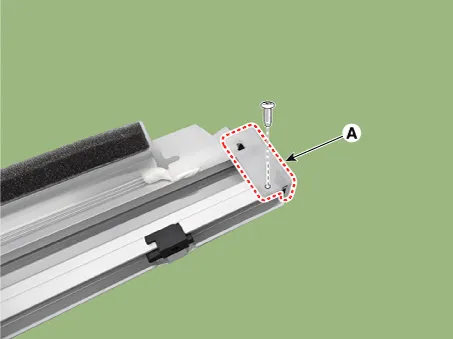
| 3. | After loosening the mounting screws, disengage the rear drip (A).
|
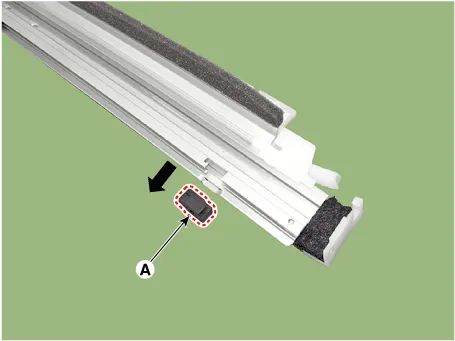
| 4. | Remove the stopper (A) by pushing it in the direction of the arrow.
|
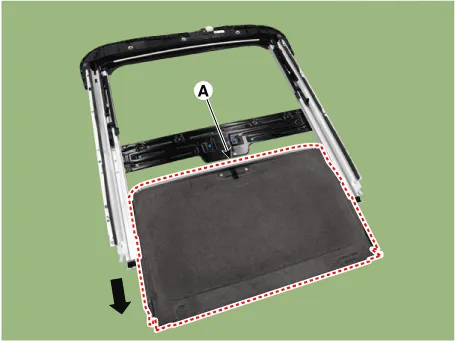
| 5. | Remove the sunroof sunshade (A) by pushing it backward.
|
| 6. | To install, reverse the removal procedure. |
Components and components location Components Location1. Sunroof assembly Repair procedures Replacement • When removing with a flat - tip screwdriver or remover, wrap protective tape around the tools to prevent damage to components.
Repair procedures Replacement1.Remove the sunroof assembly.(Refer to Sunroof - "Sunroof Assembly") 2.Remove the sunroof sunshade.(Refer to Sunroof - "Sunroof Sunshade") 3.
Other information:
Hyundai Elantra (CN7) 2021-2026 Service Manual: Heater Unit
Components and components location Component Location1. Heater unit assemblyCompoents1. Heater unit assembly2. Heater tube cover3. Heater core assembly4. Mode control actuator [LH]5. Dummy PTC6. Temperature control actuator [LH]7. Heater case [LH]8.
Hyundai Elantra (CN7) 2021-2026 Service Manual: Heater Control Unit
Components and components location Component Location1. Heater control unitComponents[Connector A] Pin No Function Pin No Function 1Mode control actuator (Feedback)21Mode control actuator (Vent)2Intake actuator (Feedback)22Mode control actu
Categories
- Manuals Home
- Hyundai Elantra Owners Manual
- Hyundai Elantra Service Manual
- Vehicle Information
- Instrument Panel Overview
- General Tightening Torque Table. General information
- New on site
- Most important about car
