Hyundai Elantra: Air Conditioning System / Condenser
Components and components location
| Components Location |
[General type]
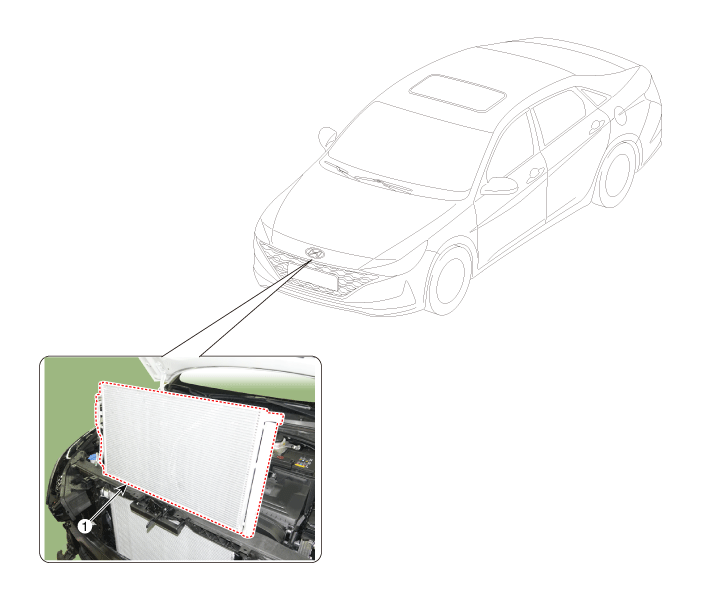
| 1. Condenser |
[N Line]
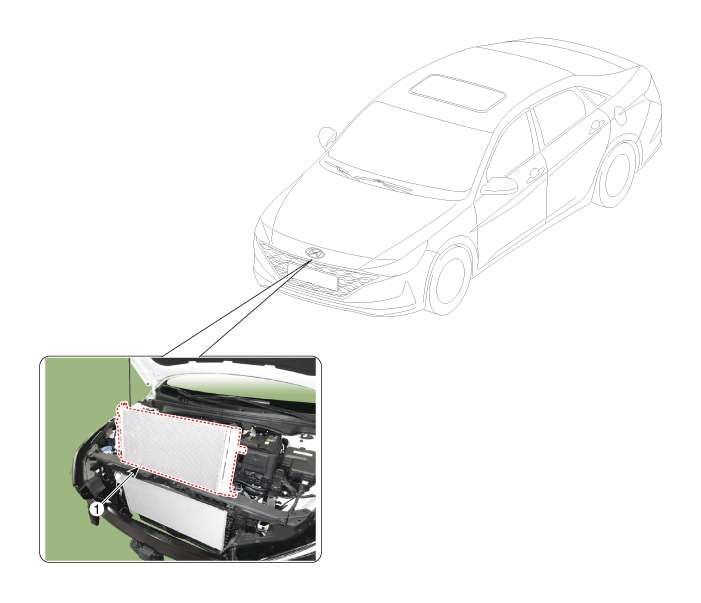
| 1. Condenser |
Repair procedures
| Inspection |
| 1. | Check the condenser fins for clogging and damage. If clogged, clean them with water, and blow them with compressed air. If bent, gently bend them using a screwdriver or pliers. |
| 2. | Check the condenser connections for leakage, and repair or replace it, if required. |
| Replacement |
[General type]
| 1. | Recover the refrigerant with a recovery / recycling / charging station. |
| 2. | Disconnect the negative (-) battery terminal. |
| 3. | Remove the front bumper. (Refer to Body - "Front Bumper Assembly") |
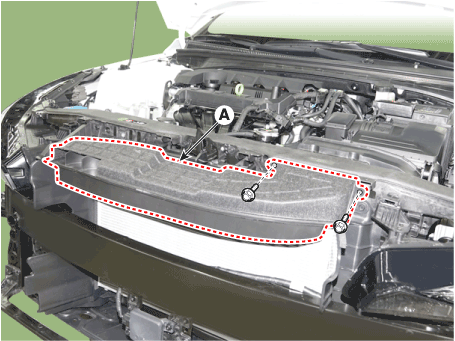
| 4. | Loosen the mounting bolts, remove the air duct (A).
|
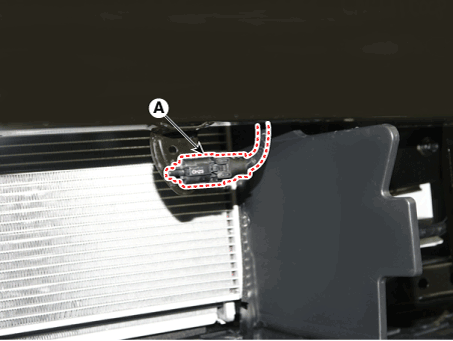
| 5. | Remove the ambient temperature sensor (A)..
|
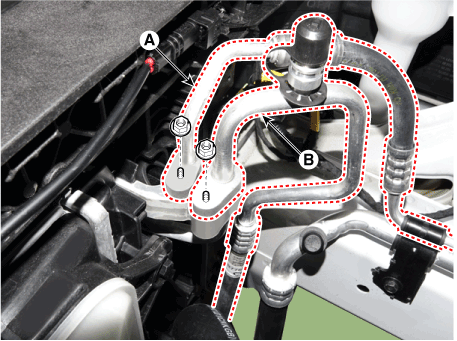
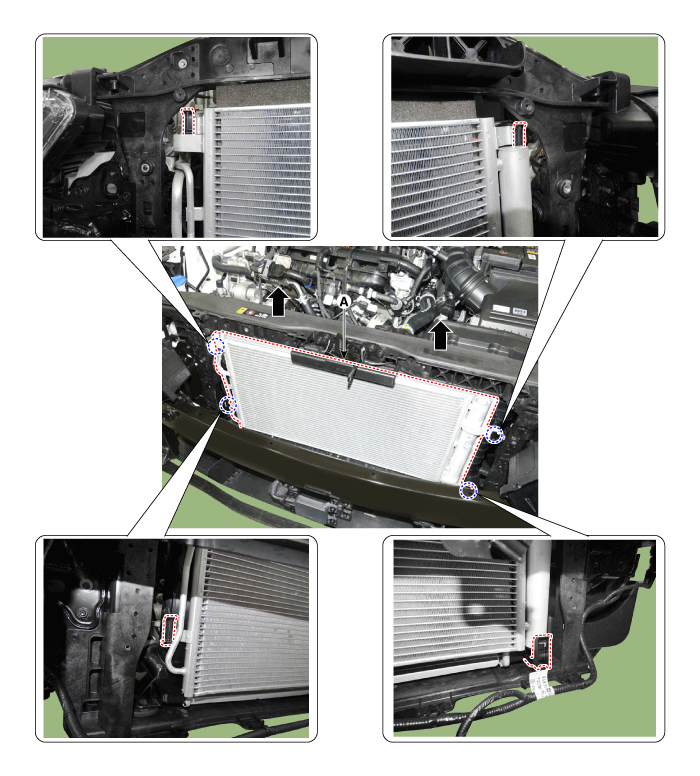
| 6. | Loosen the mounting nuts, and then disconnect the discharge line (B) and liquid line (A) from the condenser.
|
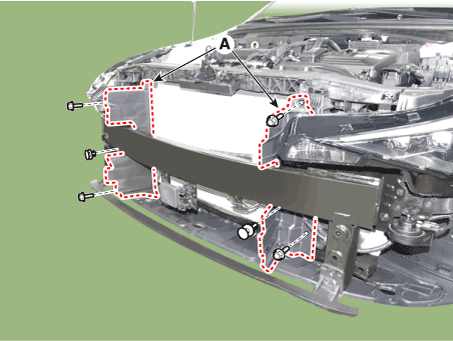
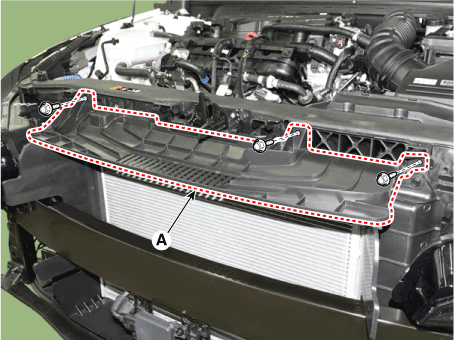
| 7. | Loosen the mounting pin-type retainers and bolts, remove the side air guard (A).
|
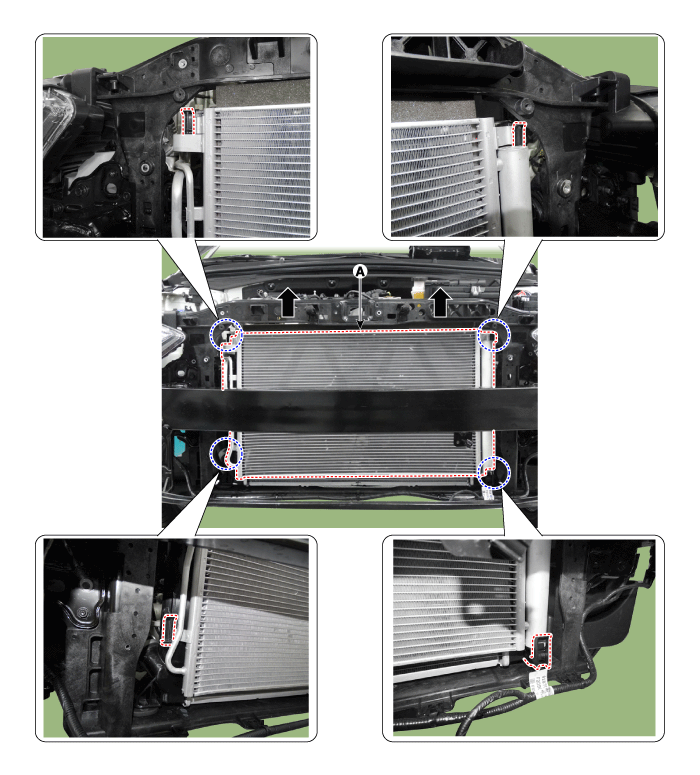
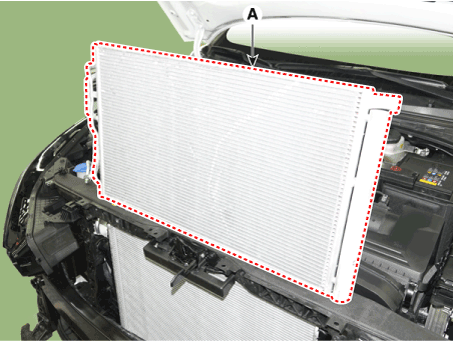
| 8. | Remove the condenser (A) from radiator.
|
| 9. | To install, reverse the removal procedure.
|

[N Line]
| 1. | Recover the refrigerant with a recovery / recycling / charging station. |
| 2. | Disconnect the negative (-) battery terminal. |
| 3. | Remove the front bumper. (Refer to Body - "Front Bumper Assembly") |
| 4. | Loosen the mounting bolts, remove the air guard (A).
|
| 5. | Remove the intercooler. (Refer to Engine Mechanical System - "Intercooler") |
| 6. | Remove the hood latch assembly. (Refer to Body - "Hood Latch Assembly") |
| 7. | Loosen the mounting nuts, and then disconnect the discharge line (B) and liquid line (A) from the condenser.
|
| 8. | Remove the condenser (A) from radiator.
|

| 9. | To install, reverse the removal procedure.
|
 Compressor
Description and operation
DescriptionThe compressor is the power unit of the A/C system.It is located on the side of engine block and driven by a V-belt of the engine...
 Receiver-Drier
Repair procedures
Replacement1.Remove the condenser.2.Remove the cap (A) on the bottom of the condenser with a L wrench. Tightening torque : 9...
Other information:
Hyundai Elantra (CN7) 2021-2025 Owner's Manual: Automatic heating and air conditioning
1. Press the AUTO button The modes, fan speeds, air intake and air-conditioning will be controlled automatically according to the temperature setting you select. You can control the blower strength in three stages by pushing the AUTO button during automatic operation...
Hyundai Elantra (CN7) 2021-2025 Service Manual: Specifications
Tightening Torques Item N.m kgf.m lb-ft Passenger Air Bag 3.9 - 5.9 0.4 - 0.6 2.9 - 4.4Curtain Airbag7.8 - 11.80.8 - 1.25.8 - 8...
Categories
- Manuals Home
- 7th Gen Hyundai Elantra Owners Manual
- 7nd Gen Hyundai Elantra Service Manual
- Recommended Lubricants and Capacities
- Drive Mode
- Fuel gauge
- Rear Seats
- Instrument Panel Overview
Side air bags
.png)
Front seat
.png)
Your vehicle is equipped with a side air bag in each front seat. The purpose of the air bag is to provide the vehicle’s driver and the front passenger with additional protection than that offered by the seat belt alone.

Copyright © 2025 www.helantra7.com