Hyundai Elantra (CN7): Fuses / Fuse/Relay Panel Description. Engine compartment fuse panel
Instrument panel fuse panel
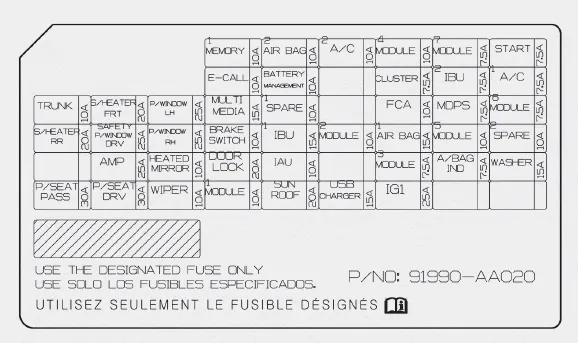
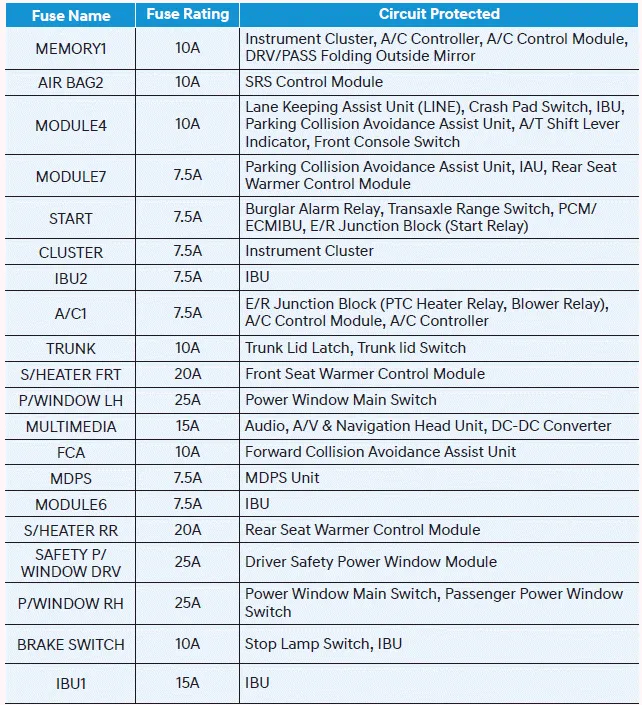
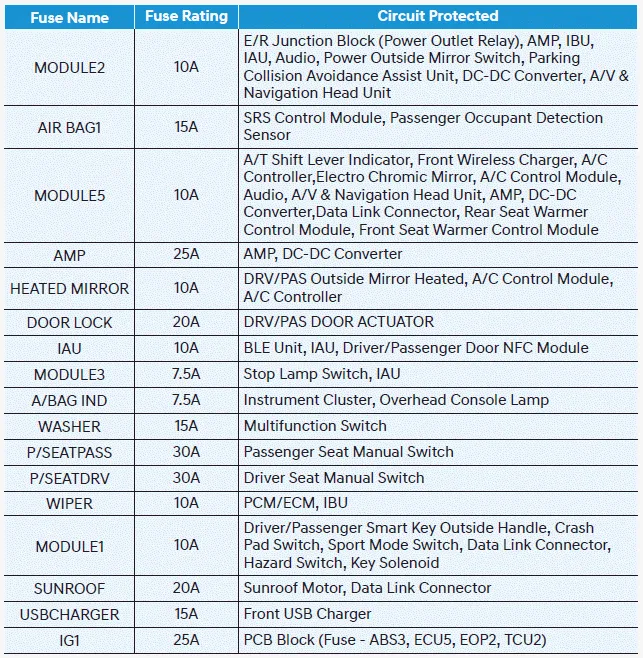
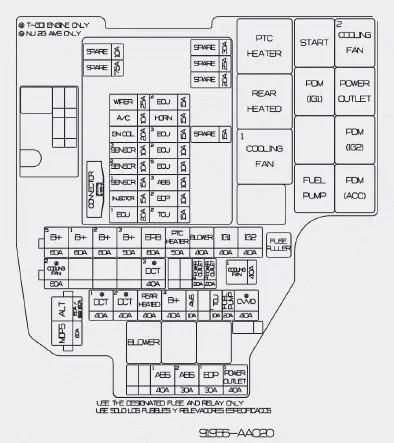
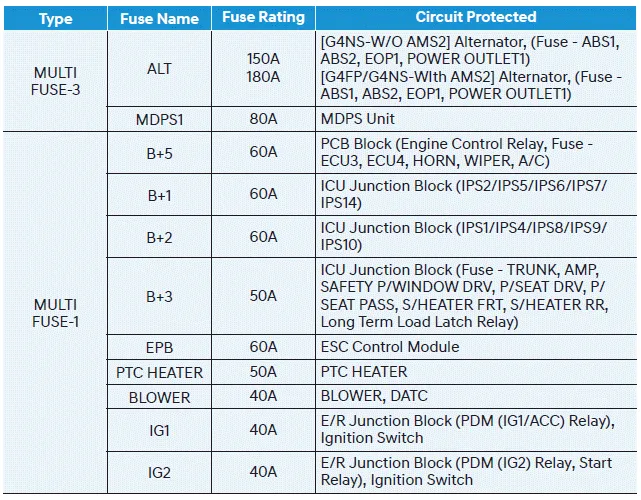
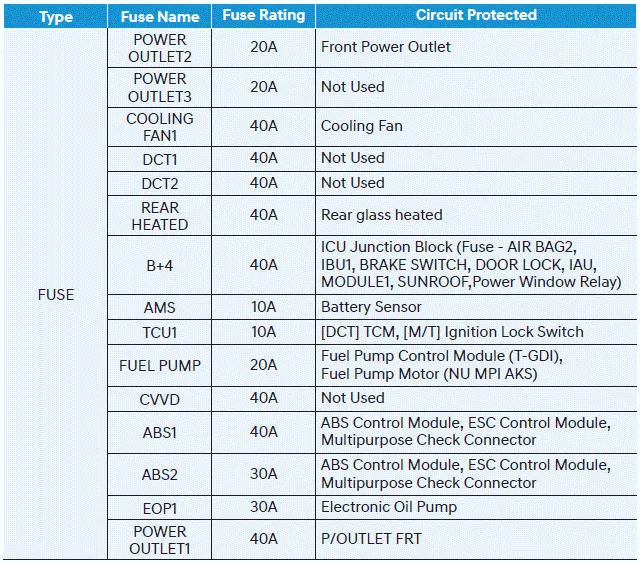
Inside the fuse/relay box cover, you can find the fuse/relay label describing fuse/ relay names and ratings.
Information
Not all fuse panel descriptions in this manual may be applicable to your vehicle; the information is accurate at the time of printing. When you inspect the fuse box on your vehicle, refer to the fuse box label.
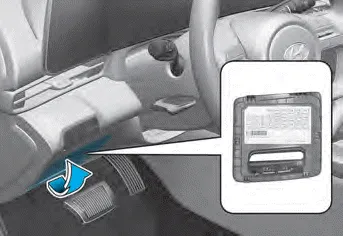
Driver’s side fuse panel
Driver’s side fuse panel
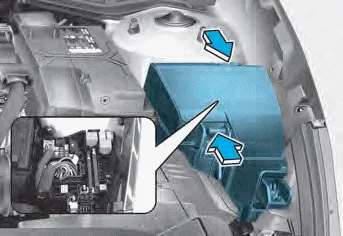
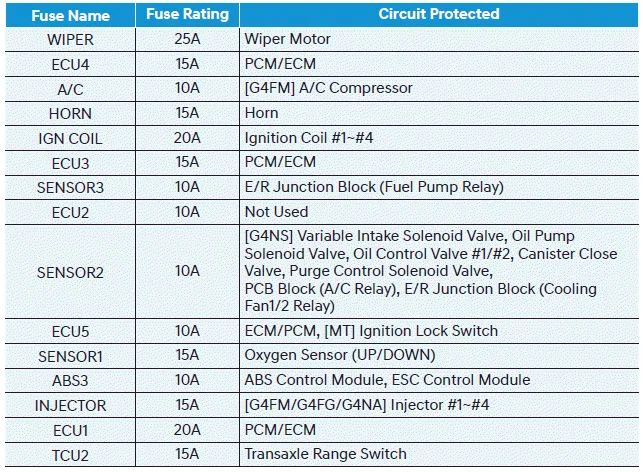
Engine compartment fuse panel
Inside the fuse/relay box cover, you can find the fuse/relay label describing fuse/ relay names and ratings.
Information
Not all fuse panel descriptions in this manual may be applicable to your vehicle; the information is accurate at the time of printing. When you inspect the fuse panel in your vehicle, refer to the fuse panel label.
Engine compartment fuse panel
Engine compartment fuse panel
Engine compartment fuse panel
Blade type fuse Cartridge type fuse 1. Turn the engine off. 2. Turn all other switches OFF. 3. Remove the fuse panel cover by pressing the tap and pulling up.
Consult an authorized HYUNDAI dealer to replace most vehicle light bulbs. It is difficult to replace vehicle light bulbs because other parts of the vehicle must be removed before you can get to the bulb.
Other information:
Hyundai Elantra (CN7) 2021-2026 Service Manual: Repair procedures
Refrigerant System Service Basics (R-134a)Refrigerant Recovery Use only service equipment that is U.L-listed and is certified to meet the requirements of SAE J2210 to remove HFC-134a(R-134a) from the air conditioning system. • Air conditioning refrigerant or lubricant vapor can irritate your eyes, nose, or
Hyundai Elantra (CN7) 2021-2026 Service Manual: Temperature Control Actuator
Description and operation DescriptionThe temperature control actuator is located at the heater unit. It regulates the temperature by the procedure as follows. The signal from the control unit adjusts the position of the temperature door by operating the temperature switch.
Categories
- Manuals Home
- Hyundai Elantra Owners Manual
- Hyundai Elantra Service Manual
- Engine Mechanical System
- Troubleshooting
- Integrated Thermal Management Module (ITM)
- New on site
- Most important about car
