Hyundai Elantra (CN7): Floor Carpet / Repair procedures
Hyundai Elantra (CN7) 2021-2025 Service Manual / Body (Interior and Exterior) / Floor Carpet / Repair procedures
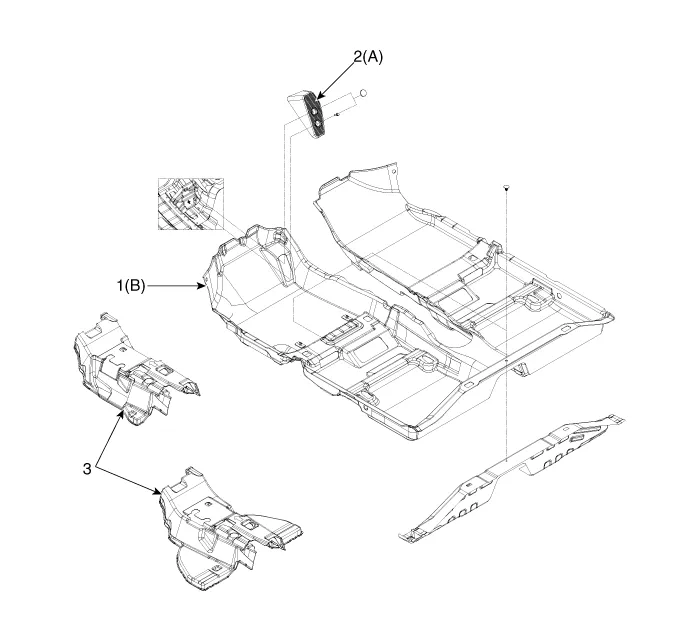
| Replacement |
|

|

| 1. | Remove the front seat assembly. (Refer to Front Seat - "Front Seat Assembly") |
| 2. | Remove the rear seat cushion assembly. (Refer to Rear Seat - "Rear Seat Assembly") |
| 3. | Remove the floor console assembly. (Refer to Floor Console - "Floor Console Assembly") |
| 4. | Remove the center pillar lower trim. (Refer to Interior Trim - "Center Pillar Trim") |
| 5. | Remove the cowl side trim. (Refer to Interior Trim - "Cowl Side Trim") |
| 6. | Remove the footrest (A). |
| 7. | Remove the floor carpet assembly (B). |
| 8. | To install, reverse the removal procedure.
|

Other information:
Hyundai Elantra (CN7) 2021-2025 Service Manual: Specification
S
Hyundai Elantra (CN7) 2021-2025 Service Manual: In-car Sensor
Description and operation DescriptionThe In-car air temperature sensor is built in the heater & A/C control unit.The sensor contains a thermistor which measures the temperature of the inside. The signal decided by the resistance value which changes in accordance with perceived inside temperature, is delivered to heater control unit and accor
Categories
- Manuals Home
- Hyundai Elantra Owners Manual
- Hyundai Elantra Service Manual
- Driver assistance system
- Maintenance
- Rear Seats
- New on site
- Most important about car

Copyright © 2025 www.helantra7.com - 0.015