Hyundai Elantra (CN7): Brake System / Brake Pad
Repair procedures
| Replacement |
| 1. | Loosen the wheel nuts slightly. Raise the vehicle, and make sure it is securely supported. |
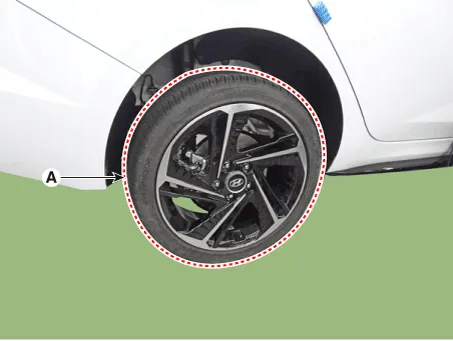
| 2. | Remove the front wheel and tire (A) from the front hub.
|


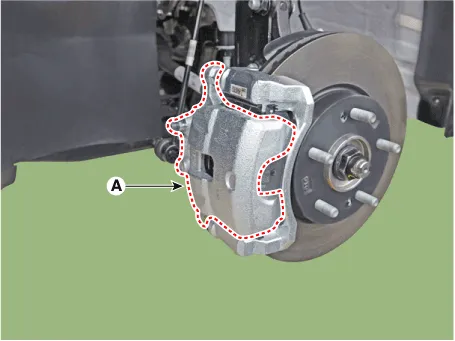
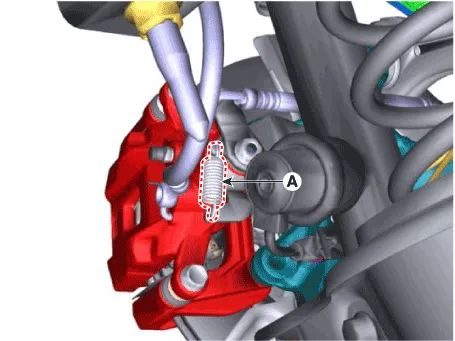
| 3. | Up the brake caliper body (A) by loosening the guide rod bolt.
|
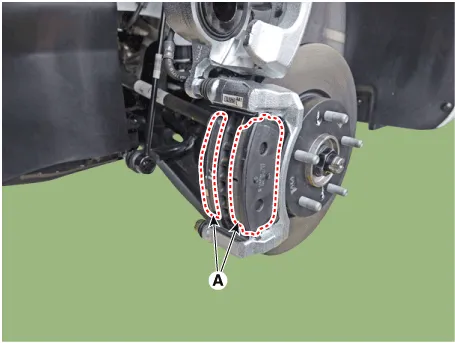
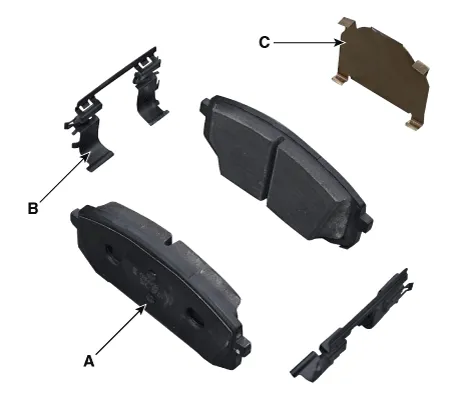
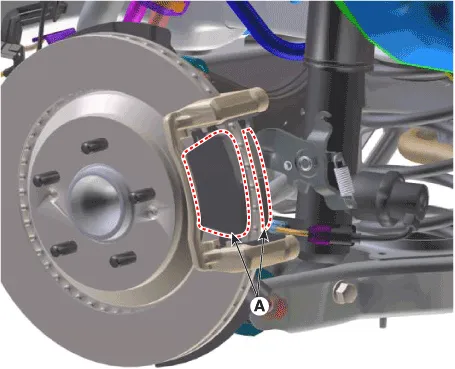
| 4. | Remove the brake pad (A).
|
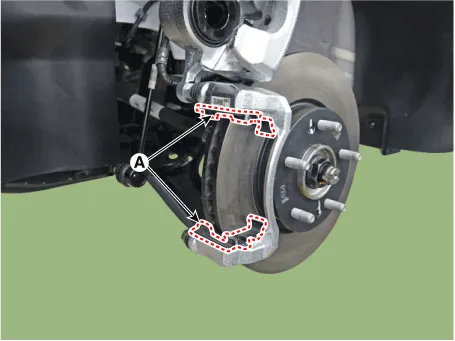
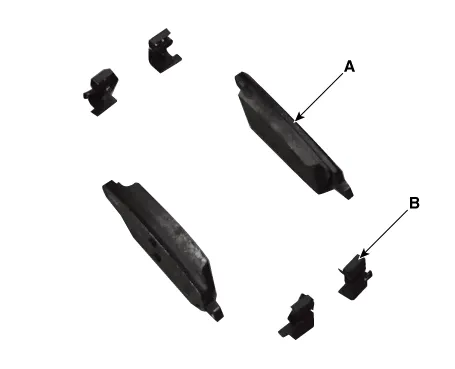
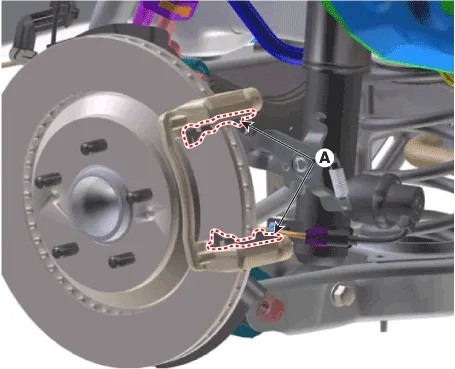
| 5. | Replace the pad retainer (A) with a new one.
|
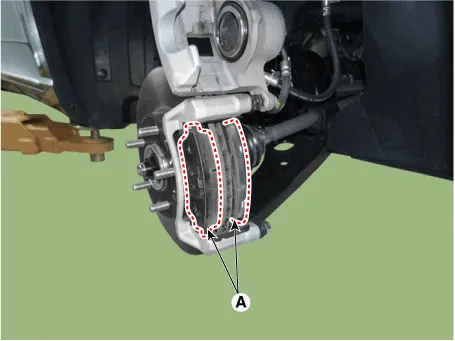
| 6. | Replace the brake pad (A) with a new one.
|
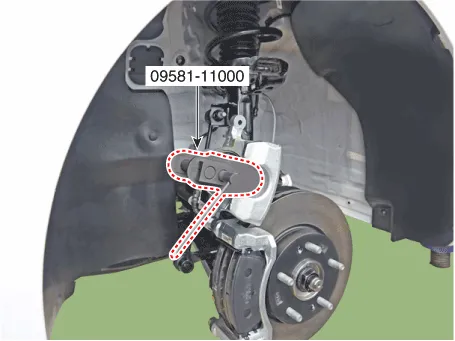
| 7. | Use a SST (09581-11000) when installing the brake caliper assembly.
|
| 8. | Install the caliper body (A) then tighten the guide rod bolt.
|
| 9. | Install the front wheel and tire (A).
|
| 1. | Loosen the wheel nuts slightly. Raise the vehicle, and make sure it is securely supported. |
| 2. | Remove the rear wheel and tire (A) from the rear hub.
|

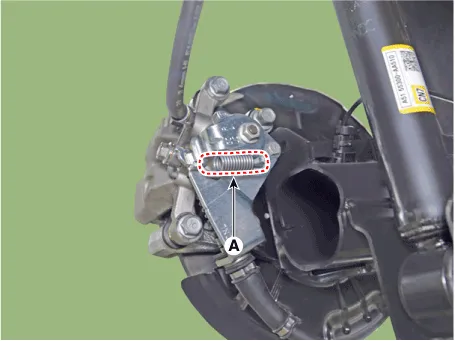
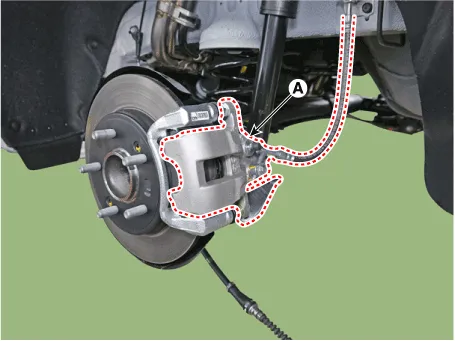
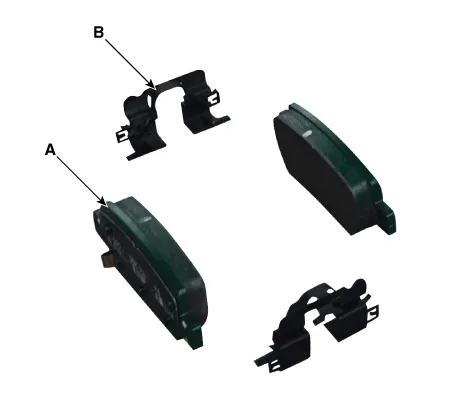
| 3. | Remove the return spring (A).
|
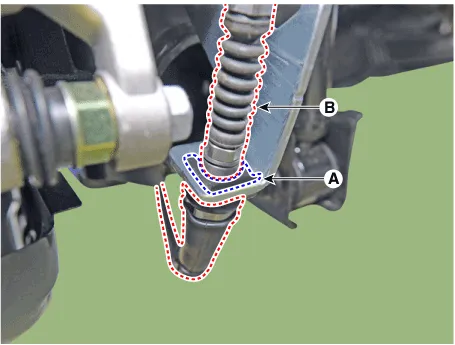
| 4. | Disconnect the parking cable (B) after remove the parking brake cable fixing clip (A).
|
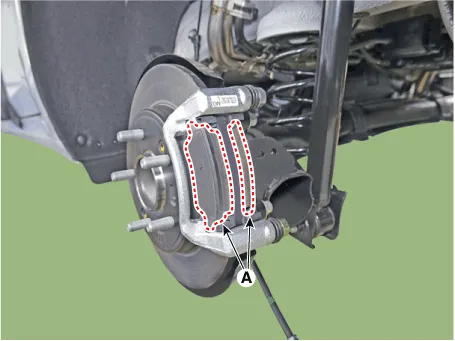
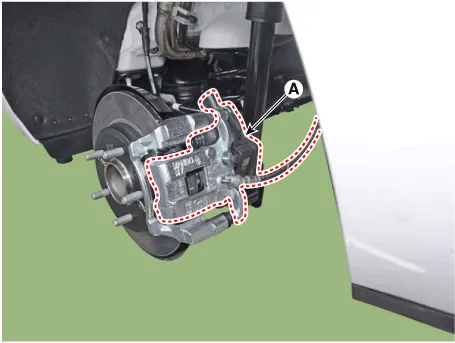
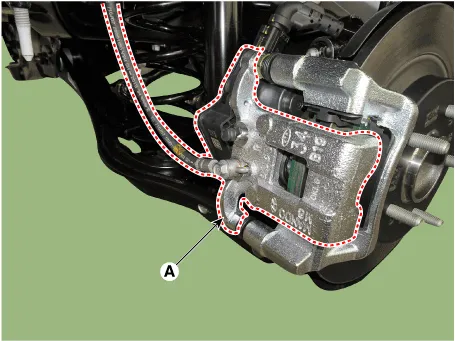
| 5. | Remove the caliper body (A) by loosening the guide rod bolt.
|
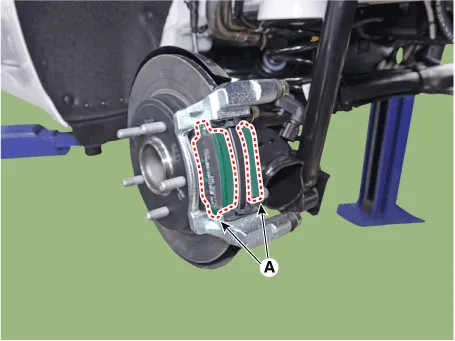
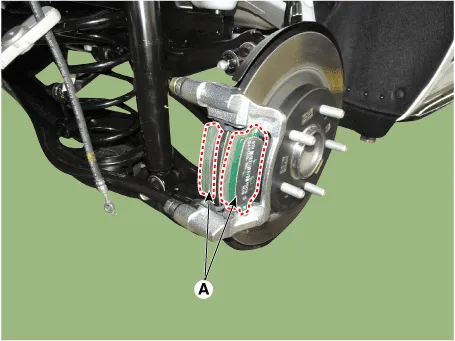
| 6. | Remove the brake pad (A).
|
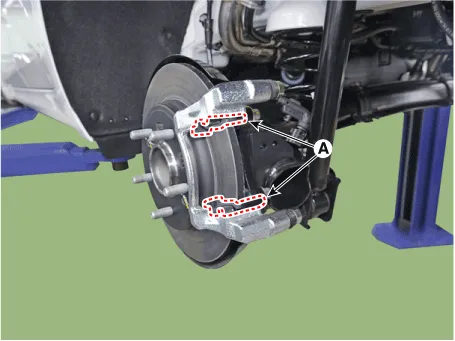
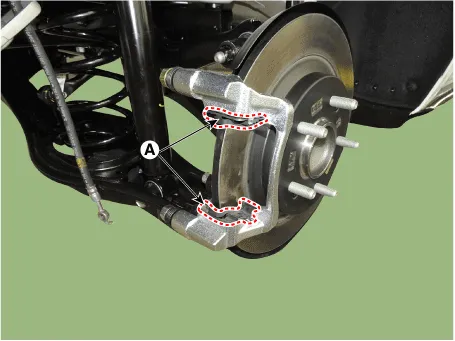
| 7. | Replace the pad liner (A) with a new one.
|
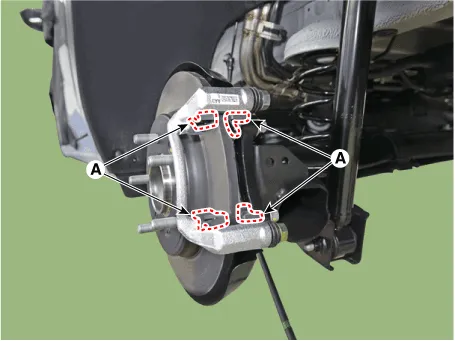
| 8. | Replace the brake pad (A) with a new one.
|
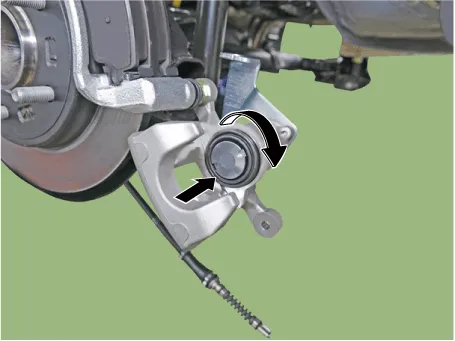
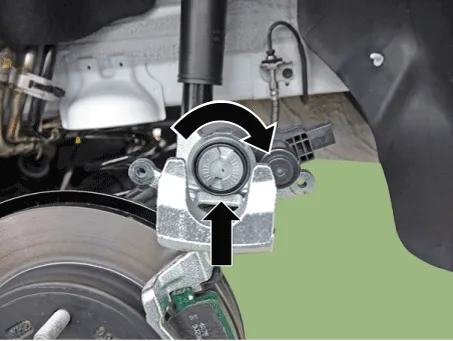
| 9. | Press in the caliper piston.
|
| 10. | Install the caliper body (A) then tighten the guide rod bolt.
|
| 11. | Connect the parking cable (B) and than install the parking brake cable fixing clip (A).
|
| 12. | Install the return spling (A).
|
| 13. | Install the front wheel and tire (A).
|
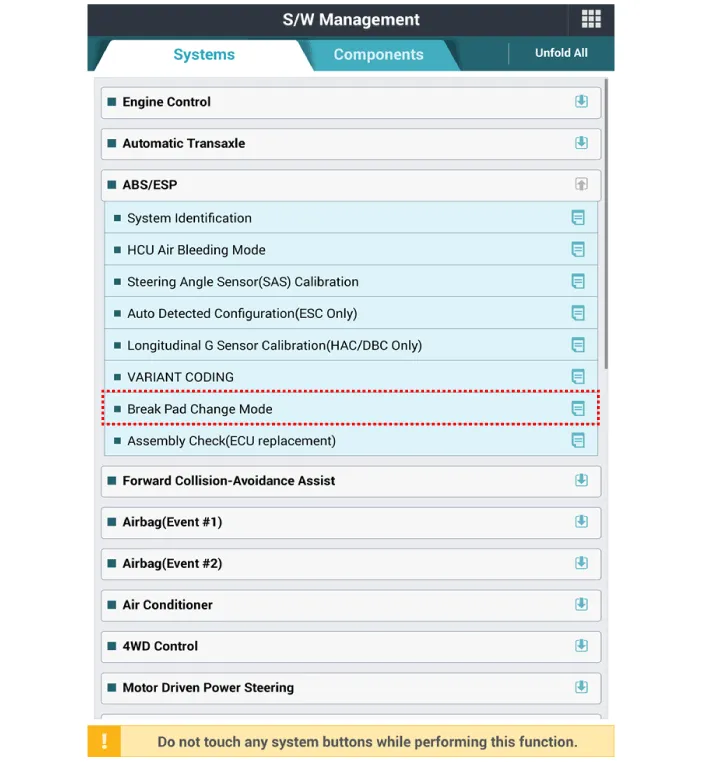
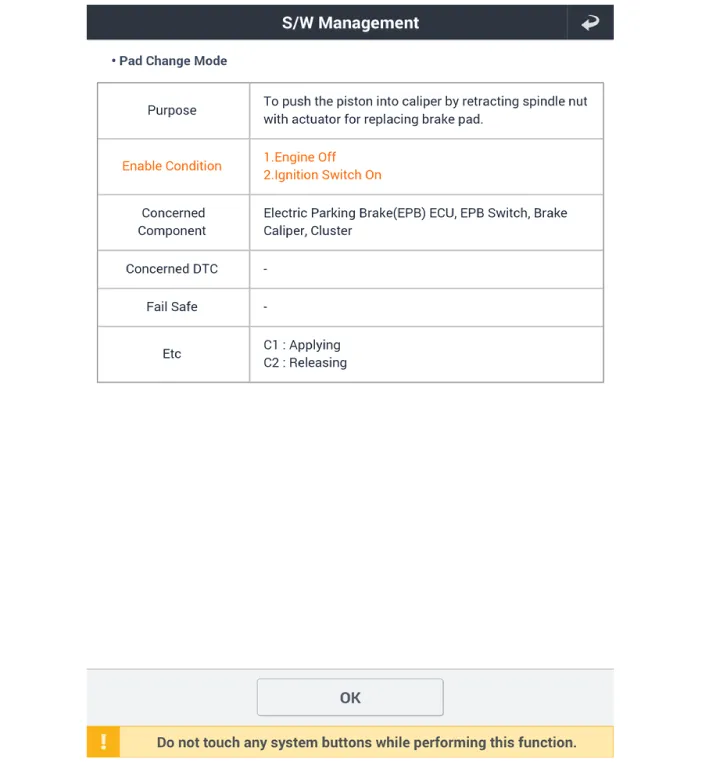
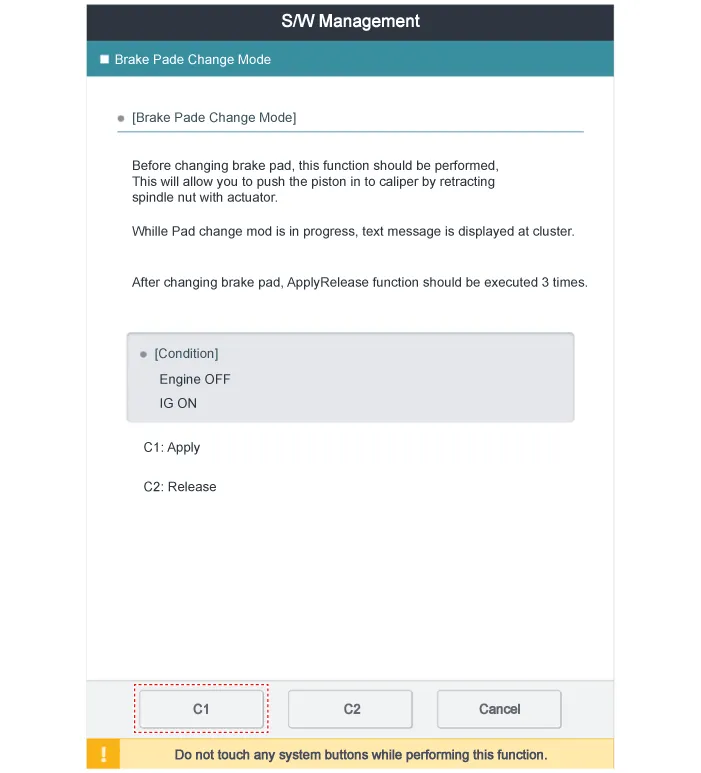
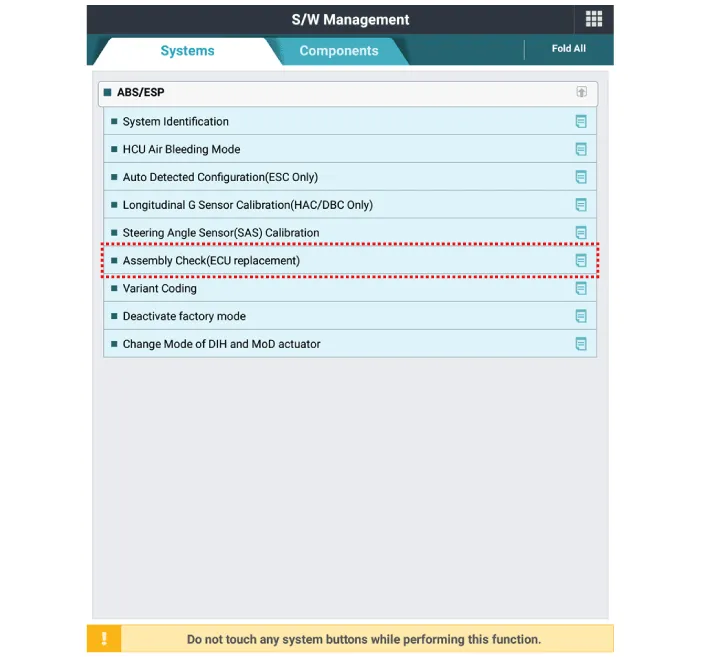
| 1. | Before removing the rear caliper, perform "Brake Pad Replacement Mode" using the diagnostic tool.
|
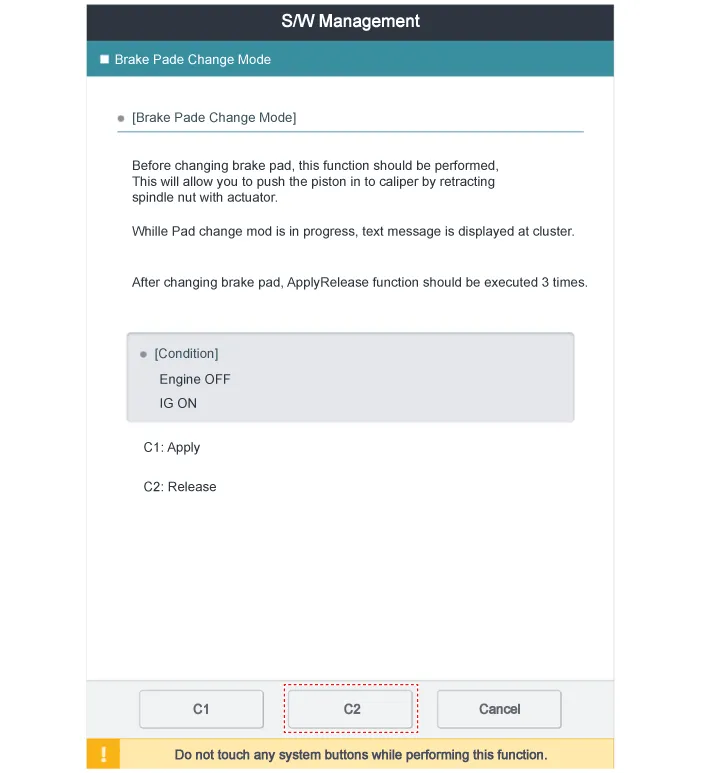
| 2. | Select C2 (Release) on the screen below.
|
| 3. | Loosen the wheel nuts slightly. Raise the vehicle, and make sure it is securely supported. |
| 4. | Remove the rear wheel and tire (A) from the rear hub.
|
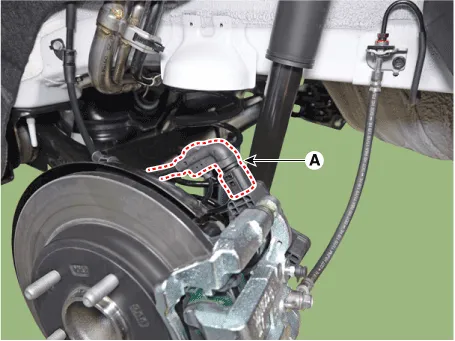
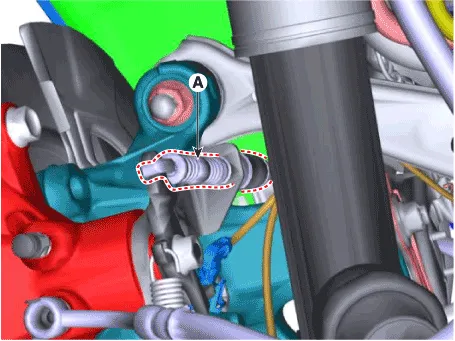
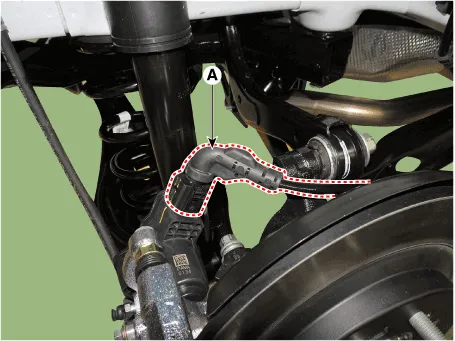
| 5. | Disconnect the EPB actuator connector (A).
|
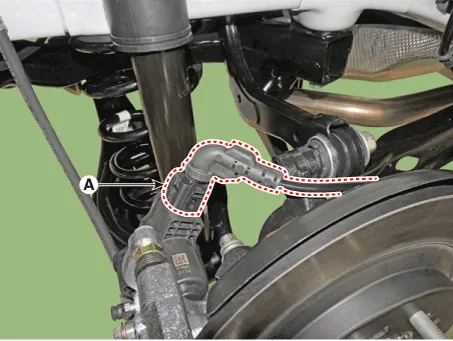
| 6. | Remove the caliper body (A) after loosening the guide rod bolt.
|
| 7. | Remove the brake pad (A).
|
| 8. | Replace the pad retainer (A) with a new one.
|
| 9. | Replace the brake pad (A) with a new one.
|
| 10. | Press in the caliper piston.
|
| 11. | Install the caliper body (A) then tighten the guide rod bolt.
|
| 12. | Connect the EPB actuator connector (A).
|
| 13. | Install the front wheel and tire (A).
|
| 14. | After replacing the brake pad (EPB applied), perform "Brake Pad Replacement Mode" using the diagnostic tool.
|
| 15. | Select C1 (Apply) on the screen below.
|
| 16. | After replacing the brake pad, make sure that the caliper is installed correctly by performing "Check assembling (ECU replaced)" from the optional function.
|
| 1. | Loosen the wheel nuts slightly. Raise the vehicle, and make sure it is securely supported. |
| 2. | Remove the rear wheel and tire (A) from the rear hub.
|
| 3. | Remove the return spring (A).
|
| 4. | Disconnect the parking brake cable (A) after removing the fixing clip.
|
| 5. | Remove the caliper body (A) after loosening the guide rod bolts.
|

| 6. | Remove the brake pad (A).
|
| 7. | Replace the pad liner (A) with a new product.
|
| 8. | Replace the brake pad (A) with a new grease coated product.
|
| 9. | Press in the caliper piston.
|
| 10. | Install the caliper body (A) then tighten the guide rod bolt.
|
| 11. | Connect the parking cable (A) and than install the parking brake cable fixing clip.
|
| 12. | Install the return spling (A).
|
| 13. | Install the rear wheel and tire (A).
|
| 1. | Before removing the rear caliper, perform "Brake Pad Replacement Mode" using the diagnostic tool.
|
| 2. | Select C2 (Release) on the screen below.
|
| 3. | Loosen the wheel nuts slightly. Raise the vehicle, and make sure it is securely supported. |
| 4. | Remove the rear wheel and tire (A) from the rear hub.
|
| 5. | Disconnect the EPB actuator connector (A).
|
| 6. | Remove the caliper body (A) after loosening the guide rod bolts.
|
| 7. | Remove the brake pad (A).
|
| 8. | Replace the pad liner (A) with a new product.
|
| 9. | Replace the brake pad (A) with a new grease coated product.
|
| 10. | Press in the caliper piston.
|
| 11. | Install the caliper body (A) then tighten the guide rod bolt.
|
| 12. | Connect the EPB actuator connector (A).
|
| 13. | Install the rear wheel and tire (A).
|
| 14. | After replacing the brake pad (EPB applied), perform "Brake Pad Replacement Mode" using the diagnostic tool.
|
| 15. | Select C1 (Apply) on the screen below.
|
| 16. | After replacing the brake pad, make sure that the caliper is installed correctly by performing "Check assembling (ECU replaced)" from the optional function.
|
| Inspection |
| 1. | Check the pad wear. Measure the pad thickness and replace it, if it is less than the specified value.
|
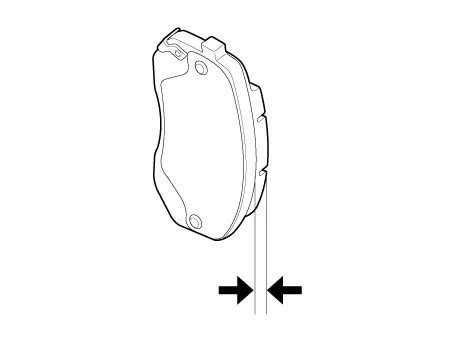
| 2. | Check that grease is applied, to sliding contact points and the pad and backing metal for damage. |
| 1. | Check the pad wear. Measure the pad thickness and replace it, if it is less than the specified value.
|
| 2. | Check the damage of pad, backing metal and contamination with grease. |
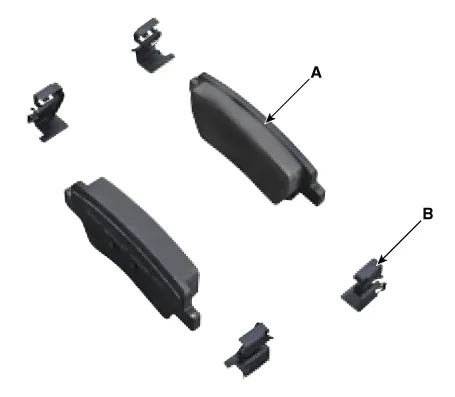
Components and components location Components[Rear parking cable type]1. Rear caliper2. Caliper carrier3. Brake pad4. Pad liner[Rear EPB type]1. Rear caliper2.
Components and components location Components1. Brake member assembly2. Stop lamp switch3. Brake pedal arm assembly4. Brake pedal pad Troubleshooting Troubleshooting1.
Other information:
Hyundai Elantra (CN7) 2021-2026 Service Manual: Heater Unit
Components and components location Component Location1. Heater unit assemblyCompoents1. Heater unit assembly2. Heater tube cover3. Heater core assembly4. Mode control actuator [LH]5. Dummy PTC6. Temperature control actuator [LH]7. Heater case [LH]8.
Hyundai Elantra (CN7) 2021-2026 Service Manual: ADAS Parking ECU (ADAS_PRK)
Components and components location Components and Components Location Repair procedures Removal • Use a plastic panel removal tool to remove interior trim pieces without marring the surface.• Take care not to bend or scratch the trim and panels.
Categories
- Manuals Home
- Hyundai Elantra Owners Manual
- Hyundai Elantra Service Manual
- Maintenance
- Body (Interior and Exterior)
- Specifications
- New on site
- Most important about car
