
Hyundai Elantra (CN7): Front Door / Front Door Side Weatherstrip
Repair procedures
| Replacement |
| [Front door side weatherstrip] |
| 1. | Loosen the front door checker (B) mounting bolt.
|
| 2. | Detach the clips, then remove the front door side weatherstrip (A).
|
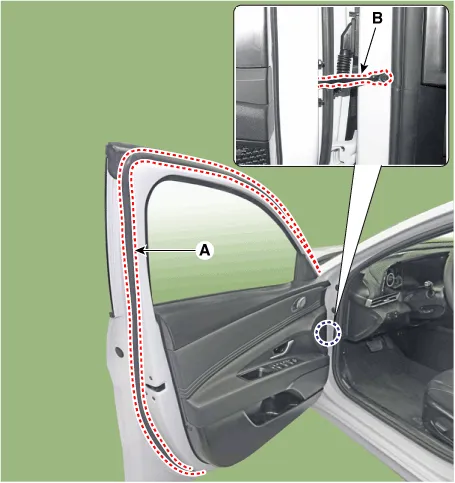
| 3. | To install, reverse the removal procedure. |
|

| [Front door body side weatherstrip] |
| 1. | Detach the clips, then remove the front door body side weatherstrip (A). [LH]
[RH]
|
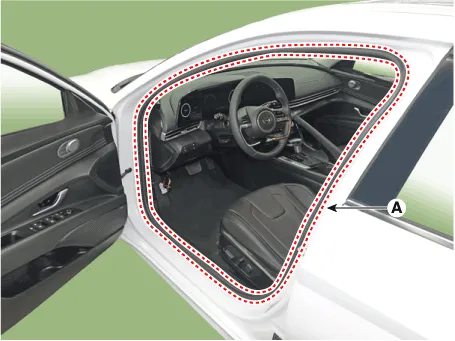
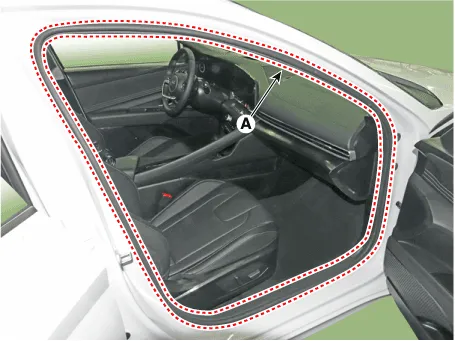
| 2. | To install, reverse the removal procedure.
|

Repair procedures Replacement1.Remove the front door trim.(Refer to Front Door - "Front Door Trim")2.Remove the front door belt inside weatherstrip (A).
Components and components location Component Location 1. Front door latch Repair procedures Replacement1.Remove the front door module.(Refer to Front Door - "Front Door Module")2.
Other information:
Hyundai Elantra (CN7) 2021-2026 Service Manual: Repair procedures
Refrigerant System Service Basics (R-134a)Refrigerant Recovery Use only service equipment that is U.L-listed and is certified to meet the requirements of SAE J2210 to remove HFC-134a(R-134a) from the air conditioning system. • Air conditioning refrigerant or lubricant vapor can irritate your eyes, nose, or
Hyundai Elantra (CN7) 2021-2026 Service Manual: Front Radar Unit
Components and components location Components Location1. Front rader unit Specifications Specification Item Specification Power supply (V)12Operation voltage (V)9 - 16 Schematic diagrams Circuit DiagramTerminal function Pin No Te
Categories
- Manuals Home
- Hyundai Elantra Owners Manual
- Hyundai Elantra Service Manual
- Troubleshooting
- Vehicle Information
- Driver assistance system
- New on site
- Most important about car
