Hyundai Elantra (CN7): Body (Interior and Exterior) / Rear Bumper
Components and components location
| Component Location |

| 1. Rear bumper assembly 2. Rear bumper under cover [LH] | 3. Rear bumper under cover [RH] 4. Rear bumper side bracket |
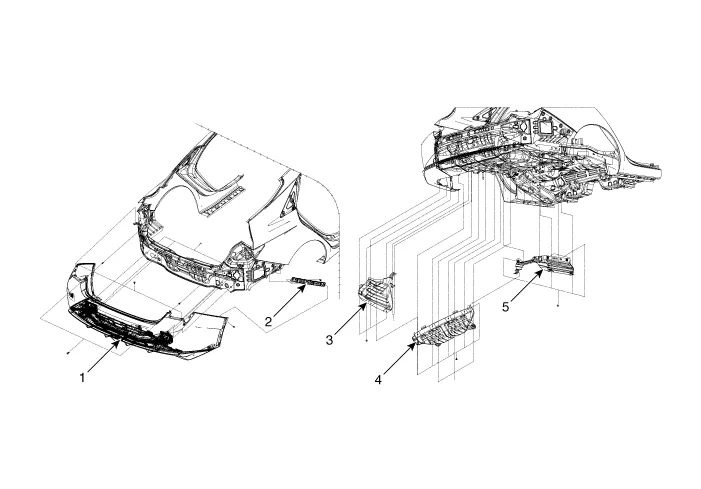
| 1. Rear bumper assembly 2. Rear bumper side bracket 3. Rear bumper under cover [LH] | 4. Rear bumper under cover [CTR] 5. Rear bumper under cover [RH] |
Rear Bumper Assembly
Components and components location
| Component Location |
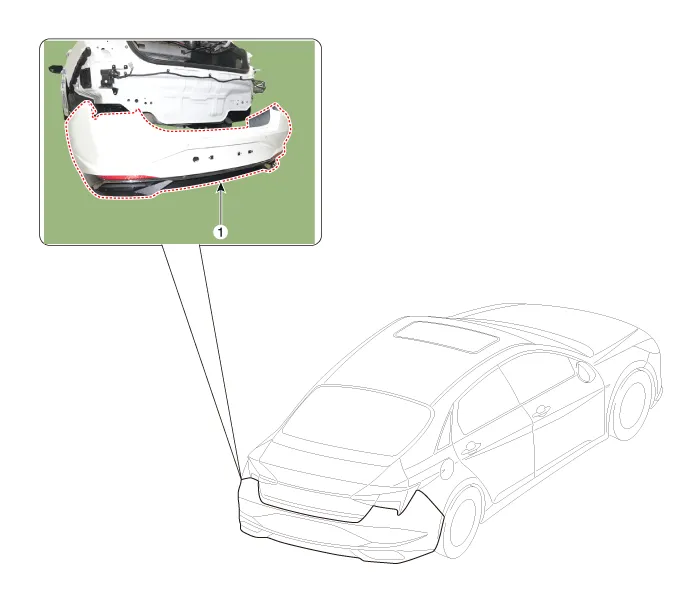
| 1. Rear bumper assembly |
Repair procedures
| Replacement |
|

|

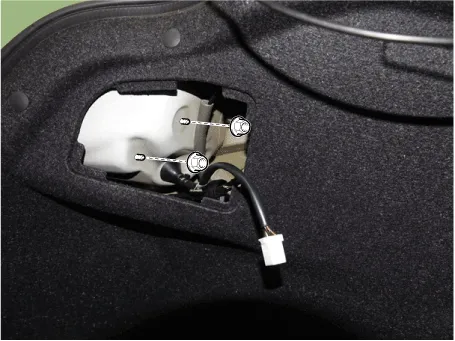
| 1. | Using a screwdriver or remover, remove the service cover (A).
|

| 2. | Detach the rear combination lamp connector (A).
|

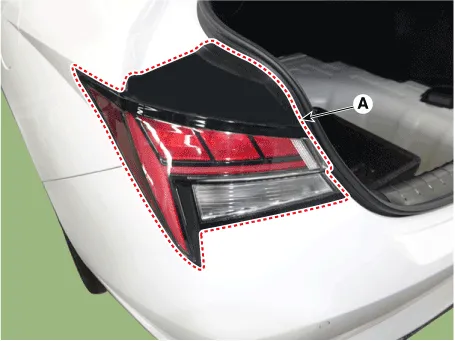
| 3. | Remove the rear combination mounting nuts and remove the rear combination lamp (A).
|
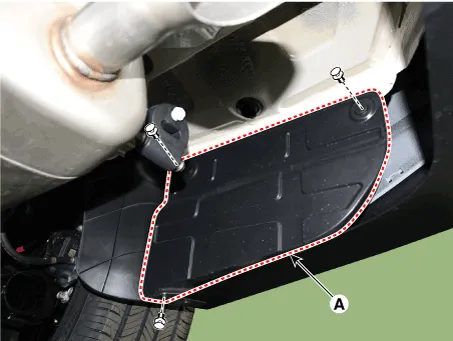
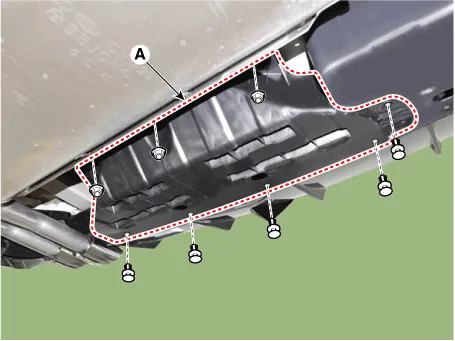
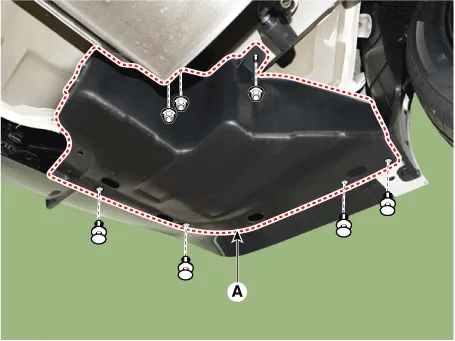
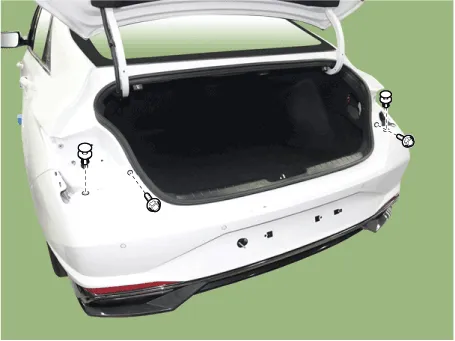
| 4. | Loosen the mounting nuts and clips, remove the rear bumper under cover (A). [General type] [LH]
[RH]
[N Line] [CTR]
[LH]
[RH]
|


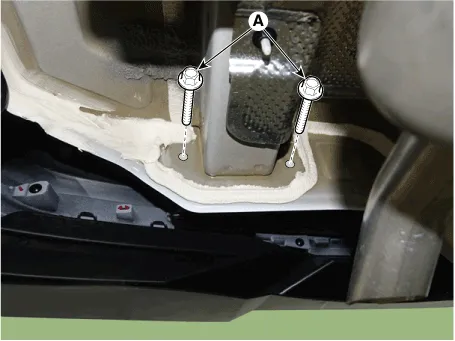
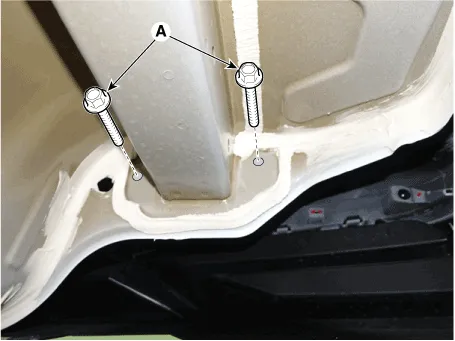
| 5. | Loosen the rear bumper assembly mounting bolts (A). [LH]
[RH]
|
| 6. | Loosen the rear bumper lower mounting clips.
|
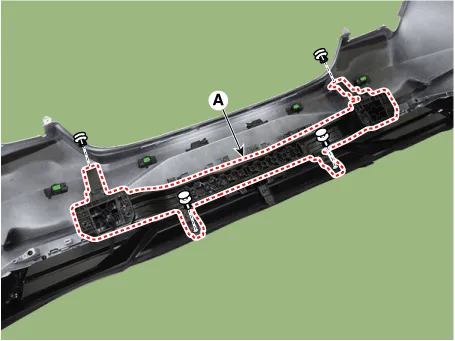
| 7. | Remove the rear bumper upper mounting clips and bolts.
|
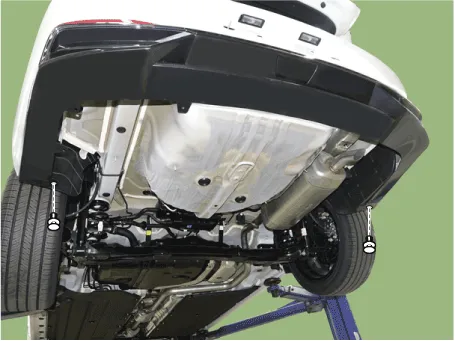
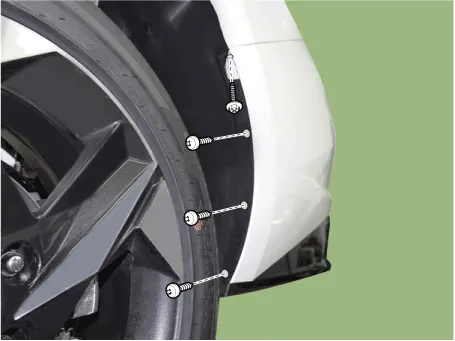
| 8. | Loosen the mounting screws on the side of rear bumper (A), detach the side part of rear bumper.
|

| 9. | Disconnect the rear bumper connector (A).
|
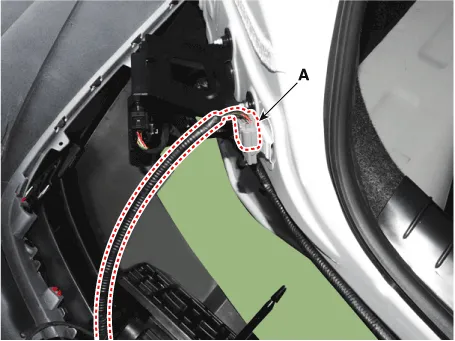
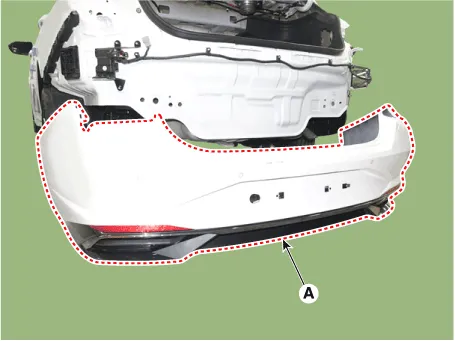
| 10. | Remove the rear bumper assembly (A).
|
| 11. | Install in the reverse order of removal.
|
Rear Bumper beam Assembly
Components and components location
| Component Location |
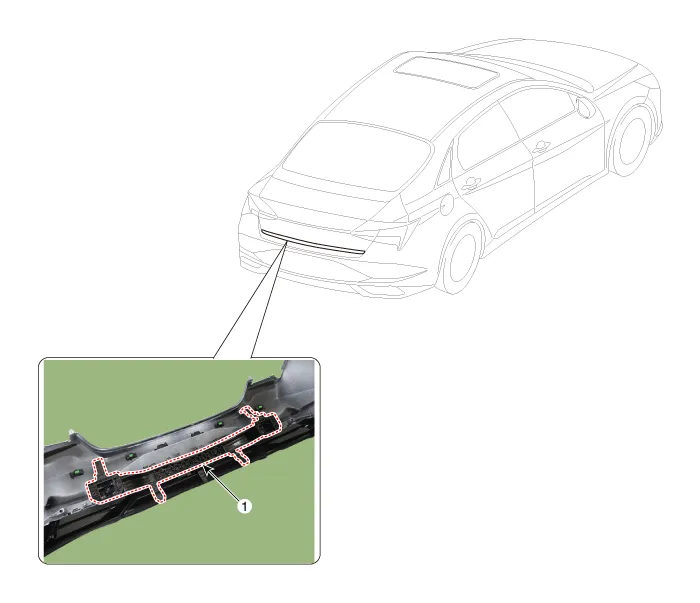
| 1. Rear bumper beam assembly |
Repair procedures
| Replacement |
|
|
| 1. | Remove the rear bumper assembly. (Refer to Rear Bumper - "Rear Bumper Assembly") |
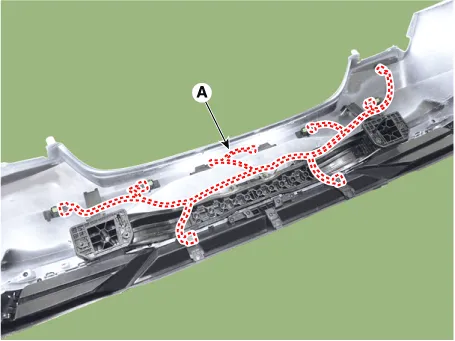
| 2. | Press the lock pin, then detach the connector, remove the wiring hanes (A).
|
| 3. | Remove fixing clips, then remove the rear bumper beam assembly (A).
|
| 4. | Install in the reverse order of removal.
|

Components and components location Components[General type]1. Front bumper assembly2. Front bumper side bracket [LH]3. Front bumper side bracket [RH][N Line]1.
Other information:
Hyundai Elantra (CN7) 2021-2026 Service Manual: Troubleshooting
Trouble Symptom ChartsTrouble Symptom 1Trouble Symptom 2 Trouble symptom Probable cause Remedy The set vehicle speed varies greatly upward or downward"Surging" (repeated alternating acceleration and deceleration) occurs after settingMalfunction of the vehicle speed se
Hyundai Elantra (CN7) 2021-2026 Service Manual: Rear View Monitor (RVM)
Description and operation DescriptionRear view camera will activate when the backup light is ON with the ignition switch ON and the shift lever in the R position.This system is a supplemental system that shows behind the vehicle through the AV monitor or the ECM (Reverse Display Room Mirror) mirror while backing-up.
Categories
- Manuals Home
- Hyundai Elantra Owners Manual
- Hyundai Elantra Service Manual
- Troubleshooting
- Body (Interior and Exterior)
- Shift-lock release
- New on site
- Most important about car
