Hyundai Elantra (CN7): Cylinder Head Assembly / Cylinder Head Cover
Hyundai Elantra (CN7) 2021-2025 Service Manual / Engine Mechanical System / Cylinder Head Assembly / Cylinder Head Cover
Components and components location
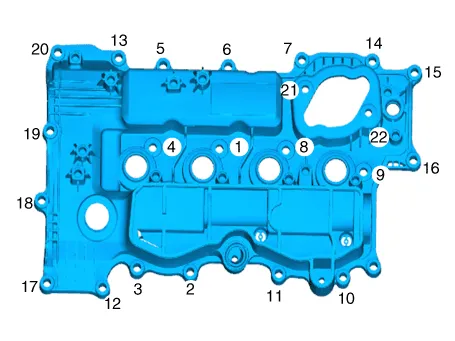
| Components |
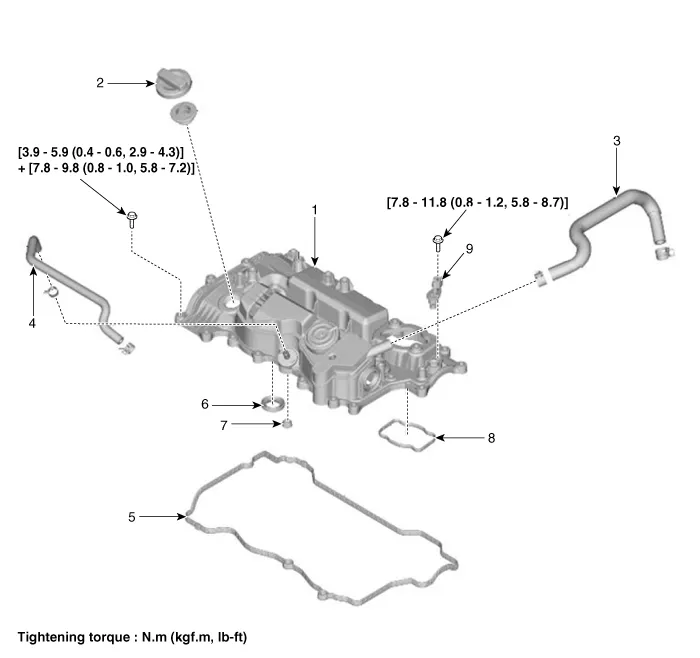
| 1. Cylinder head cover 2. Engine oil filler cap 3. Breather hose 4. PCV hose 5. Cylinder head cover gasket | 6. Oil seal 7. Gasket 8. High pressure fuel pump gasket 9. Cam position sensor |
Repair procedures
| Removal |
| 1. | Disconnect the battery negative terminal. |
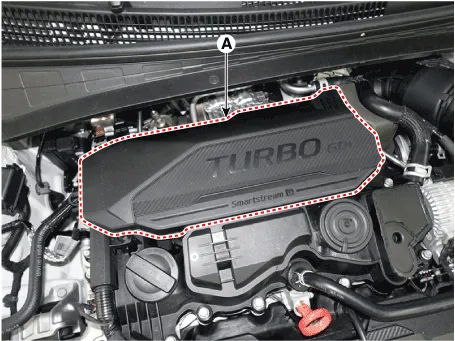
| 2. | Remove the engine cover (A).
|
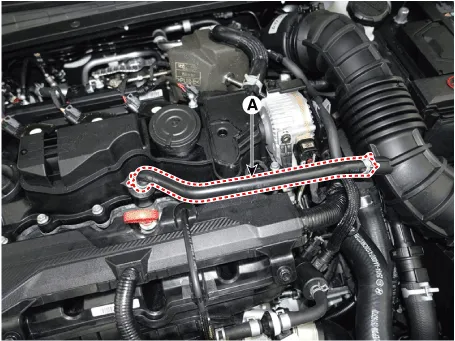
| 3. | Disconnect the breather hoses (A).
|

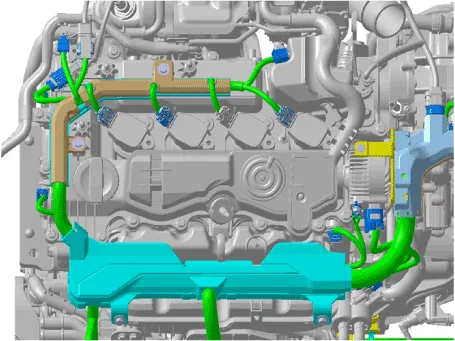
| 4. | Disconnect the wiring connectors and harness clamps and remove the connector brackets around the cylinder head cover.
|
| 5. | Remove the high pressure fuel pump. (Refer to Engine Control / Fuel System - "High Pressure Fuel Pump") |
| 6. | Remove the ignition coil. (Refer to Engine Electrical System - "Ignition Coil") |
| 7. | Remove the CVVD actuator. (Refer to Engine Control / Fuel System - "CVVD Acuator") |
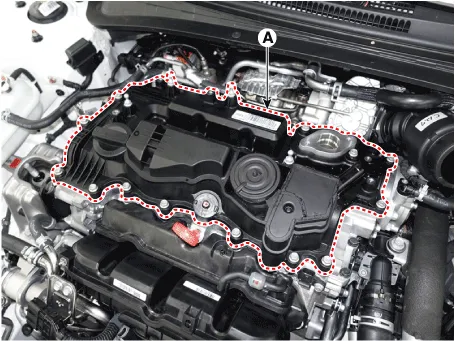
| 8. | Remove the cylinder head cover (A) with gasket.
|
| Installation |
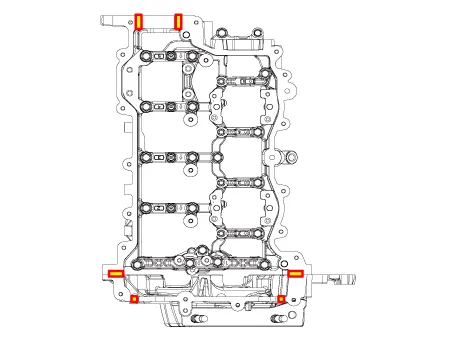
| 1. | Install the cylinder head cover.
|

| 2. | Install the other parts in the reverse order of removal. |
Repair procedures Removal 1.Disconnect the battery negative terminal.2.Remove the cylinder head cover. (Refer to Cylinder Head Assembly - "Cylinder Head Cover")3.
Other information:
Hyundai Elantra (CN7) 2021-2025 Service Manual: Description and operation
DescriptionThe immobilizer system will disable the vehicle unless the proper ignition key is used, in addition to the currently available anti-theft systems such as car alarms, the immobilizer system aims to drastically reduce the rate of auto theft.1.
Hyundai Elantra (CN7) 2021-2025 Service Manual: A/C Pressure Transducer
Description and operation DescriptionThe A/C Pressure Transducer (APT) converts the pressure value of high pressure line into voltage value after measuring it. By converted voltage value, engine ECU controls the cooling fan by operating it high speed or low speed.
Categories
- Manuals Home
- Hyundai Elantra Owners Manual
- Hyundai Elantra Service Manual
- Rear Seats
- Body Electrical System
- Engine Electrical System
- New on site
- Most important about car

Copyright © 2025 www.helantra7.com - 0.0193