Hyundai Elantra: Drive Belt System / Drive Belt
Repair procedures
| Removal and Installation |
* There are two methods to when removing the drive belt.
[When removing the drive belt from the top of the vehicle]
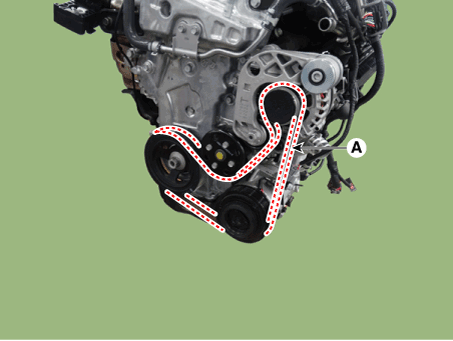
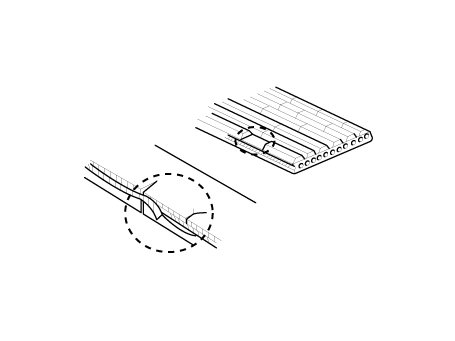
| 1. | Install the wrench to the drive belt tensioner repair hole (A) and turn it clockwise.
|
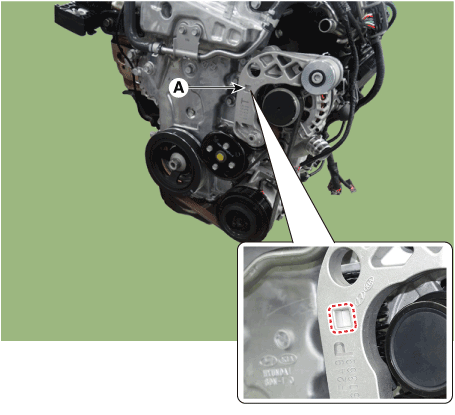


| 2. | Remove the drive belt (A).
|
| 3. | Install in the reverse order of removal.
|
[When removing the drive belt from the bottom of the vehicle]
| 1. | Remove the engine room under cover. (Refer to Engine and Transaxle Assembly - "Engine Room Under Cover") |
| 2. | Turn the spanner to clockwise after installing it to drive belt tensioner arm boss.
|
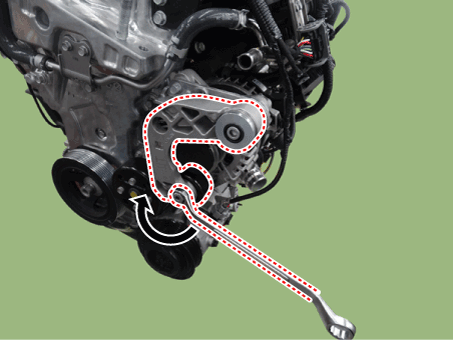
| 3. | Remove the drive belt (A).
|
| 4. | Install in the reverse order of removal.
|
| Inspection |
Drive Belt Inspection
| 1. | Visually check the belt for excessive wear, frayed cords etc.If any defect has been found, replace the drive belt.
|


 Drive Belt Tensioner
Repair procedures
Removal and Installation1.Remove the drive belt.(Refer to Drive Belt System - "Drive Belt")2.Remove the drive belt tensioner (A). Tightening torque Bolt (B) : 18...
Other information:
Hyundai Elantra (CN7) 2021-2025 Service Manual: Components and components location
Components 1. Rear torsion beam axle2. Rear torsion beam chassis bracket3. Rear axle..
Hyundai Elantra (CN7) 2021-2025 Owner's Manual: Driver Attention Warning (DAW)
Basic function Driver Attention Warning can help determine the driver's attention level by analyzing driving pattern, driving time, etc. while vehicle is being driven. The system can recommend a break when the driver’s attention level falls below a certain level. Leading Vehicle Departure Alert function Leading Vehicle Departure Alert function can inform the driver when the front vehicl..
Categories
- Manuals Home
- 7th Gen Hyundai Elantra Owners Manual
- 7nd Gen Hyundai Elantra Service Manual
- Specifications
- Engine Compartment
- Function settings
- System operation
- Dimensions, Engine specification, Bulb Wattage
Manual climate control system
To defog inside windshield
.png)
[A] : Type A, [B] : Type B
1. Select any fan speed except “0” position.
2. Select the desired temperature.
3. Select the .png) or
or
.png) position.
position.

Copyright © 2025 www.helantra7.com