Hyundai Elantra (CN7): General Information / Lift and Support Points. General information
Hyundai Elantra (CN7) 2021-2026 Service Manual / General Information / Lift and Support Points. General information
General information
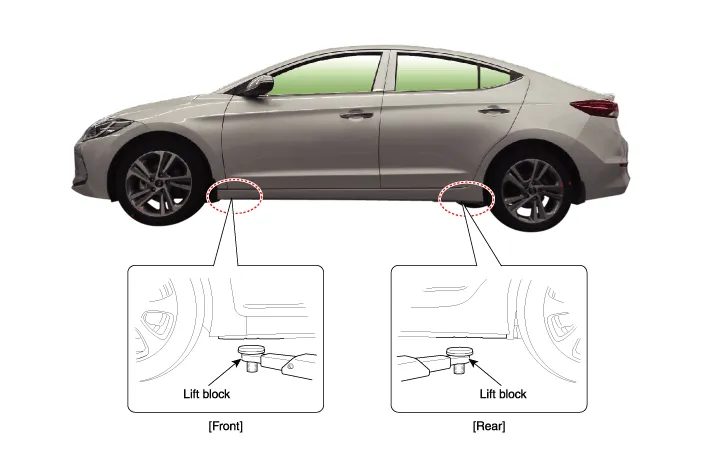
| Lift and Support Points |
|

|

| 1. | Place the lift blocks under the support points as shown in the illustration. |
| 2. | Raise the hoist a few inches (centimeters) and rock the vehicle to make sure that the vehicle is firmly supported. |
| 3. | Raise the hoist to full height to check whether the vehicle is firmly supported.
|
General information Warning and Caution Labels1. Radiator cap caution2. Fan caution3. Battery cautionAttentionSrs VehicleThis car is equipped with a supplemental restraint system.
General information TowingIf the vehicle needs to be towed, call a professional towing service. It is very dangerous to tow a vehicle with just a rope or chain.
Other information:
Hyundai Elantra (CN7) 2021-2026 Service Manual: Components and positions
C
Hyundai Elantra (CN7) 2021-2026 Service Manual: Rear View Monitor (RVM)
Description and operation DescriptionRear view camera will activate when the backup light is ON with the ignition switch ON and the shift lever in the R position.This system is a supplemental system that shows behind the vehicle through the AV monitor or the ECM (Reverse Display Room Mirror) mirror while backing-up.
Categories
- Manuals Home
- Hyundai Elantra Owners Manual
- Hyundai Elantra Service Manual
- Steering System
- Integrated Thermal Management Module (ITM)
- Body Electrical System
- New on site
- Most important about car

Copyright © 2026 www.helantra7.com - 0.019