Hyundai Elantra (CN7): Audio / Audio Remote Control
Components and components location
| Components |
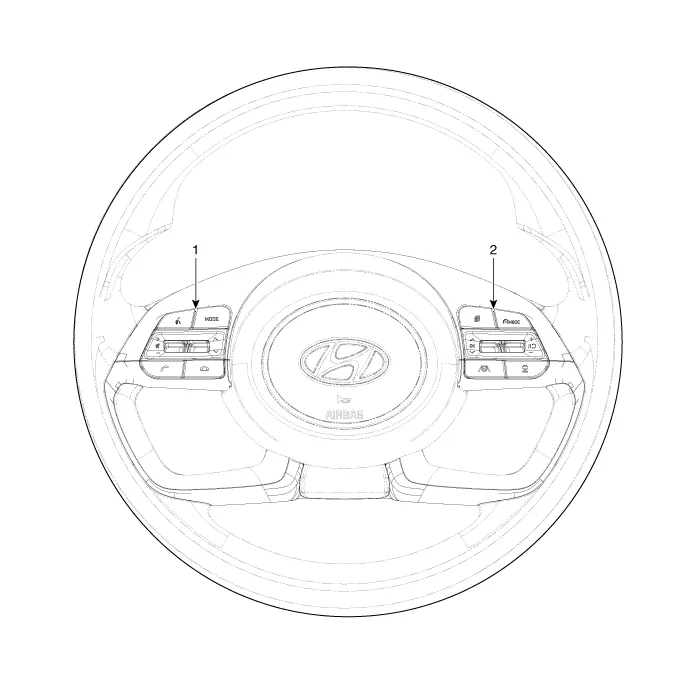
| 1. Left Remote Control Switch (Audio + Bluetooth) | 2. Right Remote Control Switch (Cruise + Trip) |
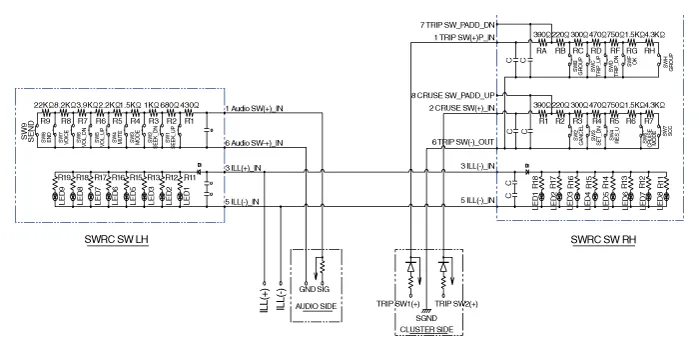
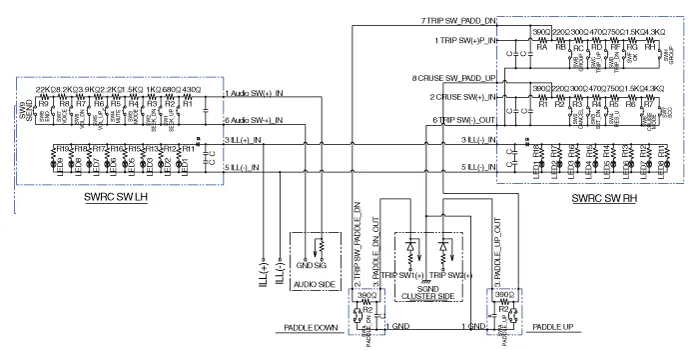
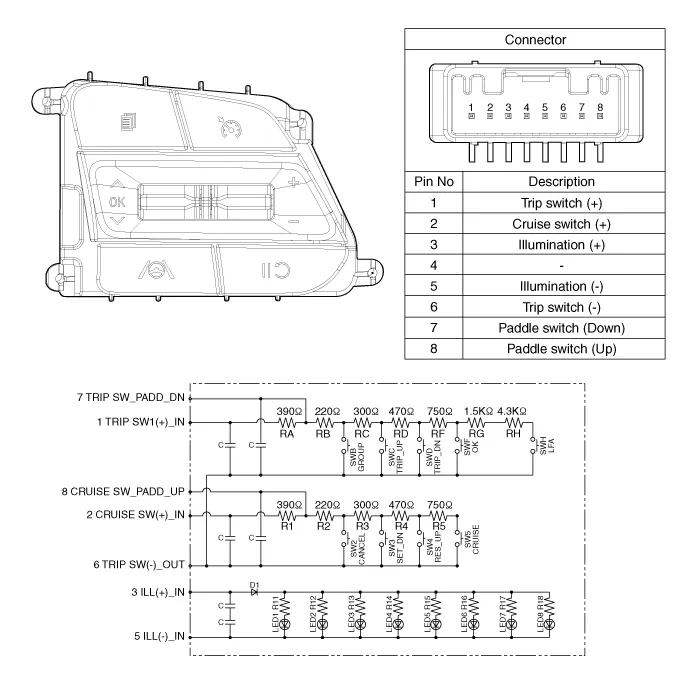
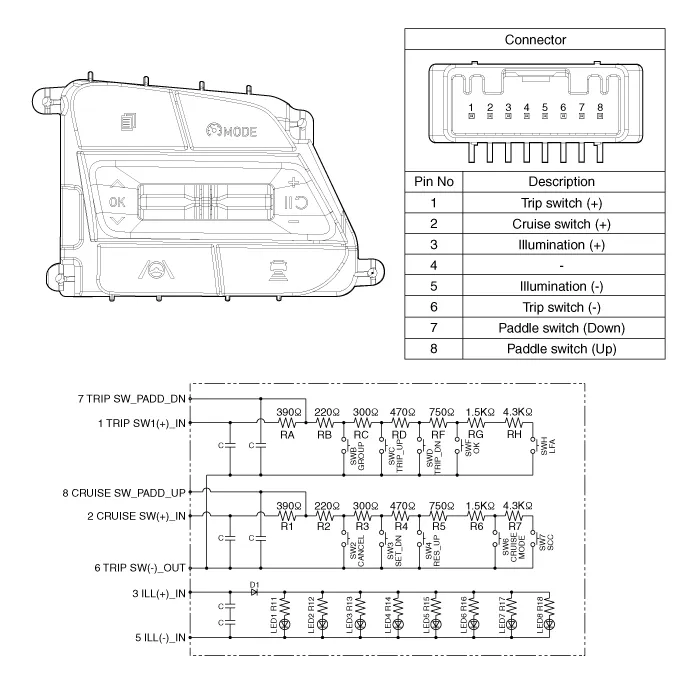
Schematic diagrams
| Circuit Diagram |
| [Without paddle shift] |
| [With paddle shift] |


Repair procedures
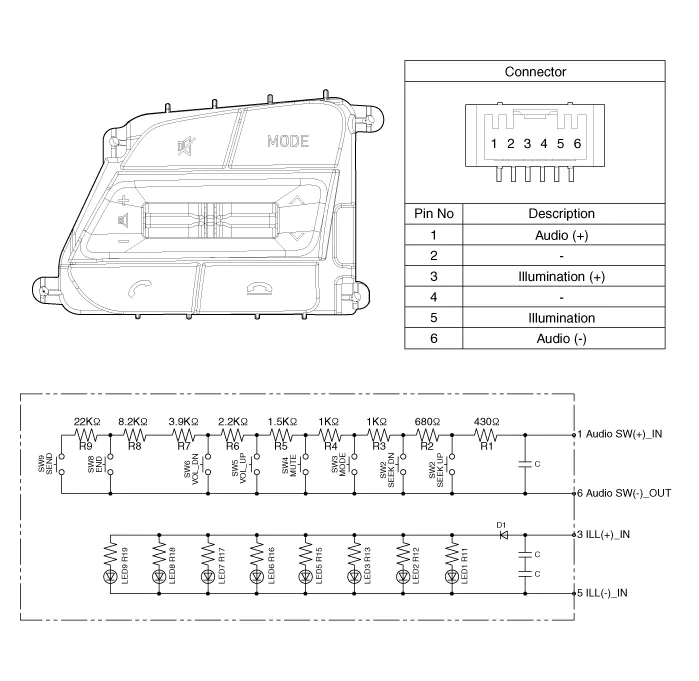
| Inspection |
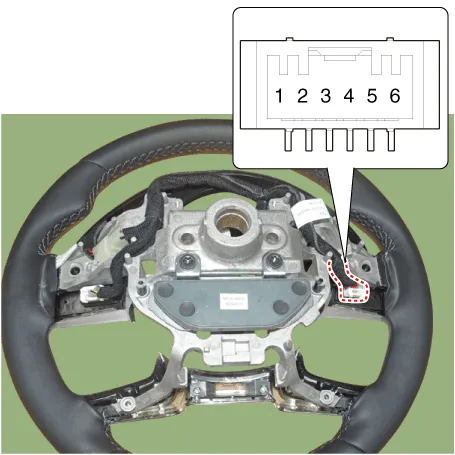
| 1. | Check for resistance between terminals in each switch position (LH).
[LH : Audio + Hands free]
|
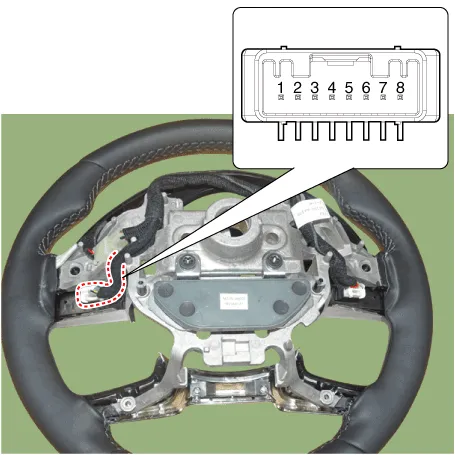
| 2. | Check for resistance between terminals in each switch position (RH).
[Cruise]
[Trip]
|
| Removal |
| 1. | Disconnect the negative (-) battery terminal. |
| 2. | Remove the steering wheel assembly. (Refer to Steering System - "Steering Wheel") |
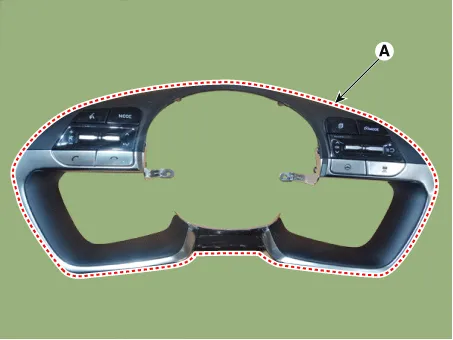
| 3. | Remove the steering back cover (A).
|

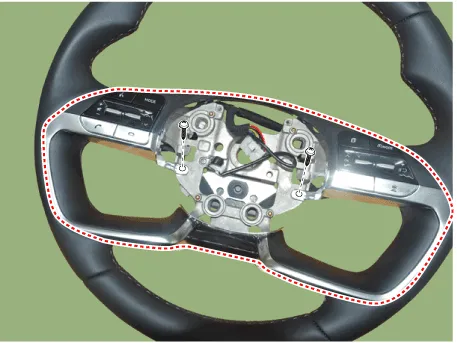
| 4. | Remove the steering remote control connector (A).
|
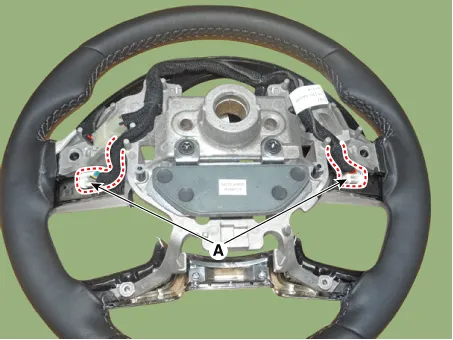
| 5. | Remove the steering remote control switch (A) after loosening the screws.
|
| Installation |
| 1. | Install the steering wheel remote control after connecting the connector. |
| 2. | Install the steering wheel. |
| 3. | Connect the negative (-) battery terminal. |
Repair procedures InspectionGlass Antenna Test1.Wrap aluminum foil (A) around the tip of the tester probe (B) as shown.2.Touch one tester probe to the glass antenna terminal (A) and move the other tester probe along the antenna wires to check that continuity exists.
Description and operation DescriptionThe multimedia jack on the console upper cover is for customers who like to listen to external portable music players like the MP3 etc.
Other information:
Hyundai Elantra (CN7) 2021-2025 Service Manual: Description and operation
Description and OperationBlcok Diagram • This system monitors the driving situations through the radar and the camera. Thus, for a situation out of the sensing range, the system may not normally operate. The System may be limited when : • The radar sensor or camer
Hyundai Elantra (CN7) 2021-2025 Service Manual: Components and components location
C
Categories
- Manuals Home
- Hyundai Elantra Owners Manual
- Hyundai Elantra Service Manual
- Rear Seats
- Vehicle Information
- Towing
- New on site
- Most important about car
