Hyundai Elantra: Brake System / Brake oil
Specifications
| Specification |
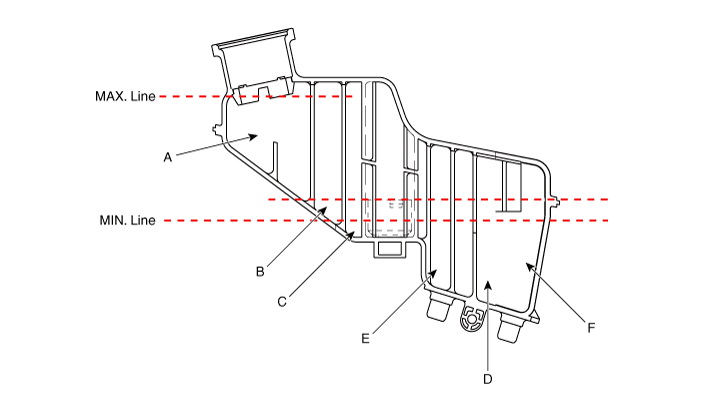
|
Fluid Type
|
| DOT 4 |
|
Reservoir Quantity (cc)
| ||
| Total Volume | A + B + C + D + E + F | 405 ± 20 |
| MAX LEVEL | A + B + C + D + E | 392 ± 20 |
| ON LEVEL | B + C + D + E | 155 ± 10 |
| MIN LEVEL | C + D + E | 107 ± 10 |
| PART LEVEL | D | Pri : 44 ± 5 |
| E | Sec : 37 ± 5 | |
| CLUTCH LEVEL | F | 13 ± 5 |
Repair procedures
| Replacement |
| 1. | Turn ignition switch OFF and disconnect the negative (-) battery cable. |
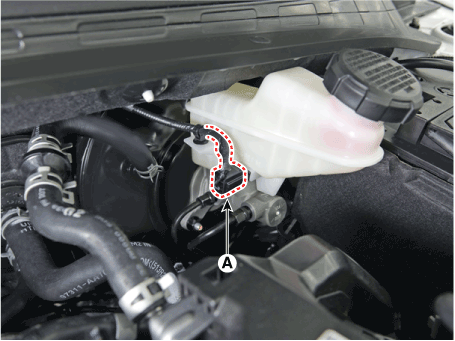
| 2. | Disconnect the brake fluid level sensor connector (A).
|
| 3. | Remove the brake fluid from the master cylinder reservior with a syringe.
|
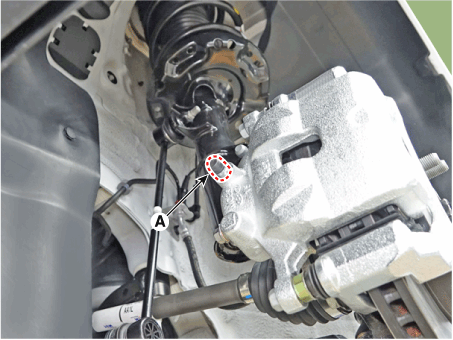
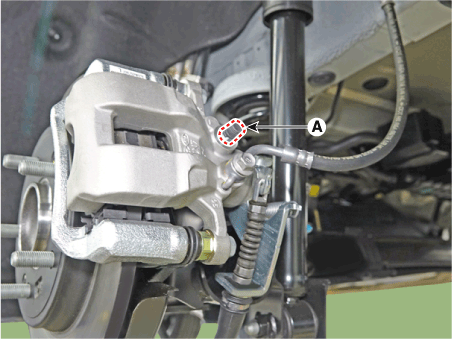
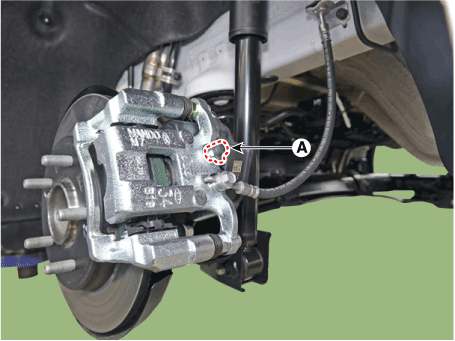
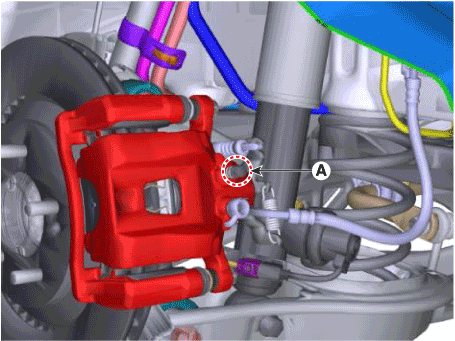
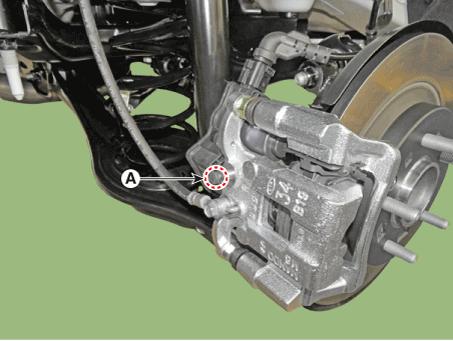
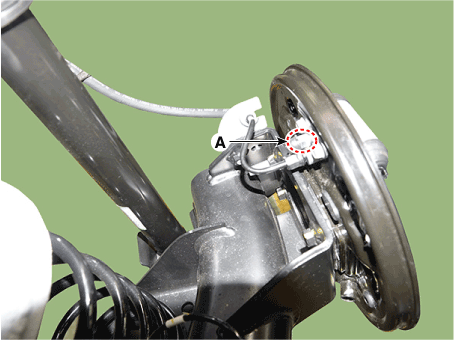
| 4. | Loosen the bleed screw (A) and depress the brake pedal repeatedly several times until the brake fluid reaches the caliper cylinder. [Front]
[Rear torsion beam parking cable type]
[Rear torsion beam EPB type]
[Rear multi link parking cable type]
[Rear multi link EPB type]
[Rear Drum Brake Type]
|
| 5. | Retighten the bleed screw and then make sure the brake fluid in the reservoir is at the MAX (upper) level line. |
| 6. | Loosen the right-rear brake bleed screw (A) to allow air to escape from the system. Then tighten the bleed screw securely. [Front]
[Rear torsion beam parking cable type]
[Rear torsion beam EPB type]
[Rear multi link parking cable type]
[Rear multi link EPB type]
[Rear Drum Brake Type]
|
| 7. | Re-tighten the bleed screw. |
| 8. | Have an assistant press the brake pedal several times to pressurize it and keep it pressed. |
| 9. | Pump the brake pedal several times, and then loosen the bleeder screw until fluid starts to run out without bubbles. Then close the bleeder screw. [Front]
[Rear torsion beam parking cable type]
[Rear torsion beam EPB type]
[Rear multi link parking cable type]
[Rear multi link EPB type]
[Rear Drum Brake Type]
|
| 10. | Repeat the procedure for wheel in the sequence until air bubbles no longer appear in the fluid. |
| 11. | Connect the negative (-) cable. |
| 12. | Connect the brake fluid level sensor. |
 Brake Line
Components and components location
Components
Repair procedures
RemovalBrake Tube [Engine Room]1.Disconnect the brake fiuid level switch connector, and remove the reservoir cap...
 Rear Disc Brake
Components and components location
Components[Rear parking cable type]1. Rear caliper2. Caliper carrier3. Brake pad4. Pad liner[Rear EPB type]1. Rear caliper2...
Other information:
Hyundai Elantra (CN7) 2021-2025 Owner's Manual: Rear Seats
Folding the rear seat The rear seatbacks can be folded to facilitate carrying long items or to increase the luggage capacity of the vehicle. WARNING Never allow passengers to sit on top of the folded down seatback while the vehicle is moving...
Hyundai Elantra (CN7) 2021-2025 Owner's Manual: Battery Sensor Deactivation
[A] : Battery sensor The battery sensor is deactivated, when the battery is disconnected from the negative pole for maintenance purpose. In this case, the ISG system is limitedly operated due to the battery sensor deactivation. Thus, the driver needs to take the following procedures to reactivate the battery sensor after disconnecting the battery...
Copyright © 2025 www.helantra7.com



.png)