Hyundai Elantra: Brake System / Rear Disc Brake
Components and components location
| Components |
[Rear parking cable type]
| 1. Rear caliper 2. Caliper carrier | 3. Brake pad 4. Pad liner |
[Rear EPB type]

| 1. Rear caliper 2. Caliper carrier | 3. Brake pad 4. Pad liner |
Repair procedures
| Removal |
| 1. | Loosen the wheel nuts slightly. Raise the vehicle, and make sure it is securely supported. |
| 2. | Remove the rear wheel and tire (A) from the rear hub.
|

| 3. | Loosen the brake hose bolt (A) from the caliper seperate the brake hose.
|
| 4. | Remove the return spring (A).
|
| 5. | Disconnect the parking brake cable (B) after remove fixing clip (A).
|
| 6. | Remove the caliper body (A) by loosening the guide rod bolt.
|
| 7. | Remove the brake pad (A).
|
| 8. | Remove the pad liner (A).
|
| 9. | Remove the caliper carrier (A) by loosening the caliper mouniting bolts.
|
| 10. | Remove the front brake disc (A) by loosening the screws.
|
[Rear torsion beam EPB type]
| 1. | Before removing the rear caliper, perform "Brake Pad Replacement Mode" using the diagnostic tool.
|
| 2. | Select C2 (Release) on the screen below.
|
| 3. | Loosen the wheel nuts slightly. Raise the vehicle, and make sure it is securely supported. |
| 4. | Remove the rear wheel and tire (A) from the rear hub.
|
| 5. | Disconnect the EPB actuator connector (A).
|
| 6. | Remove the hose after loosening the brake hose bolt (A) from the caliper.
|
| 7. | Remove the caliper body (A) after loosening the guide rod bolt.
|

| 8. | Remove the brake pad (A).
|
| 9. | Remove the pad liner (A).
|
| 10. | Remove the caliper carrier (A) after loosening the caliper mounting bolt.
|
| 11. | Remove the rear brake disc (A) after loosening the screw.
|
[Rear multi link parking cable type]
| 1. | Loosen the wheel nuts slightly. Raise the vehicle, and make sure it is securely supported. |
| 2. | Remove the rear wheel and tire (A) from the rear hub.
|
| 3. | Remove the hose from the caliper after loosening the brake hose bolt (A).
|
| 4. | Remove the return spring (A).
|
| 5. | Disconnect the parking brake cable (A) after removing the fixing clip.
|
| 6. | Remove the caliper body (A) after loosening the guide rod bolts.
|
| 7. | Remove the brake pad (A).
|
| 8. | Remove the pad liner (A).
|
| 9. | Remove the caliper carrier (A) after loosening the caliper mounting bolts.
|
| 10. | Remove the brake disc (A) after loosening the mounting screw.
|
[Rear multi link EPB type]
| 1. | Before removing the rear caliper, perform "Brake Pad Replacement Mode" using the diagnostic tool.
|
| 2. | Select C2 (Release) on the screen below.
|
| 3. | Loosen the wheel nuts slightly. Raise the vehicle, and make sure it is securely supported. |
| 4. | Remove the rear wheel and tire (A) from the rear hub.
|
| 5. | Disconnect the EPB actuator connector (A).
|
| 6. | Remove the hose after loosening the brake hose bolt (A) from the caliper.
|
| 7. | Remove the caliper body (A) after loosening the guide rod bolt.
|
| 8. | Remove the brake pad (A).
|
| 9. | Remove the brake pad (A).
|

| 10. | Remove the caliper carrier (A) after loosening the caliper mounting bolt.
|
| 11. | Remove the rear brake disc (A) after loosening the screw.
|
| Inspection |
Front Brake Disc Thickness Check
| 1. | Check the brake disc for damage and cracks. |
| 2. | Remove all rust and contamination from the surface, and measure the disc thickness at 24 points, at least, of same distance (5mm) from the brake disc outer circle.
|
| 3. | If wear exceeds the limit, replace the discs and pad assembly left and right of the vehicle. |
Front Brake Disc Runout Check
| 1. | Place a dial gauge about 10mm (0.20 in) from the outer circumference of the brake disc, and measure the runout of the disc.
|
| 2. | If the runout of the brake disc exceeds the limit specification, replace the disc, and then measure the runout again. |
| 3. | If the runout cannot be corrected by changing the position of the brake disc, replace the brake disc. |
| Installation |
| 1. | To install, reverse the removal procedures. |
| 2. | Press in the caliper piston. [Rear parking cable type]
[Rear EPB type]
|
| 3. | After installation, bleed the brake system. (Refer to Brake System - "Brake Bleeding Prcoedures") |
| 4. | After installing the rear caliper (EPB applied), perform “Brake Pad Replacement Mode” using the diagnostic tool.
|
| 5. | Select C1 (Apply) on the screen below.
|
| 6. | After replacing the rear caliper, make sure that the caliper is installed correctly by performing "Check assembling (ECU replaced)" from the option.
|
| Adjustment |
[Rear parking cable type]
|
| 1. | Remove the floor console to reach the adjusting nut. |
| 2. | Loosen the parking brake cable until both operating levers rest in fully off position. |
| 3. | Bring the brake pads in their operating position by pressing the brake pedal down several times until there is resistance. |
| 4. | Tension the parking brake cable by tightening the adjusting nut, until the operating levers on both calipers lift from the stop, up to a distance of (A) and (D) between operating lever (B) and stopper (C).
[G 1.6 MPI / LPI]
[G 1.6 T-GDI]
|
| 5. | Refit the floor console. |
| 6. | Parking brake lever in the car must be in fully loosened position. |
| 7. | If the handbrake cables where changed, actuate the parking brake a few times with maximum force to stretch the parking brake cables, and then control adjusting as above. |
| 8. | Check the wheels of their free operation. |
| 9. | Test drive. |
 Brake oil
Specifications
Specification
Fluid Type
DOT 4
Reservoir Quantity (cc)
Total VolumeA + B + C + D + E + F405 ± 20MAX LEVEL A + B + C + D + E 392 ± 20ON LEVELB + C + D + E155 ± 10MIN LEVELC + D + E107 ± 10PART LEVELDPri : 44 ± 5ESec : 37 ± 5CLUTCH LEVEL F 13 ± 5
Repair procedures
Replacement1...
 Brake Pad
Repair procedures
Replacement[Front]1.Loosen the wheel nuts slightly.Raise the vehicle, and make sure it is securely supported.2.Remove the front wheel and tire (A) from the front hub...
Other information:
Hyundai Elantra (CN7) 2021-2025 Owner's Manual: Light Bulbs
Consult an authorized HYUNDAI dealer to replace most vehicle light bulbs. It is difficult to replace vehicle light bulbs because other parts of the vehicle must be removed before you can get to the bulb. This is especially true for removing the headlamp assembly to get to the bulb(s)...
Hyundai Elantra (CN7) 2021-2025 Service Manual: Start/Stop Button
Components and components location Component Repair procedures Removal1.Disconnect the negative(-) battery terminal.2.Remove the AVN Head unit.(Refer to Body Electrical System - "AVN(Audio Video Navigation) head unit")3.Loosen the mounting screws and remove the start/stop button (A)...
Categories
- Manuals Home
- 7th Gen Hyundai Elantra Owners Manual
- 7nd Gen Hyundai Elantra Service Manual
- System disabled
- Vehicle Information
- Fuel gauge
- Integrated Thermal Management Module (ITM)
- Drive Mode
Rear center seat belt
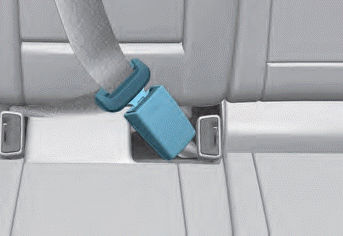
When using the rear center seat belt, the buckle with the “CENTER” mark must be used.
WARNING
Make sure that the seatback is locked in place when using the rear center seat belt.
If not, the seatback may move when there is a sudden stop or collision, which could result in serious injury.

Copyright © 2025 www.helantra7.com