Hyundai Elantra: Interior Trim / Center Pillar Trim
Components and components location
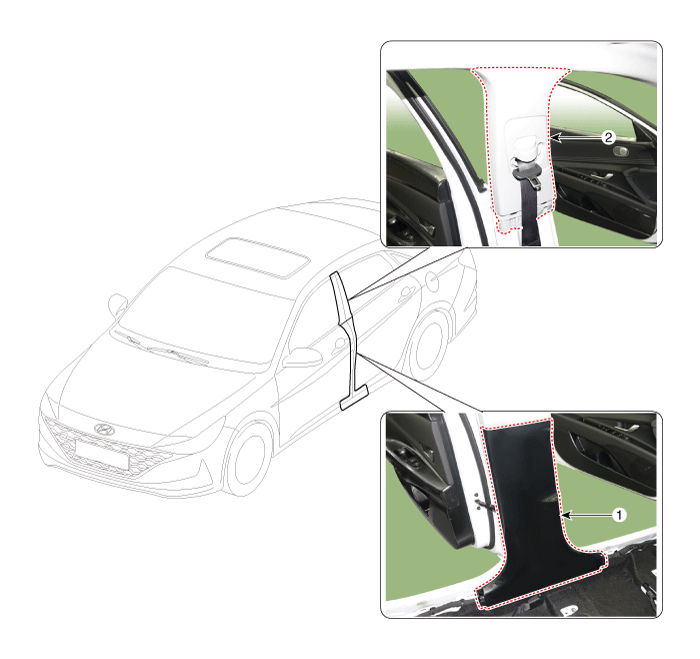
1. Center pillar lower trim
| 2.Center pillar upper trim
|
Repair procedures
[Center pillar lower trim]
| •
| When removing with a flat - tip screwdriver or remover, wrap protective tape around the tools to prevent damage to components. |
| •
| Put on gloves to prevent hand injuries. |
|
| •
| Take care not to bend or scratch the trim and panels. |
|
| 1. | Remove the front door scuff trim. (Refer to Interior Trim - "Door Scuff Trim") |
| 2. | Remove the rear door scuff trim. (Refer to Interior Trim - "Door Scuff Trim") |
| 3. | Using a screwdriver or remover, remove the center pillar lower trim (A). 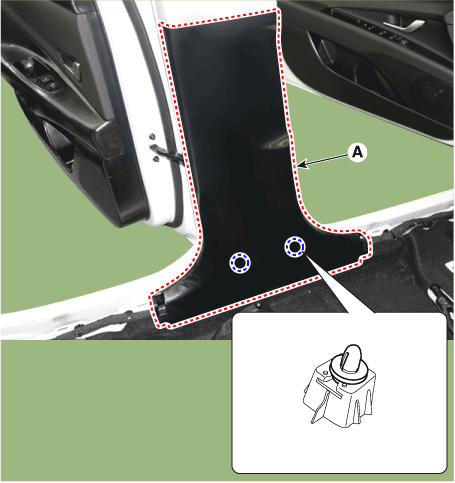
|
| 4. | To install, reverse the removal procedure. | •
| Replace any damaged clips (or pin - type retainers). |
|
|
[Center pillar upper trim]
| •
| When removing with a flat - tip screwdriver or remover, wrap protective tape around the tools to prevent damage to components. |
| •
| Put on gloves to prevent hand injuries. |
|
| •
| Take care not to bend or scratch the trim and panels. |
|
| 1. | Remove the center pillar lower trim. (Refer to Interior Trim - "Center Pillar Trim") |
| 2. | Remove the front seat belt lower anchor cover (A). 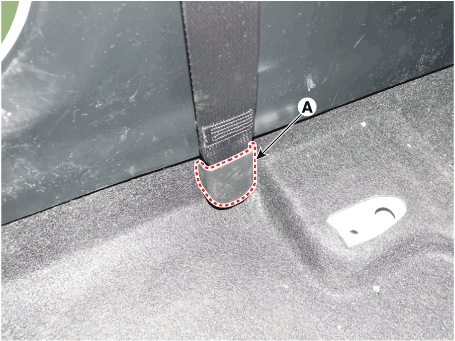
|
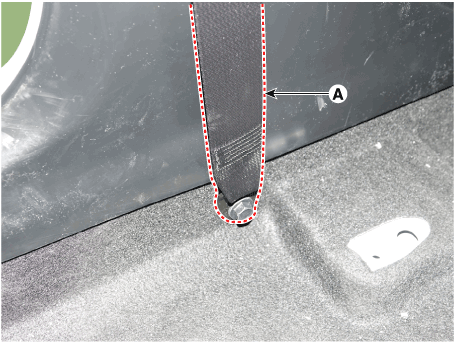
| 3. | Loosen the mounting bolt, remove the front seat belt lower anchor (A). Tightening torque : 39.2 - 53.9 N.m (4.0 - 5.5 kgf.m, 28.9 - 39.8 lb-ft) |
|
| 4. | Using a screwdriver or remover, remove the center pillar upper trim (A). 
|
| 5. | To install, reverse the removal procedure. | •
| Replace any damaged clips (or pin - type retainers). |
|
|
Components and components location
Component Location 1. Front pillar trim
Repair procedures
Replacement
•
When removing with a flat - tip screwdriver or remover, wrap protective tape around the tools to prevent damage to components...
Components and components location
Component Location 1. Rear pillar trim
Repair procedures
Replacement
•
When removing with a flat - tip screwdriver or remover, wrap protective tape around the tools to prevent damage to components...
Other information:
A/S Repair produresMDPS System A/S Workflow ※ For detailed DTC or other DTC A/S procedures, see "CN7 MDPS DTC Diagnostic Guide" ① Noise / malfunction Inspection② Warning lamp (DTC) / CAN Line error2 - 1 Checking Connectors and Wiring1...
All Season Tires
HYUNDAI specifies all season tires
on some models to provide good
performance for use all year round,
including snowy and icy road conditions.
All season tires are identified by ALL
SEASON and/or M+S (Mud and Snow) on
the tire sidewall...


 Front Pillar Trim
 Rear Pillar Trim
.png)
