Hyundai Elantra: Clutch System / Clutch Cover And Disc
Hyundai Elantra (CN7) 2021-2025 Service Manual / Clutch System / Clutch System / Clutch Cover And Disc
Repair procedures
| Removal |
| 1. | Remove the manual transaxle assembly. (Refer to Manual Transaxle System - "Manual Transaxle") |
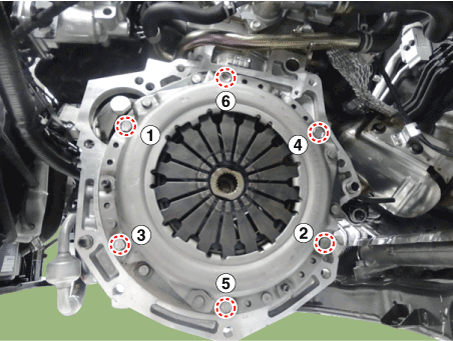
| 2. | Remove the clutch cover assembly after loosening the bolts.
[Gasoline 1.6 MPI / Gasoline 1.6 T-GDI]
[Gasoline 2.0 MPI]
|


| Inspection |
| 1. | Inspect diaphragm spring wear which is in contact with a concentric slave cylinder bearing. |
| 2. | Check the clutch cover and disc surface for wear or cracks. |
| 3. | Check the clutch disc facing for slipping or oil marks. |
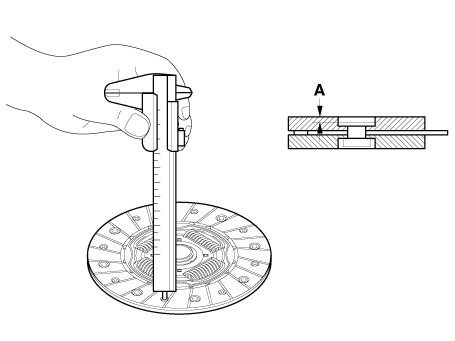
| 4. | Measure the depth from a clutch facing surface to a rivet. If the measured value is less than the specification below, replace it.
|
| Installation |
|
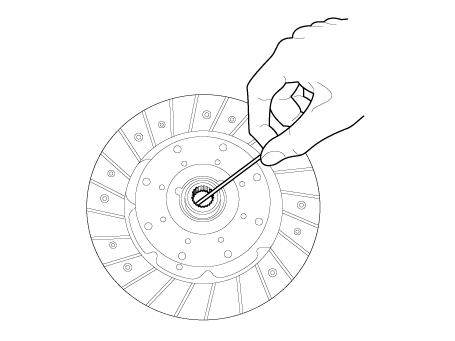
| 1. | Apply grease on a disc spline part and transaxle input shaft spline part as required.
|

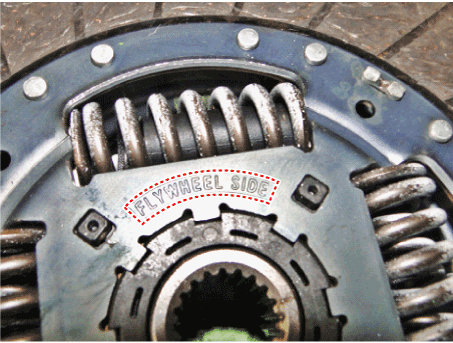
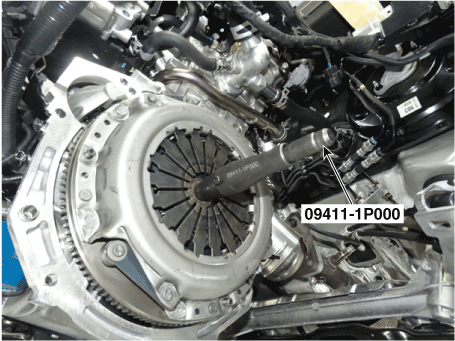
| 2. | Before installing the clutch disc, check the “TM SIDE” and “FLYWHEEL SIDE” marked on the clutch disc, and install it with the clutch cover using a special tool (09411-1P000).
|

| 3. | Install the clutch disc and the cover with SST (A: 09411-1P000).
|
| 4. | Install the clutch cover mounting bolts.
|
| 5. | Remove the clutch disc guide SST (No.: 09411-1P000).
|
| 6. | Install the transaxle assembly. (Refer to Manual Transaxle System - "Manual Transaxle") |

 Ignition Lock & Clutch Switch
Description and operation
Description–
Clutch operation is detected through clutch switch signal. This signal enables ECM to cope with instant change of load condition...
Other information:
Hyundai Elantra (CN7) 2021-2025 Service Manual: Specifications
SpecificationsPurge Control Solenoid Valve (PCSV)▷ Specification Item Specification Coil Resistance (Ω)22.0 - 26.0 [20°C (68°F)]..
Hyundai Elantra (CN7) 2021-2025 Owner's Manual: Headlamp, Parking Lamp, Daytime Running Light, Turn Signal Lamp and Side Marker
(1) Headlamp (Low) (2) Headlamp (High) (3) Daytime running lamp (DRL)/ Parking lamp (4) Turn signal lamp (5) Side marker Headlamp (Halogen bulb) WARNING Handle halogen bulbs with care. Halogen bulbs contain pressurized gas that will produce flying pieces of glass that could cause injuries if broken. Wear eye protection when changing a bulb. Allow the bulb to cool down before..
Categories
- Manuals Home
- 7th Gen Hyundai Elantra Owners Manual
- 7nd Gen Hyundai Elantra Service Manual
- Dimensions, Engine specification, Bulb Wattage
- Engine Mechanical System
- Forward Collision–Avoidance Assist (FCA) (sensor fusion)
- Engine Compartment
- Fuel gauge
Steering wheel audio control
.png)
The steering wheel audio control switches are installed for your convenience.
NOTICE
Do not operate audio remote control buttons simultaneously.
VOLUME (VOL + / VOL -) (1)
Move the VOLUME toggle switch up to increase volume. Move the VOLUME toggle switch down to decrease volume.
Copyright © 2025 www.helantra7.com