Hyundai Elantra (CN7): AVN System / AVN Remote Controller
Components and components location
| Components |
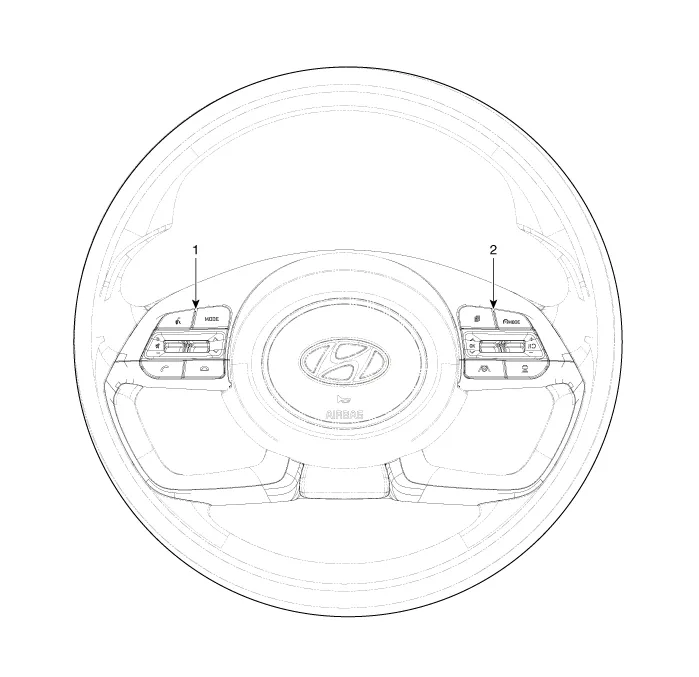
| 1. Left Remote Control Switch (Audio + Bluetooth) | 2. Right Remote Control Switch (Cruise + Trip) |
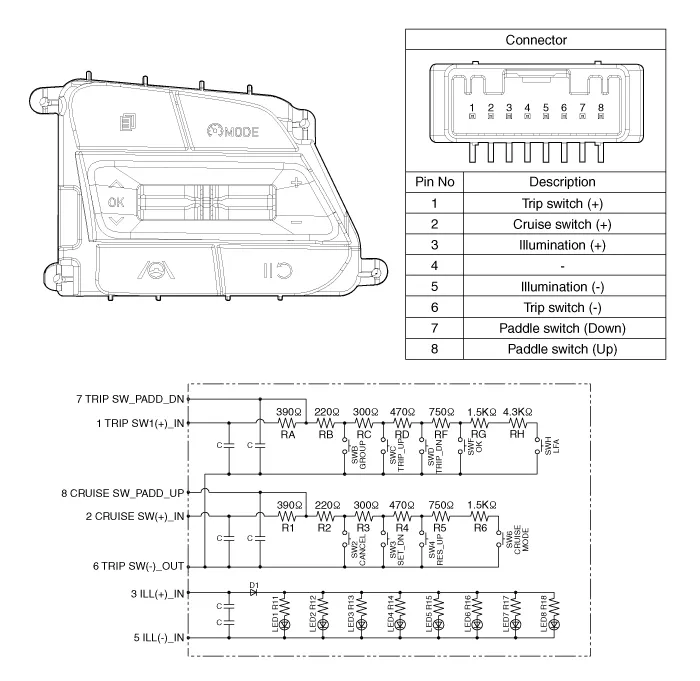
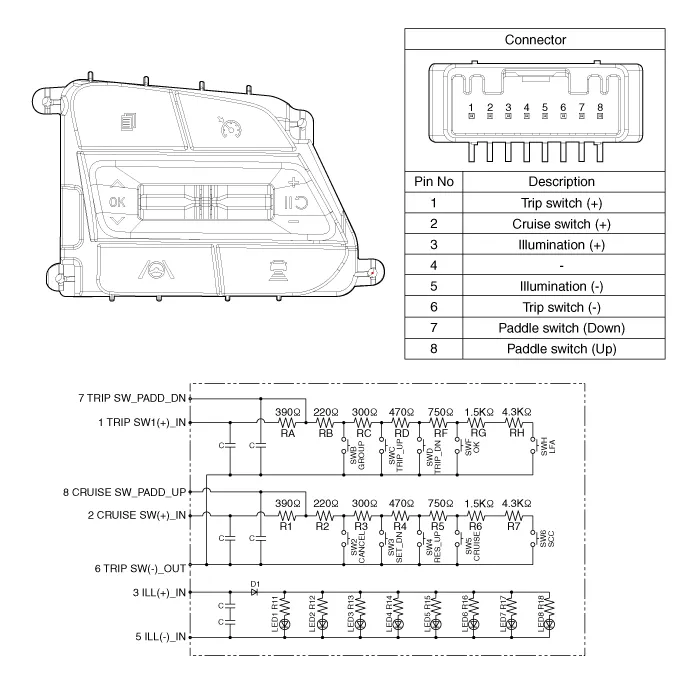
Schematic diagrams
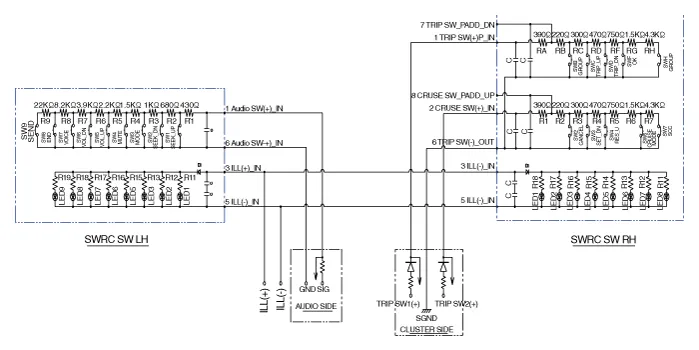
| Circuit Diagram |
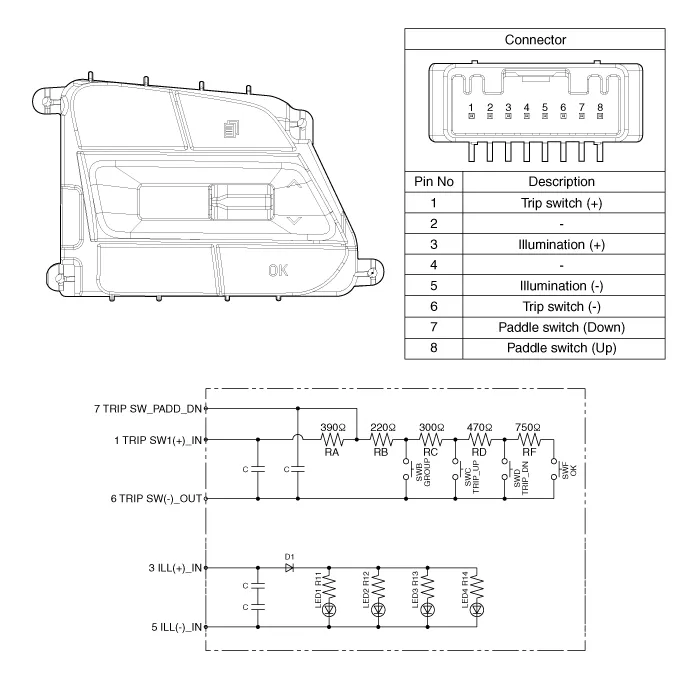
| [Without paddle shift] |
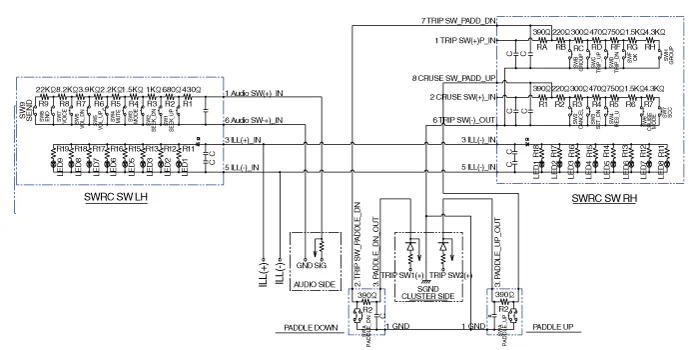
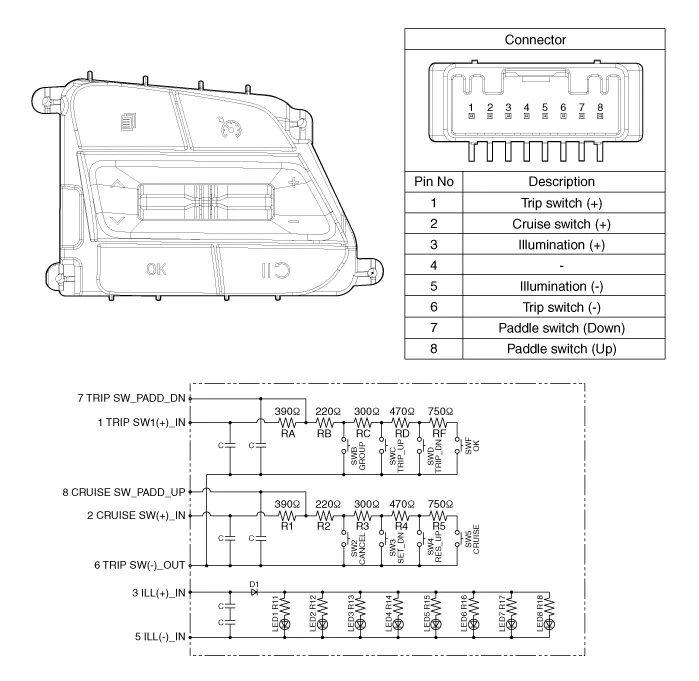
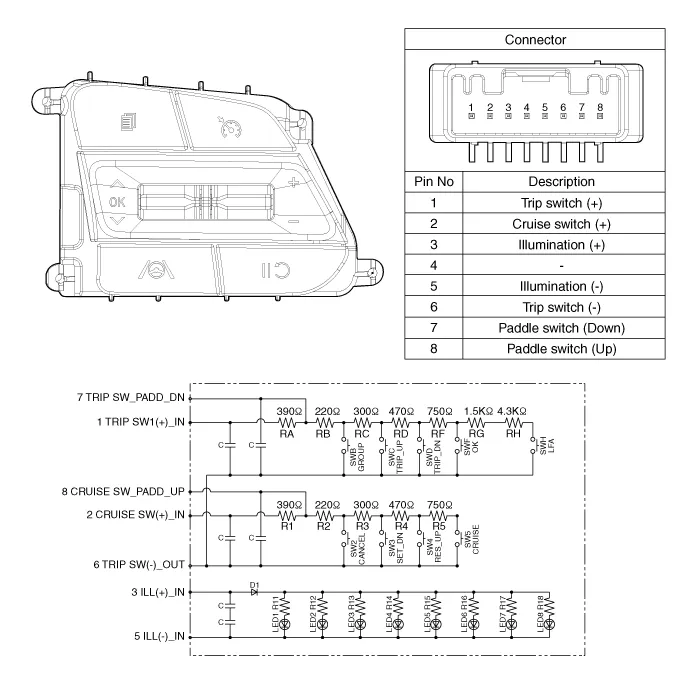
| [With paddle shift] |

Repair procedures
| Inspection |
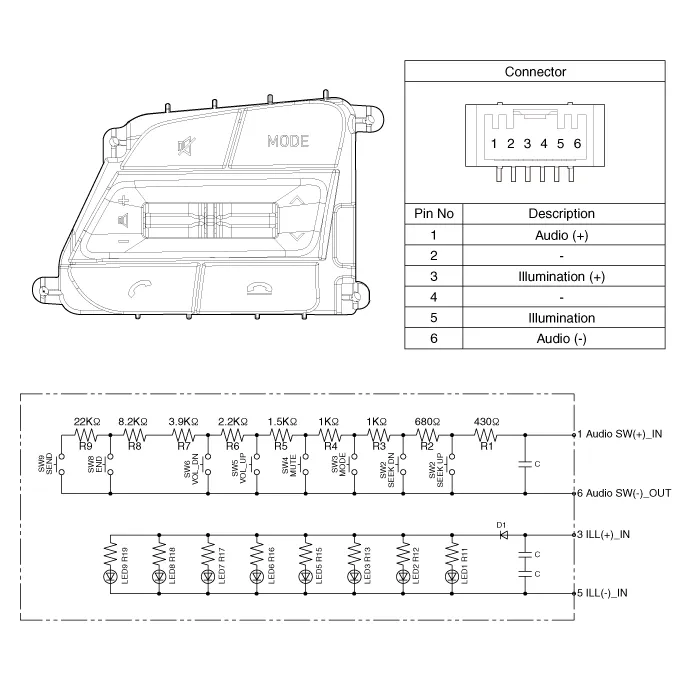
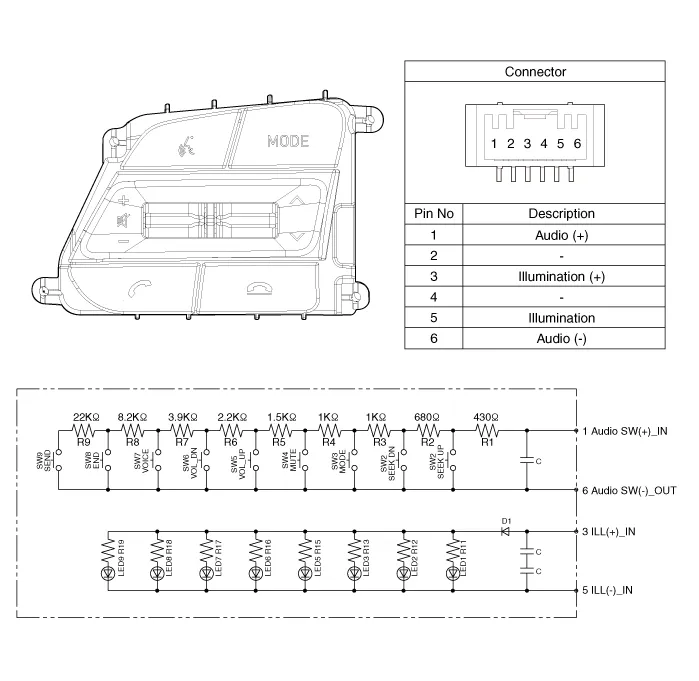
| 1. | Check for resistance between terminals in each switch position (LH).
[LH : Audio + Hands free]
|
| 2. | Check for resistance between terminals in each switch position (RH).
[Cruise]
[Trip]
|
| Removal |
| 1. | Disconnect the negative (-) battery terminal. |
| 2. | Remove the steering wheel assembly. (Refer to Steering System - "Steering Wheel") |
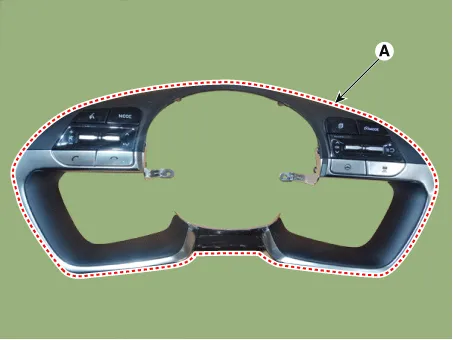
| 3. | Remove the steering back cover (A).
|

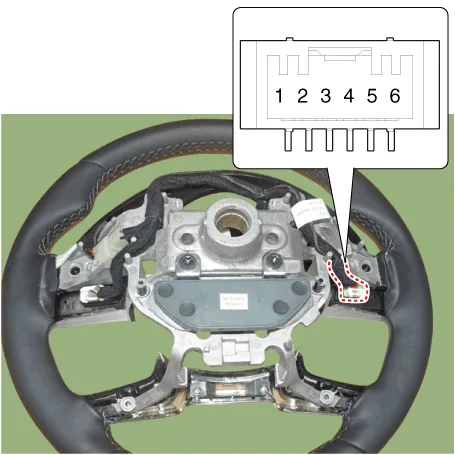
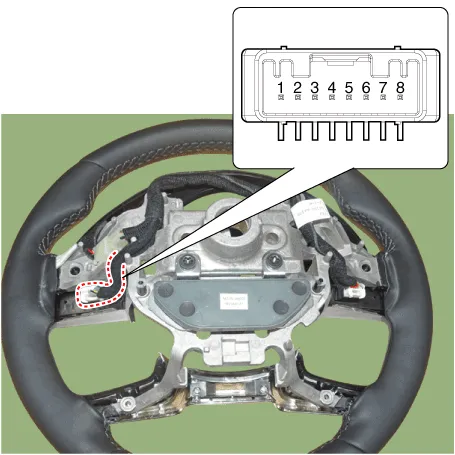
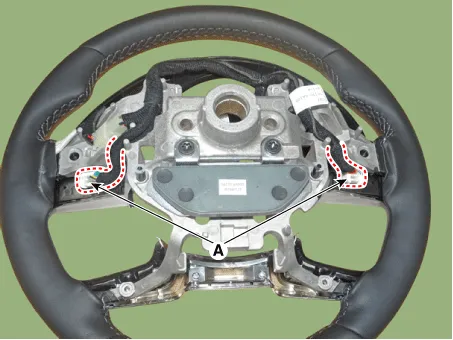
| 4. | Remove the steering remote control connector (A).
|
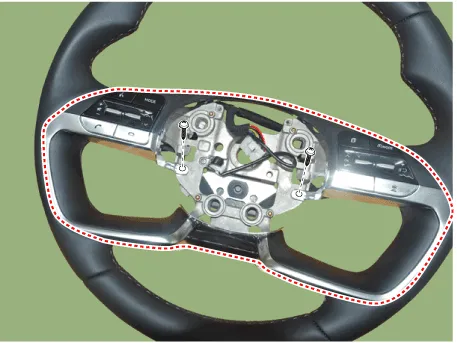
| 5. | Remove the steering remote control switch (A) after loosening the screws.
|
| Installation |
| 1. | Install the steering wheel remote control after connecting the connector. |
| 2. | Install the steering wheel. |
| 3. | Connect the negative (-) battery terminal. |
Components and components location Components NO Connector A NO Connector B 1BATT (+)1Subwoofer 2 (+)2BATT (+)2Subwoofer 1 (+)3BATT (+)3Sub woofer speaker (+)4BATT (+)4-5-5-6Multimedia CAN (High)6-7Multimedia CAN (Low)7Navigation voice (+)8ACC8-9-9-10-10-11-11-12-12Rear door speaker - RH (+)13-13Rear door speaker - LH (+)14-14Center speaker (+)15-15 -16Ground16Front door tweeter speaker - RH (-)17Ground17Front door tweeter speaker - LH (-)18Ground18Sub woofer speaker (-)19Ground19-20SPDIF (High)20-21SPDIF (Low)21Navigation voice (+)22SPDIF GND22-23-23-24IGN 124-25-25Rear door speaker - RH (-)26-26Rear door speaker - LH (-) 27-27Center speaker (+)28-28 - Repair procedures Removal1.
Components and components location Components Repair procedures RemovalRoof Antenna1.Disconnect the negative (-) battery terminal.2.Remove the roof trim.
Other information:
Hyundai Elantra (CN7) 2021-2026 Service Manual: Auto Lighting Control System
Description and operation DescriptionIt's a system that uses illumination sensor to automatically turn ON the tail lamp and head lamp based on the change in surrounding environment's illumination condition. It activates when the vehicle enters/exits tunnel, or when the illumination condition in surrounding environment changes due to rain, snow, or
Hyundai Elantra (CN7) 2021-2026 Service Manual: Repair procedures
Variant Coding When you need variant coding:– Replace Front View Camera with a new one※ EOL Variant Coding and calibration required for new replacementFront View Camera Variant CodingFront view camera variant coding makes it possible to operate functions for each vehicle type.
Categories
- Manuals Home
- Hyundai Elantra Owners Manual
- Hyundai Elantra Service Manual
- Body Electrical System
- Repair procedures
- Auto Hold. Warning messages
- New on site
- Most important about car
