
Hyundai Elantra (CN7): Emission Control System / Evaporative Emission Control System
Hyundai Elantra (CN7) 2021-2026 Service Manual / Emission Control System / Evaporative Emission Control System
Schematic diagrams
| Schematic Diagram |
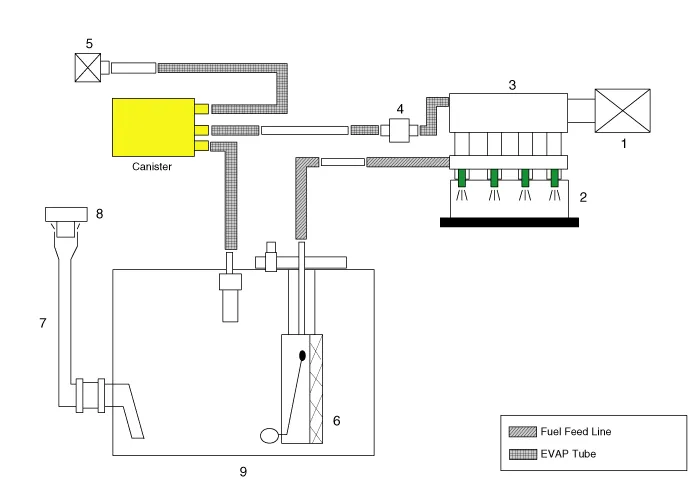
| 1. Air cleaner 2. Delivery pipe & injector 3. Engine 4. Purge control solenoid valve (PCSV) 5. Fuel tank air filter | 6. Fuel pump 7. Fuel filler neck 8. Fuel filler cap 9. Fuel tank |
Canister
Canister is filled with charcoal and absorbs evaporated vapor in fuel tank. The gathered fuel vapor in canister is drawn into the intake manifold by the ECM/PCM when appropriate conditions are set.
Purge Control Solenoid Valve (PCSV)
Purge Control Solenoid Valve (PCSV) is installed in the passage connecting canister and intake manifold. It is a duty type solenoid valve and is operated by ECM/PCM signal.
To draw the absorbed vapor into the intake manifold, the ECM/PCM will open the PCSV, otherwise the passage remains closed.
Fuel Filler Cap
A ratchet tightening device on the threaded fuel filler cap reduces the chances of incorrect installation, which would seal the fuel filler. After the gasket on the fuel filler cap and the fill neck flange contact each other, the ratchet produces a loud clicking noise indicating the seal has been set.
Canister
Repair procedures
| Removal |
| 1. | Turn the ignition switch OFF and disconnect the negative (-) battery cable. |
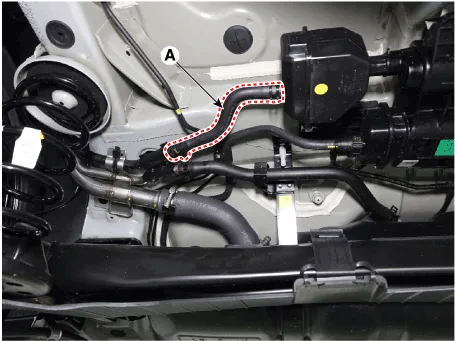
| 2. | Disconnect the vent hose (A).
|
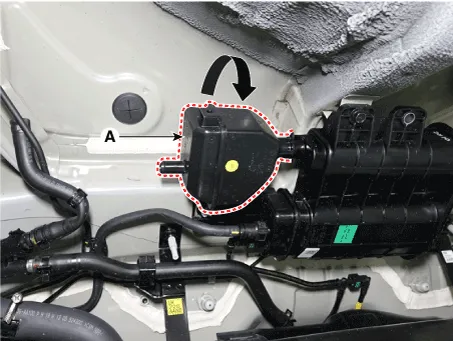
| 3. | Remove the fuel tank air filter (A) by rotating it 30 degrees.
|
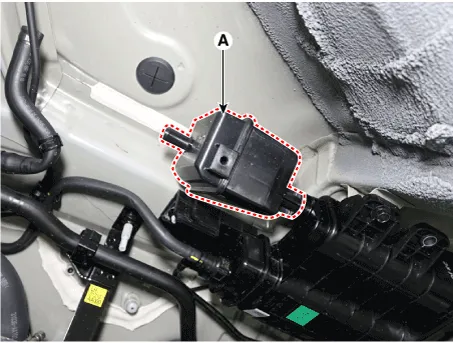
| 4. | Disconnect the vapor hose quick-connectors (A).
|
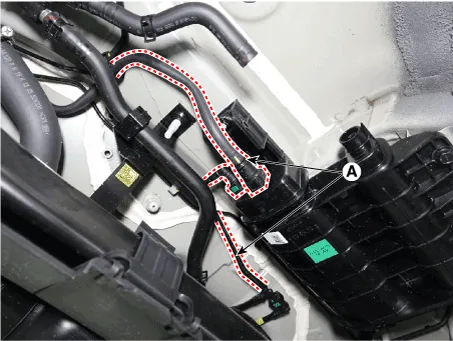
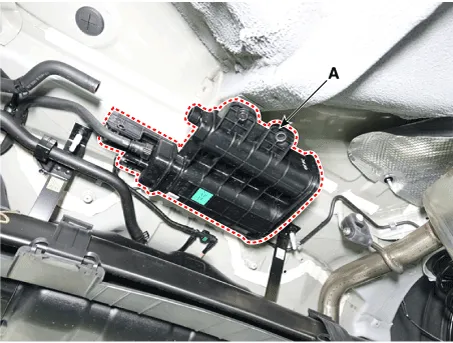
| 5. | Remove the canister (A).
|
| Inspection |
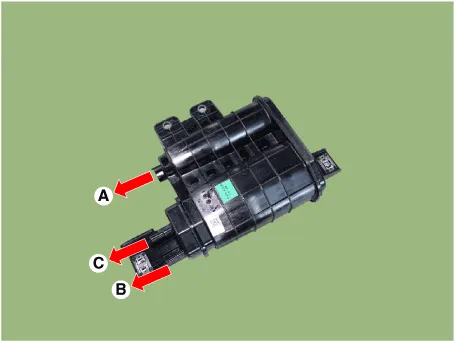
| 1. | Check for the following items visually.
A : Canister ↔ Atmosphere B : Canister ↔ Fuel Tank C : Canister ↔ Intake Manifold |
| Installation |
| 1. | Install in the reverse order of removal. |
Fuel Filler Cap
Description and operation
| Description |
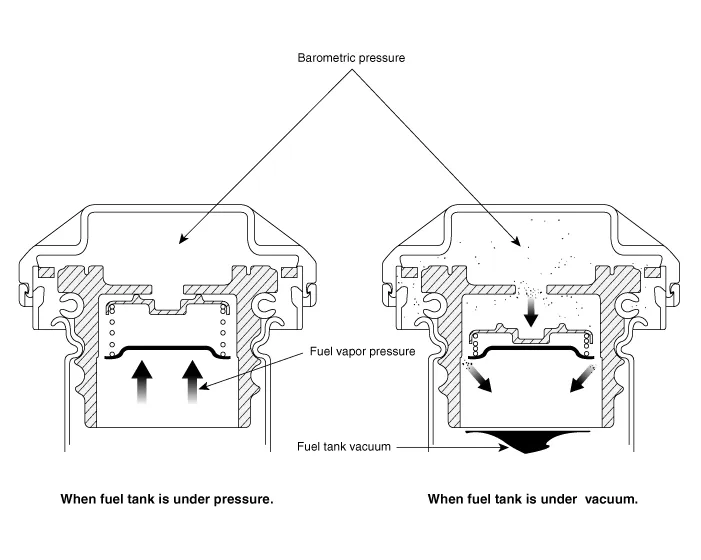
A ratchet tightening device on the threaded fuel filler cap reduces the chances of incorrect installation, which would seal the fuel filler. After the gasket on the fuel filler cap and the filler neck flange contact each other, the ratchet produces a loud clicking noise indicating the seal has been set.
Fuel Tank Air Filter
Repair procedures
| Removal |
| 1. | Turn the ignition switch OFF and disconnect the negative (-) battery cable. |
| 2. | Disconnect the vent hose (A).
|
| 3. | Remove the fuel tank air filter (A) by rotating it 30 degrees.
|
| Installation |
| 1. | Install in the reverse order of removal. |
Schematic Diagram
Other information:
Hyundai Elantra (CN7) 2021-2026 Service Manual: Specifications
SpecificationAir Conditioner Item Specification CompressorTypeGamma 1.6 MPI, Gasoline 2.0 NU MPI, Gasoline 1.6 T-GDI : 6HVx14Gasoline 1.6 MPI : 6HVe14Oil type & CapacityFD46XG (IDEMITSU) 100 ± 10 g Pulley type6PK-TYPEDisplacement145 cc/revExpansion valveTypeBlock type RefrigerantTypeR - 134
Hyundai Elantra (CN7) 2021-2026 Service Manual: Receiver-Drier
Repair procedures Replacement1.Remove the condenser.2.Remove the cap (A) on the bottom of the condenser with a L wrench. Tightening torque : 9.81 - 14.71 N.m (1.0 - 1.5 kgf.m, 7.2 - 10.8 lb-ft) 3.Remove the receiver-drier (A) from condenser using a long nose plier.
Categories
- Manuals Home
- Hyundai Elantra Owners Manual
- Hyundai Elantra Service Manual
- Troubleshooting
- Integrated Thermal Management Module (ITM)
- Engine Mechanical System
- New on site
- Most important about car

Copyright © 2026 www.helantra7.com - 0.0093