Hyundai Elantra (CN7): Body (Interior and Exterior) / Hood
Repair procedures
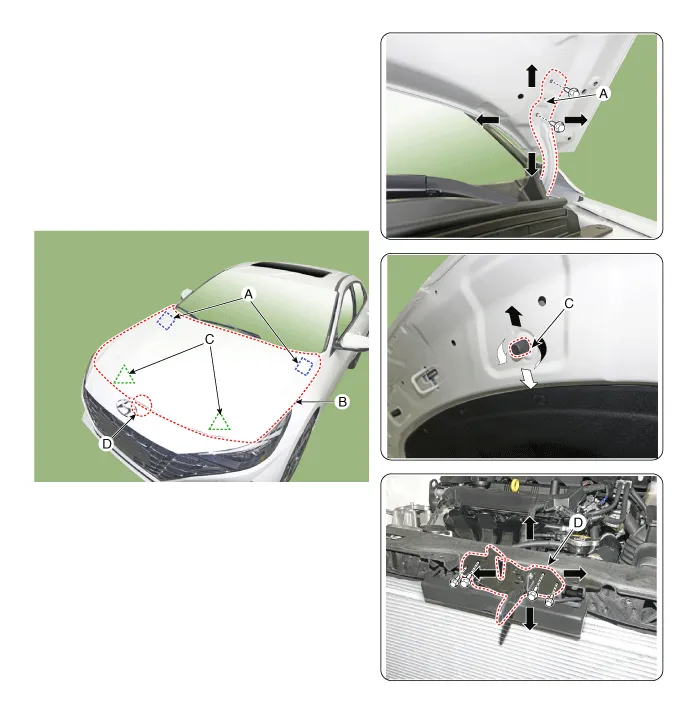
| Adjustment |
| 1. | After loosening the hinge (A) mounting bolt, adjust the hood (B) by moving it up and down or from side to side and tighten the bolt. |
| 2. | Adjust the hood height by moving the hood overslam bumpers (C) up and down. |
| 3. | After loosening the hood latch (D) mounting bolts, adjust the latch by moving it up and down or from side to side.
|
Hood Assembly
Components and components location
| Component Location |

| 1. Hood assembly |
Repair procedures
| Replacement |
|

|

| 1. | After loosening the hood hinge (A) mounting bolts, remove the hood assembly (B).
|
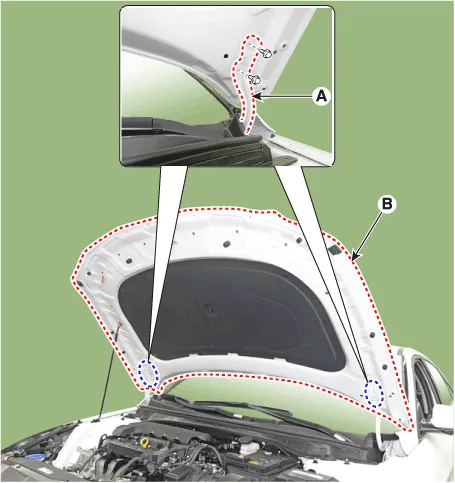
| 2. | To install, reverse the removal procedure.
|
Hood Insulator Pad
Repair procedures
| Replacement |
|
| 1. | Using a clip remover, remove the clips and then the hood insulator pad (A).
|

| 2. | To install, reverse the removal procedure.
|
Hood Latch Release Handle
Components and components location
| Component Location |
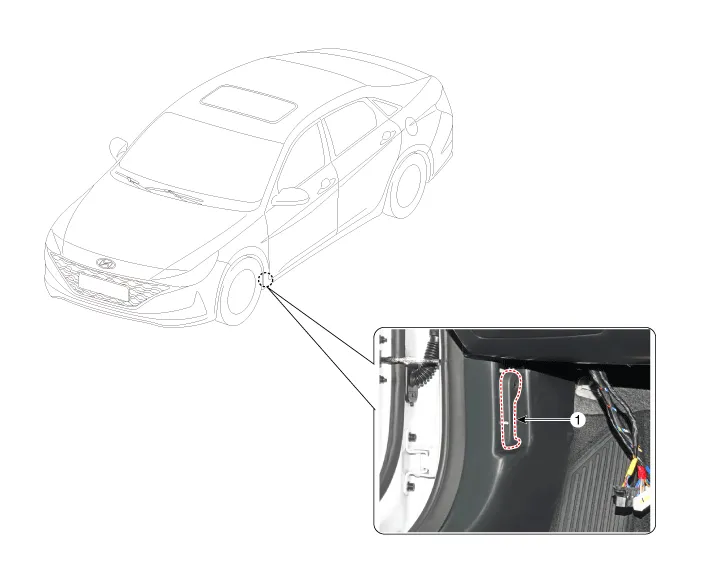
| 1. Hood latch release handle |
Repair procedures
| Replacement |
| 1. | Using screw driver or remover, remove the hood release handle (A).
|
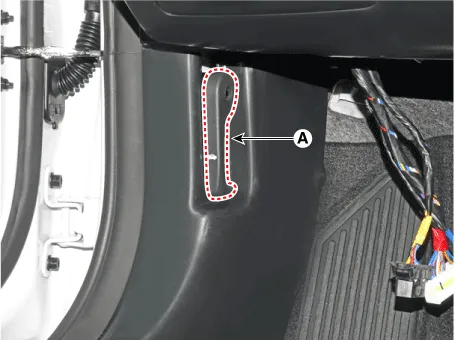
| 2. | To install, reverse the removal procedure.
|
Hood Latch
Components and components location
| Component Location |

| 1. Hood latch assembly |
Repair procedures
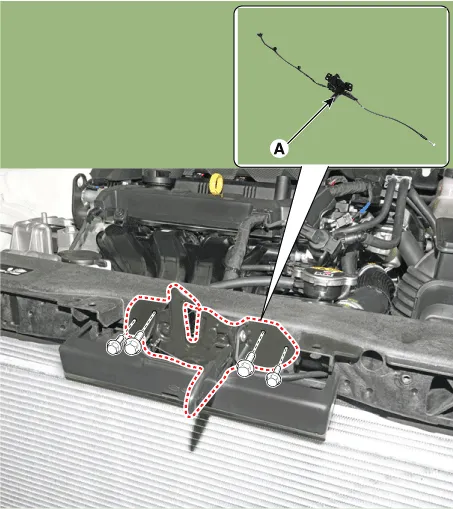
| Replacement |
| 1. | Remove the front bumper. (Refer to Front Bumper - "Front Bumper Assembly") |
| 2. | Disconnect the connector (A), then remove the wiring mounting clips.
|

| 3. | Disconnect the hood latch release cable (A).
|

| 4. | Loosen the mounting bolts and remove the hood latch assembly (A).
|
| 5. | To install, reverse the removal procedure.
|
Hood Weatherstrip
Repair procedures
| Replacement |
| 1. | Remove the hood weatherstrip (A).
|
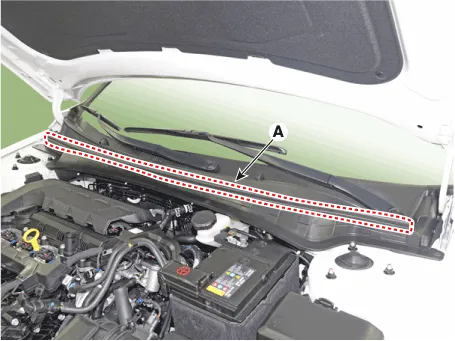
| 2. | To install, reverse the removal procedure. |
Components and components location Component Location1. Fender assembly Repair procedures Replacement • When removing the fender, wrap protective tape around a screwdriver or remover not to damage components• Put on gloves to prevent hand injuries1.
Other information:
Hyundai Elantra (CN7) 2021-2026 Service Manual: Description and operation
Description and OperationBlcok Diagram • This system monitors the driving situations through the radar and the camera. Thus, for a situation out of the sensing range, the system may not normally operate. The System may be limited when : • The radar sensor or camer
Hyundai Elantra (CN7) 2021-2026 Service Manual: Front Radar Unit
Components and components location Components Location1. Front rader unit Specifications Specification Item Specification Power supply (V)12Operation voltage (V)9 - 16 Schematic diagrams Circuit DiagramTerminal function Pin No Te
Categories
- Manuals Home
- Hyundai Elantra Owners Manual
- Hyundai Elantra Service Manual
- Suspension System
- Maintenance
- Integrated Thermal Management Module (ITM)
- New on site
- Most important about car
