
Hyundai Elantra (CN7): Driveshaft Assembly / Joint Assembly (Wheel side)
Repair procedures
| Removal |
| 1. | Remove the front drive shaft. (Refer to Driveshaft Assembly - "Front Driveshaft") |
| 2. | Remove the trans axle side joint. (Refer to Driveshaft Assembly - "Transaxl Joint") |
| 3. | Remove the dynamic damper. (Refer to Driveshaft Assembly - "Dynamic Damper") |
| 4. | Remove the wheel side joint small diameter (A) and large diameter (B) boot band using driver (-).
|
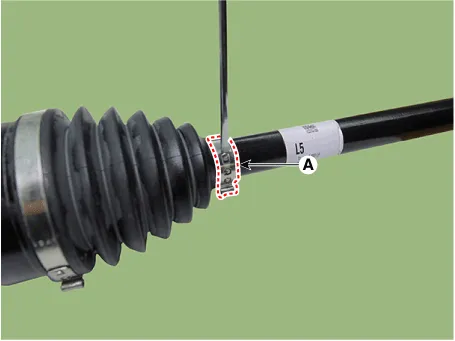
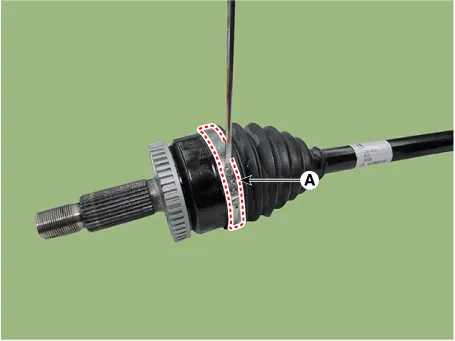
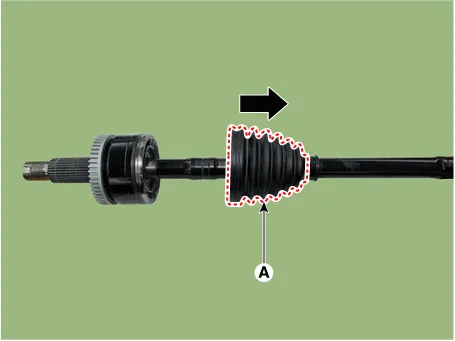
| 5. | Remove the wheel side joint boot (A).
|

| 1. | Remove the front drive shaft. (Refer to Driveshaft Assembly - "Front Driveshaft") |
| 2. | Remove the trans axle side joint. (Refer to Driveshaft Assembly - "Transaxl Joint") |
| 3. | Remove the dynamic damper. (Refer to Driveshaft Assembly - "Dynamic Damper") |
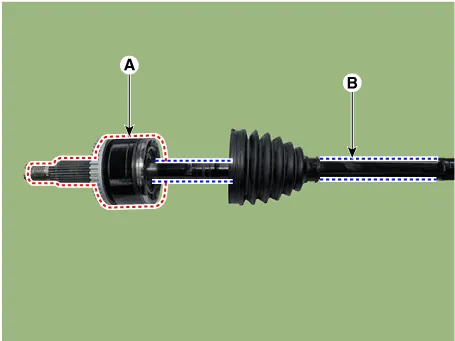
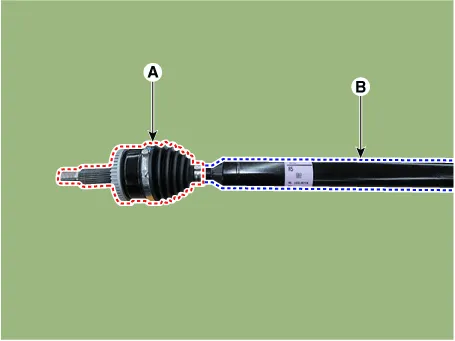
| 4. | Replace the wheel side joint assembly (A) and shaft (B).
|
| Inspection |
| 1. | Check the boot for water or foreign objects. |
| 2. | Replace any defective parts. |
| Installation |
|
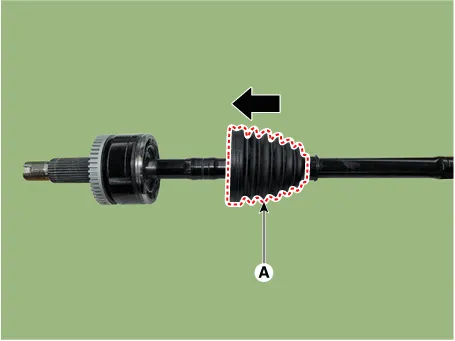
| 1. | Install the new boot (A) in the direction of the arrow.
|
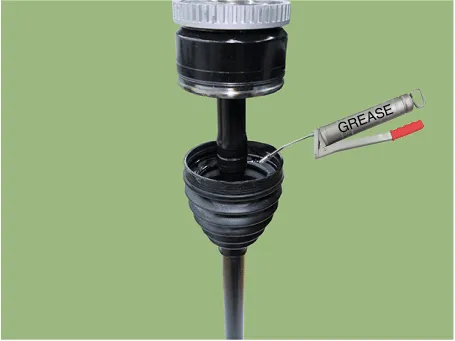
| 2. | Apply the grease specified inside the boot.
|
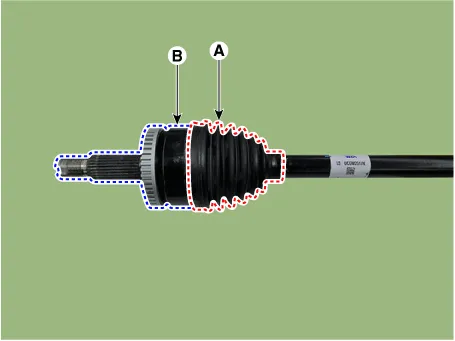
| 3. | Install the wheel side boot (A) into the housing (B).
|
| 4. | Install the large diameter boot band (B) using SST (0K495-C5000).
|
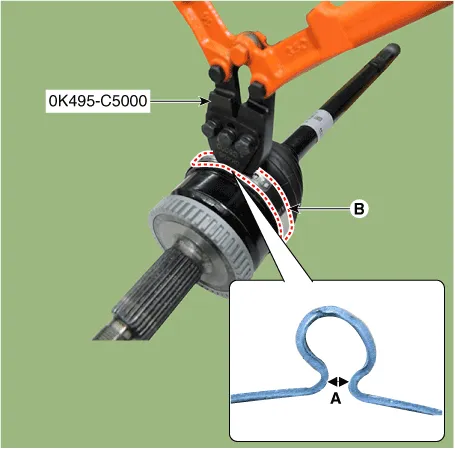
| 5. | Install the small diameter boot band (B) using SST (0K495-C5000).
|
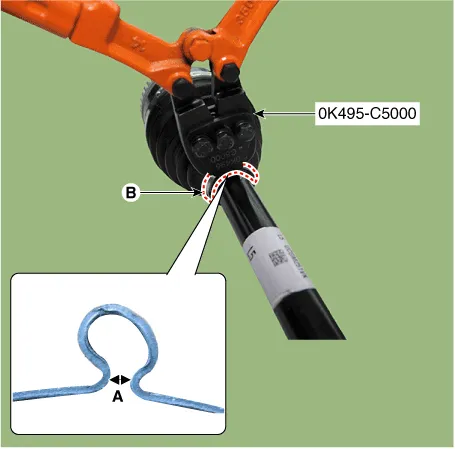
| 6. | Install the dynamic damper. [If equipped] (Refer to Driveshaft Assembly - "Dynamic Damper") |
| 7. | Install the transaxle side joint. (Refer to Driveshaft Assembly - "Joint Assembly(Transaxle side)") |
| 8. | Install the front drive shaft. (Refer to Driveshaft Assembly - "Front Driveshaft") |
|

| 1. | Replace the wheel side joint assembly (A) and shaft (B).
|
| 2. | Remove the dynamic damper. (Refer to Driveshaft Assembly - "Dynamic Damper") |
| 3. | Install the transaxle side joint. (Refer to Driveshaft Assembly - "Joint Assembly(Transaxle side)") |
| 4. | Install the front drive shaft. (Refer to Driveshaft Assembly - "Front Driveshaft") |
Repair procedures Removal • Drive shaft joints require special grease, so do not add any other type of grease.
Components and components location Components[Rear disc brake type]1. Rear brake disc2. Hub bearing assembly3. Dust cover4. Rear carrier[Rear drum brake type]1.
Other information:
Hyundai Elantra (CN7) 2021-2026 Service Manual: Wireless Power Charging Unit
Components and positions Components Circuit diagram Circuit Diagram Repair procedures Removal • Handling wireless charging system parts by wet hands may cause electric shock. 1.Disconnect the negative (-) battery terminal.
Hyundai Elantra (CN7) 2021-2026 Service Manual: Special service tools
Special Service Tools Tool Name / Number Illustration Description LKA Compensator(09890-3V100)Used for compensating front view camera unitBCW Sensor Correction Tool Set(09958-3T500)Used to correct the blind-spot radar unit.
Categories
- Manuals Home
- Hyundai Elantra Owners Manual
- Hyundai Elantra Service Manual
- Troubleshooting
- Vehicle Information
- Body Electrical System
- New on site
- Most important about car
