
Hyundai Elantra (CN7): Rear Seat / Rear Seat Assembly
Components and components location
| Component Location |

| 1. Rear seat cushion assembly | 2. Rear seat back assembly |
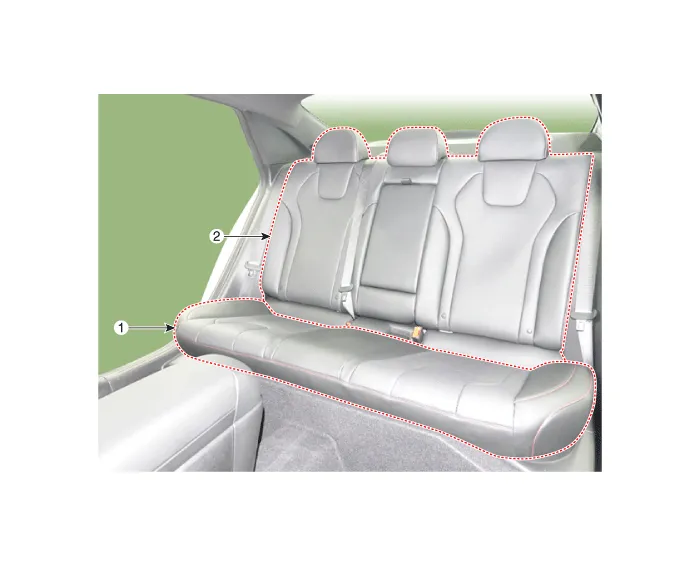
| 1. Rear seat cushion assembly | 2. Rear seat back assembly |
Repair procedures
| Replacement |
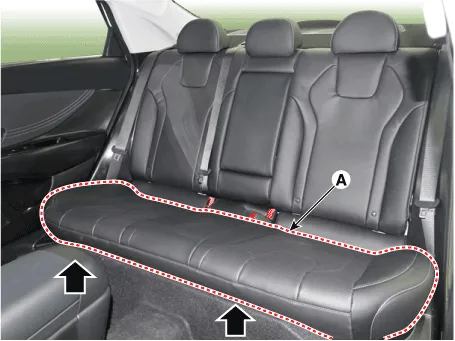
| 1. | Loosen the mounting bolts, remove the rear seat cushion assembly (A).
|
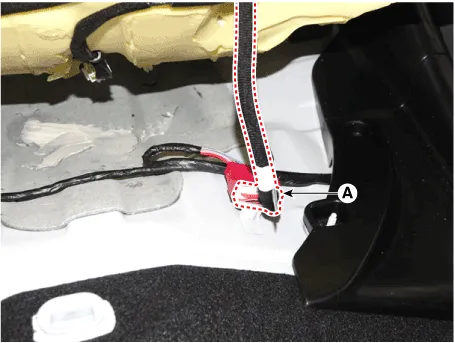
| 2. | Disconnect the rear seat cushion connector (A).
|
| 3. | To install, reverse the removal procedure.
|

| 1. | Remove the rear seat cushion assembly. (Refer to Rear Seat - "Rear Seat Assembly") |
| 2. | Fold the rear seat back assembly (A) by pulling the folding lever in the direction of the arrow.
|

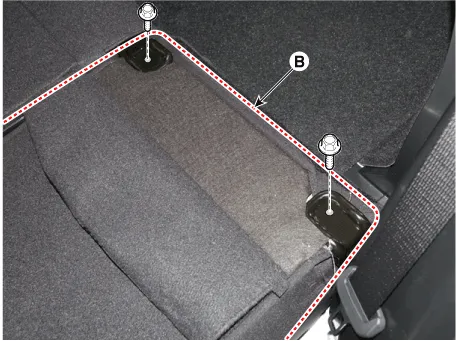
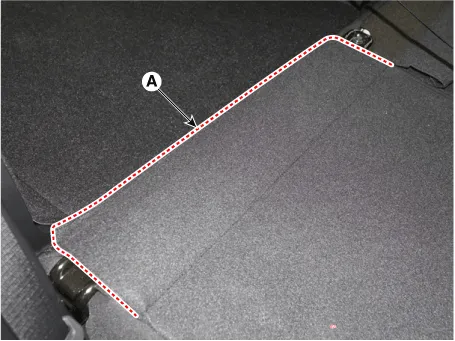
| 3. | Separate the rear seat cover (A), loosen the mounting bolts and remove the rear seat assebmly (B).
[LH]
[RH]
|


| 4. | To install, reverse the removal procedure. |
Components[General type]1. Rear seat back assembly [LH]2. Rear seat back assembly [RH]3. Rear seat back armrest4. Rear seat cushion assembly [General type]1.
Components and components location Component Location [General type]1. Rear seat back cover [LH]2. Rear seat back cover [RH][N Line]1. Rear seat back cover [LH]2.
Other information:
Hyundai Elantra (CN7) 2021-2026 Service Manual: Head Lamp Leveling Device
Components and components location Component Location1. Head lamp leveling actuator2. Head lamp leveling switch Head Lamp Leveling Switch Schematic diagrams Schematic Diagrams Repair procedures Replacement1.Disconnect the negative (-) battery terminal.
Hyundai Elantra (CN7) 2021-2026 Service Manual: Troubleshooting
TroubleshootingWireless Power Charger System Troubleshooting Trouble status Inspection item Inspection Not chargedCheck the mobile phone status R-1Amber LED blinks OvercurrentR-2OverheatingR-2Foreign matterR-2R-1.
Categories
- Manuals Home
- Hyundai Elantra Owners Manual
- Hyundai Elantra Service Manual
- Front Radar Unit
- Drive Mode
- Instrument Panel Overview
- New on site
- Most important about car
