
Hyundai Elantra (CN7): Rear Suspension System / Rear torsion beam axle
Hyundai Elantra (CN7) 2021-2026 Service Manual / Suspension System / Rear Suspension System / Rear torsion beam axle
Components and components location
| Components |
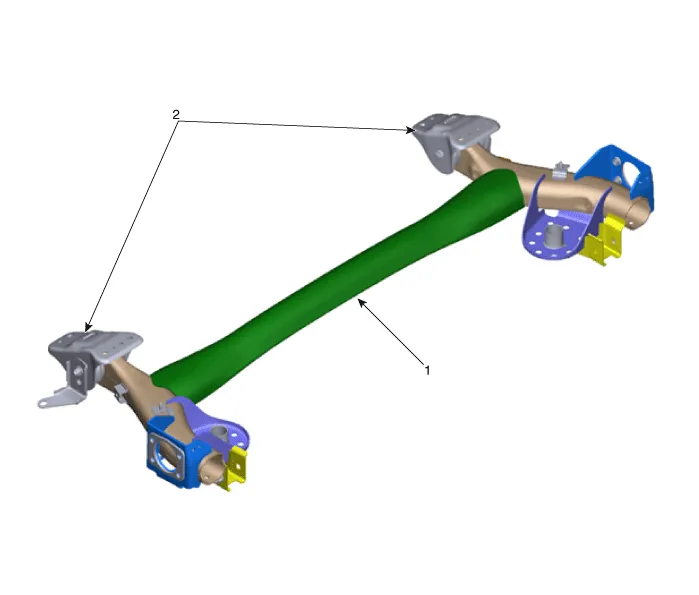
| 1. Torsion beam axle | 2. Rear torsion beam chassis bracket |
Repair procedures
| Removal |
[Rear disc brake parking cable type]
| 1. | Loosen the wheel nuts slightly. Raise the vehicle, and make sure it is securely supported. |
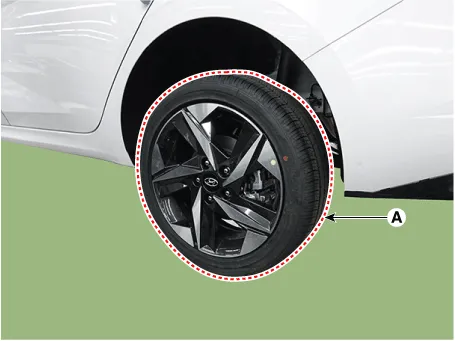
| 2. | Remove the rear wheel and tire (A) from the rear hub.
|

| 3. | Remove the rear caliper. (Refer to Brake System - "Rear Disc Brake") |
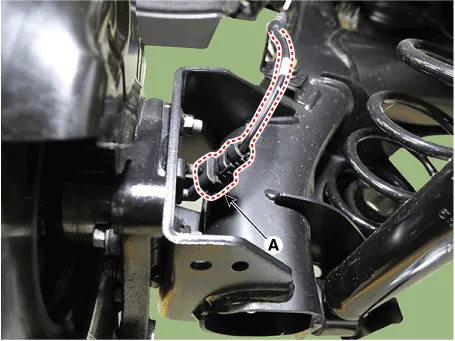
| 4. | Disconnect the rear wheel speed sensor connector (A).
|
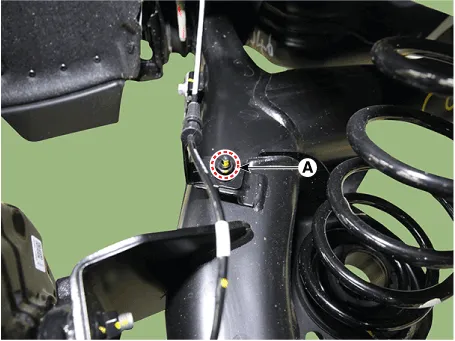
| 5. | Remove the rear wheel speed sensor bracket after loosening the mounting nut (A).
|
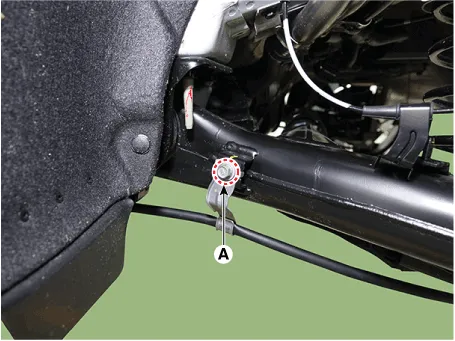
| 6. | Remove the parking brake cable bracket after loosening the mounting bolt (A).
|
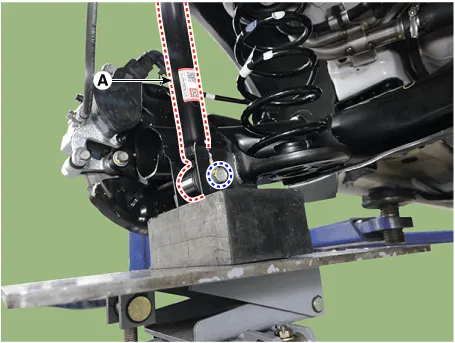
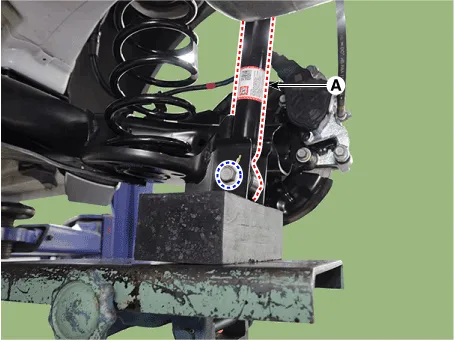
| 7. | Remove the rear shock absober (A) from the torsion beam axle after loosening the mounting bolt.
[LH]
[RH]
|
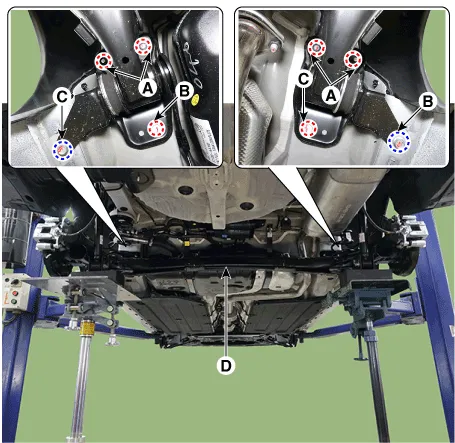
| 8. | Remove the torsion beam axle (D) after loosening the mounting nuts (A) and bolts (B, C).
|
[Rear disc brake EPB type]
| 1. | Loosen the wheel nuts slightly. Raise the vehicle, and make sure it is securely supported. |
| 2. | Remove the rear wheel and tire (A) from the rear hub.
|
| 3. | Remove the rear caliper. (Refer to Brake System - "Rear Disc Brake") |
| 4. | Disconnect the rear wheel speed sensor connector (A).
|
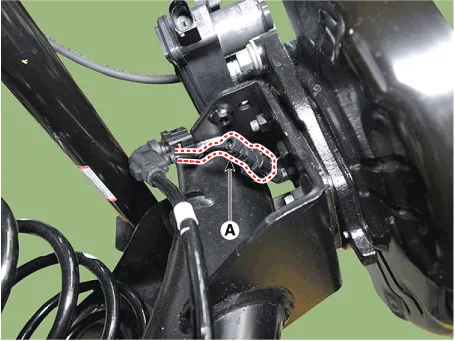
| 5. | Remove the rear wheel speed sensor bracket after loosening the mounting nut (A).
|
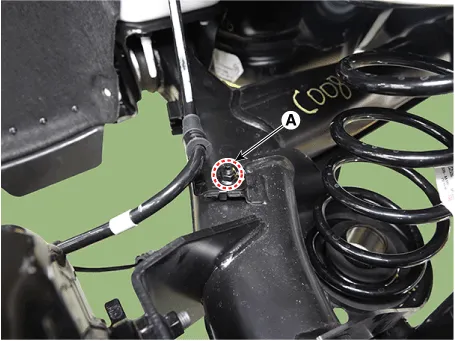
| 6. | Remove the rear shock absober (A) from the torsion beam axle after loosening the mounting bolt.
[LH]
[RH]
|
| 7. | Remove the torsion beam axle (D) after loosening the mounting nuts (A) and bolts (B, C).
|
[Rear drum brake type]
| 1. | Loosen the wheel nuts slightly. Raise the vehicle, and make sure it is securely supported. |
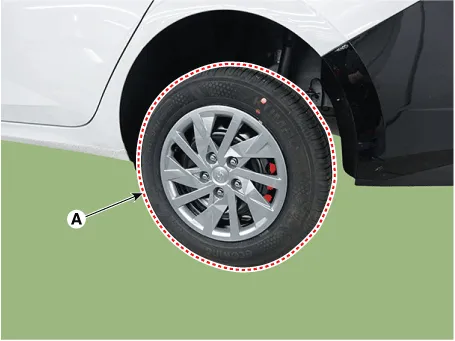
| 2. | Remove the rear wheel and tire (A) from the rear hub.
|
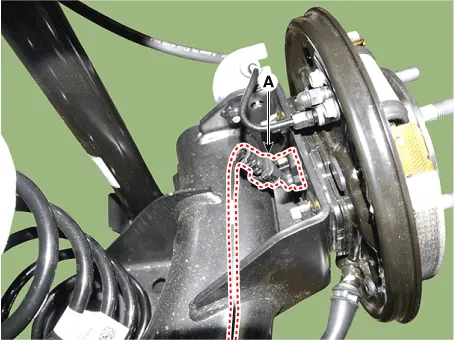
| 3. | Disconnect the rear wheel speed sensor connector (A).
|
| 4. | Loosen the screw and then remove the rear drum brake (A).
|
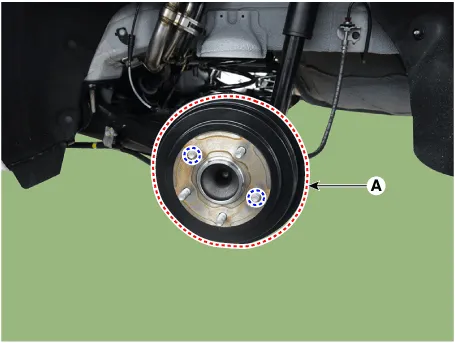
| 5. | Loosen the hub mounting bolts and then remove the hub (A) from the torsion beam.
|
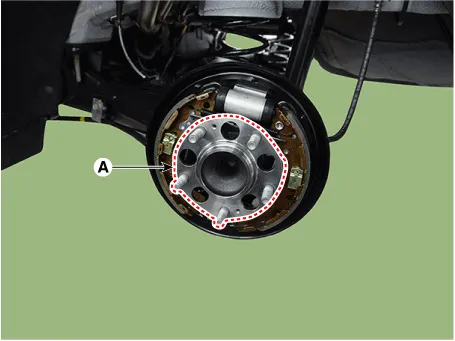
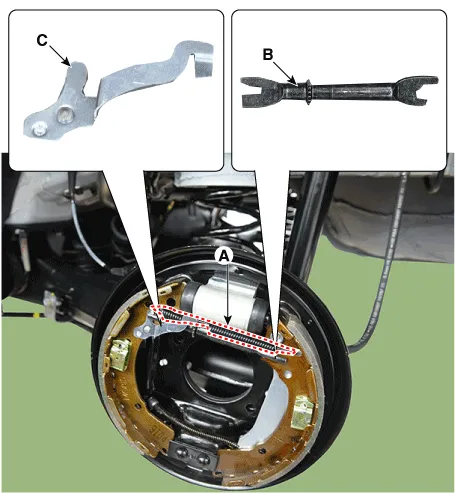
| 6. | Remove the lower shoe return spring (A).
|
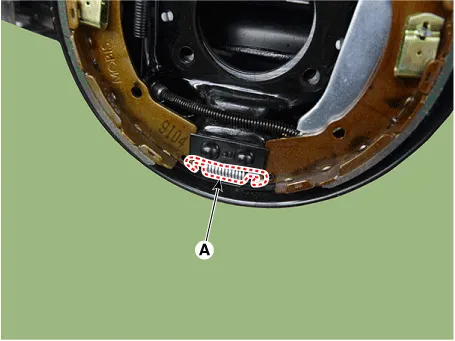
| 7. | Remove the adjuster spring (A).
|
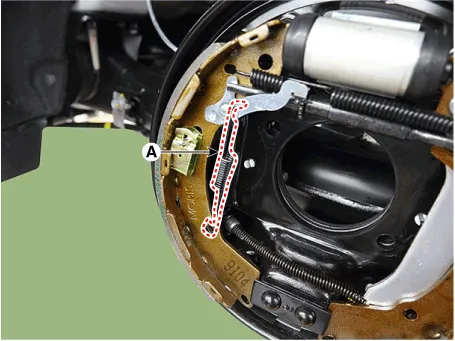
| 8. | Remove the upper shoe return spring (A). |
| 9. | Remove the upper shoe adjuster (B). |
| 10. | Remove the adjusting lever (C).
|
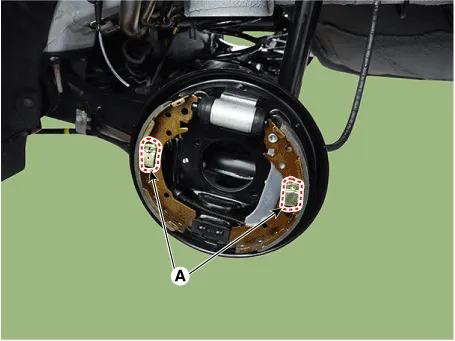
| 11. | Remove the shoe holder (A) and then remove the rining.
|
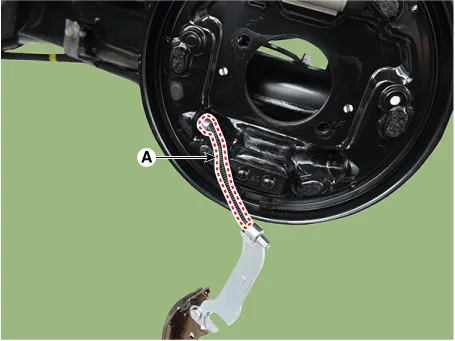
| 12. | Disconnect the parking brake cable (A) from lining.
|
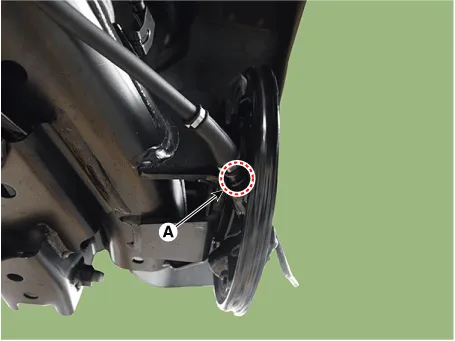
| 13. | Remove the clip (A).
|
| 14. | Remove the brake hose (A) after loosening the brake flare nut.
|
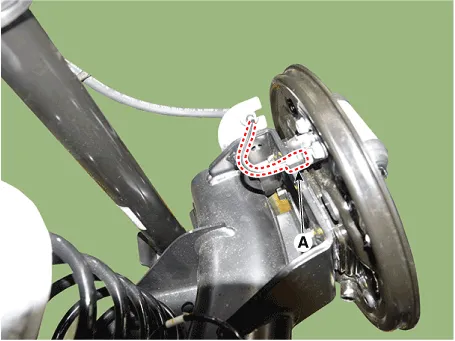
| 15. | Loosen the rear parking cable bracket mounting bolts (A).
|
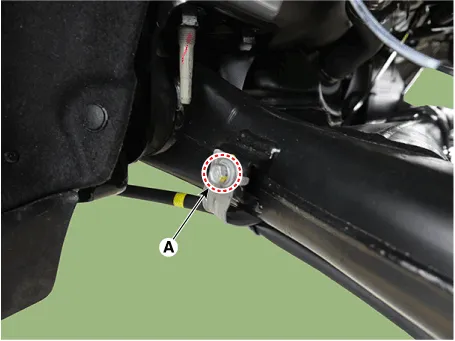
| 16. | Loosen the rear wheel speed sensor bracket mounting nuts (A).
|
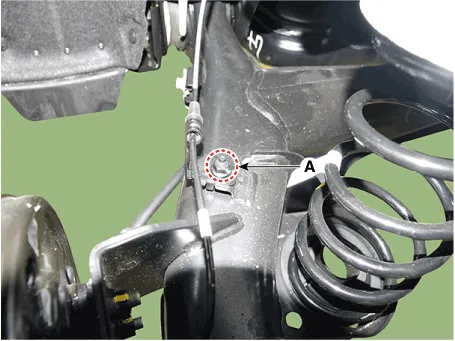
| 17. | Remove the rear brake hose bracket mounting bolts (A).
|
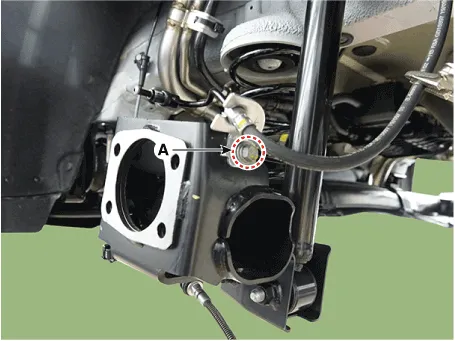
| 18. | Support the rear torsion beam axle with a jack. |
| 19. | Loosen the rear torsion beam axle stay mounting bolts (A, B) and nuts (C).
|
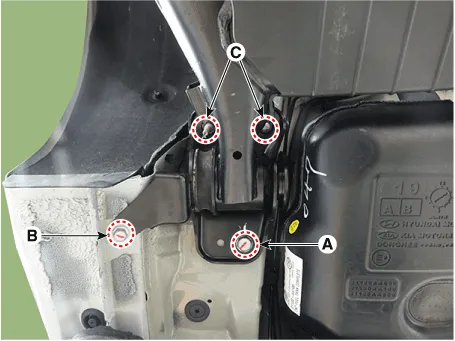
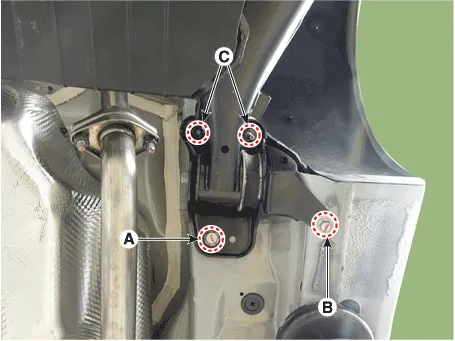
| 20. | Loosen the bolt and then separate the rear shock absorber (A) from the torsion beam axle.
|
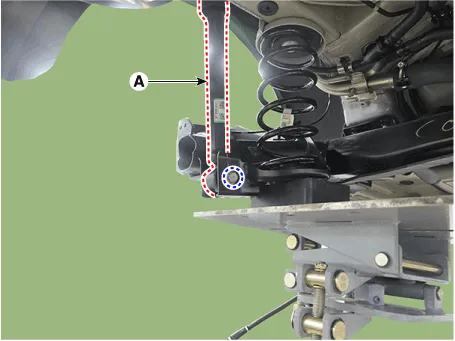
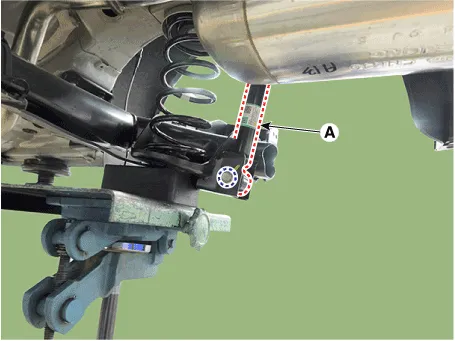
| 21. | Remove the torsion beam axle (A).
|
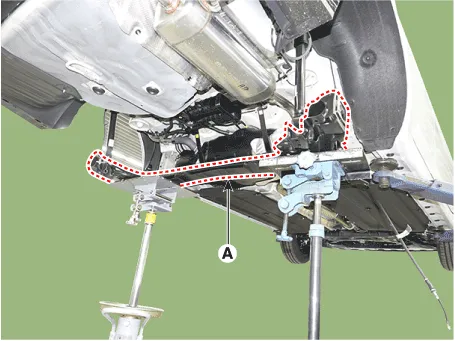
| Replacement |
[Rear torsion beam axle bush replace]
| 1. | Remove the rear torsion beam axle from the vehicle. (Refer to Rear Torsion Beam Axle - "Removal") |
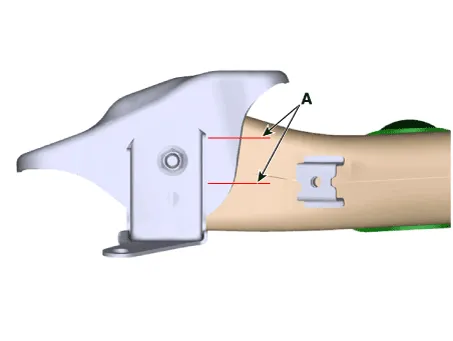
| 2. | Mark (A) between the rear torsional beam chassis bracket and the torsional beam axle.
|
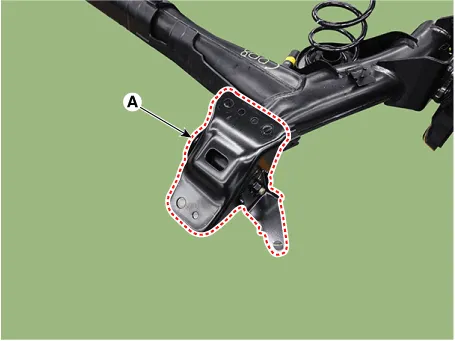
| 3. | Remove the rear torsion beam axle stay (A) after loosening the mounting bolt and nut.
|
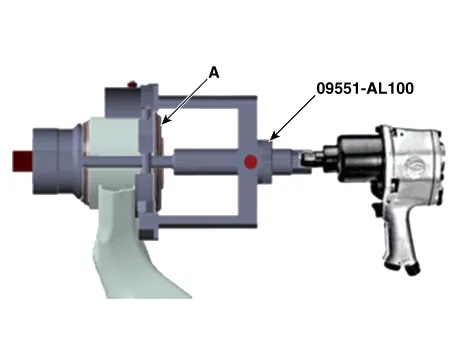
| 4. | Using the SST (09551-AL100), replace the bush (A).
|

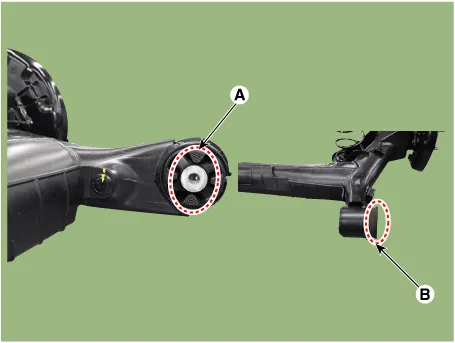
| 5. | Install the torsion beam axle stay (A) and tighten the bolt and nut to the specified torque.
|
| Installation |
| 1. | To install, reverse the removal procedures. |
Components and components location Components1. Coil spring upper pad2. Rear coil spring3. Coil spring lower pad Repair procedures Removal1.
Other information:
Hyundai Elantra (CN7) 2021-2026 Service Manual: Compressor
Description and operation DescriptionThe compressor is the power unit of the A/C system.It is located on the side of engine block and driven by a V-belt of the engine.The compressor changes low pressure and low temperature refrigerant gas into high pressure and high temperature refrigerant gas.
Hyundai Elantra (CN7) 2021-2026 Service Manual: Condenser
Components and components location Components Location[General type]1. Condenser[N Line]1. Condenser Repair procedures Inspection1.Check the condenser fins for clogging and damage. If clogged, clean them with water, and blow them with compressed air.
Categories
- Manuals Home
- Hyundai Elantra Owners Manual
- Hyundai Elantra Service Manual
- Vehicle Information
- Integrated Thermal Management Module (ITM)
- Body (Interior and Exterior)
- New on site
- Most important about car

Copyright © 2026 www.helantra7.com - 0.0229