Hyundai Elantra: Front Seat Belt / Front Seat Belt Pretensioner
Hyundai Elantra (CN7) 2021-2025 Service Manual / Body (Interior and Exterior) / Front Seat Belt / Front Seat Belt Pretensioner
Components and components location
| Components Location |
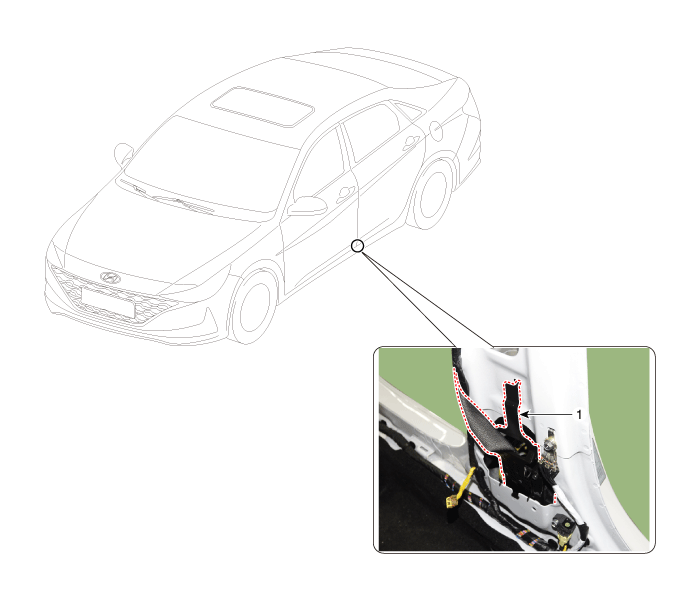
| 1. Front seat belt pretensioner |
Repair procedures
| Replacement |
|

| 1. | Remove the center pillar upper trim. (Refer to Interior Trim - "Center Pillar Trim") |
| 2. | Remove the center pillar lower trim. (Refer to Interior Trim - "Center Pillar Trim") |
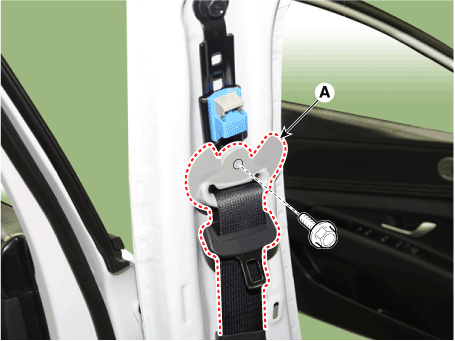
| 3. | After loosening the front belt upper anchor mounting bolt, remove the front belt upper anchor (A).
|
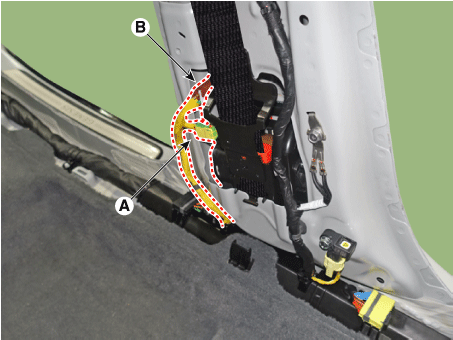
| 4. | Separate the seat belt retractor connector (A) and pre-active seat belt connector (B).
|
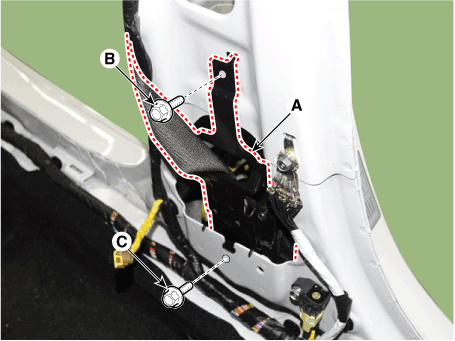
| 5. | Loosen the mounting bolt (B) and (C), remove the front seat belt retractor (A).
|
| 6. | Install in the reverse order of removal.
|

 Components and components location
Components1. Front seat belt retractor2. Height adjust 3. Front seat belt upper anchor4. Rear seat belt retractor [RH]5. Rear seat belt retractor [CTR]6...
 Height Adjust
Components and components location
Component Location 1. Height adjust
Repair procedures
Replacement1.Remove the front seat belt upper anchor...
Other information:
Hyundai Elantra (CN7) 2021-2025 Owner's Manual: Locking your vehicle (Touch sensor type)
1. Close all doors, engine hood and trunk. 2. Carry the smart key. 3. Either touch the touch sensor on the door handle (the engraved part) or press the Door Lock button (1) on the smart key. 4. The hazard warning lights will blink. 5. Make sure the doors are locked by pulling the door outside handle...
Hyundai Elantra (CN7) 2021-2025 Owner's Manual: Sunroof
If your vehicle is equipped with a sunroof, you can slide or tilt your sunroof with the sunroof control switch located on the overhead console. The sunroof can only be opened, closed, or tilted when the ignition switch is in the ON position. The sunroof can be operated for approximately 3 minutes after the ignition switch is turned to the ACC or OFF position...
Categories
- Manuals Home
- 7th Gen Hyundai Elantra Owners Manual
- 7nd Gen Hyundai Elantra Service Manual
- Body Electrical System
- Maintenance
- Fuel gauge
- Drive Mode
- Control Cable
Tachometer
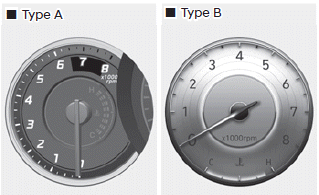
The tachometer indicates the approximate number of engine revolutions per minute (RPM).
Use the tachometer to select the correct shift points and to prevent lugging and/ or over-revving the engine.
NOTICE
Do not operate the engine within the tachometer's RED ZONE. This may cause severe engine damage.

Copyright © 2025 www.helantra7.com