Hyundai Elantra: Front Bumper / Radiator Grill
Hyundai Elantra (CN7) 2021-2025 Service Manual / Body (Interior and Exterior) / Front Bumper / Radiator Grill
Components and components location
| Component Location |
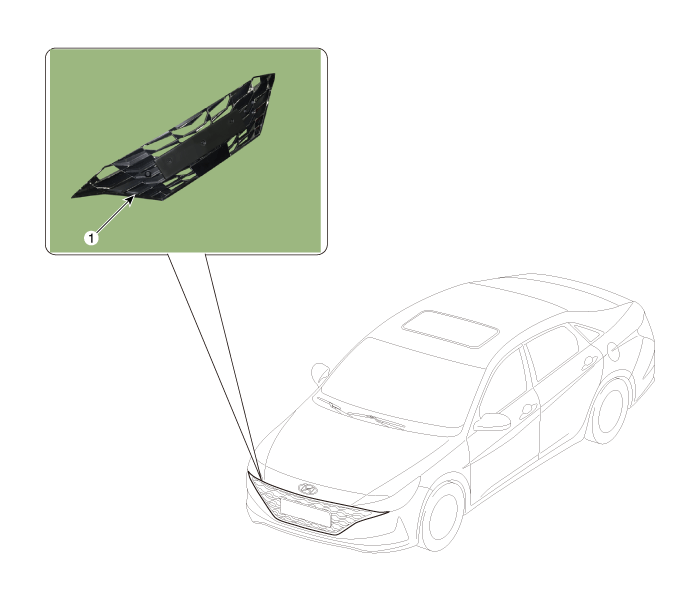
| 1. Radiator grill |
Repair procedures
| Replacement |
[General type]
|

|

| 1. | Remove the front bumper assembly. (Refer to Front Bumper - "Front Bumper Assembly") |
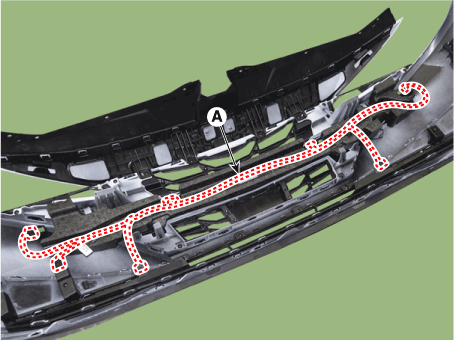
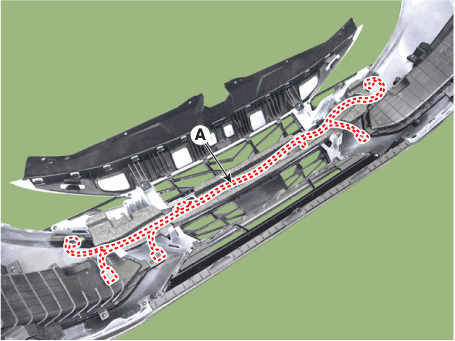
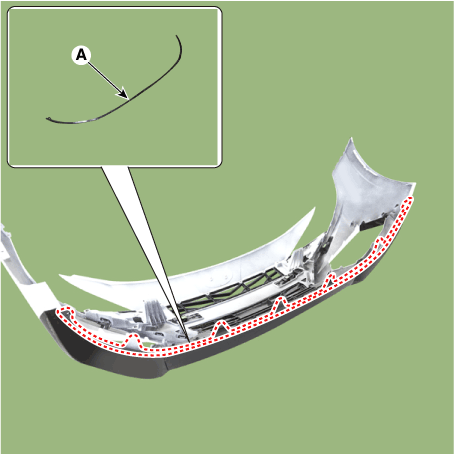
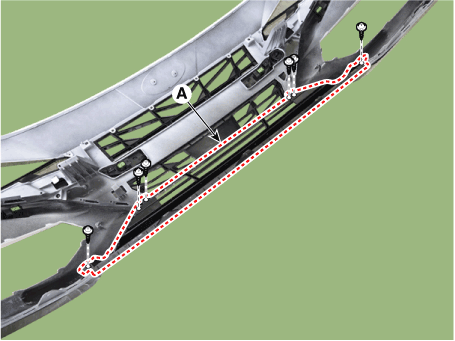
| 2. | Detach the wiring (A) mounted on the front bumper assembly and energy absober.
|
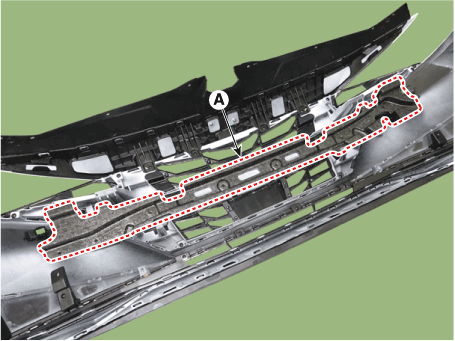
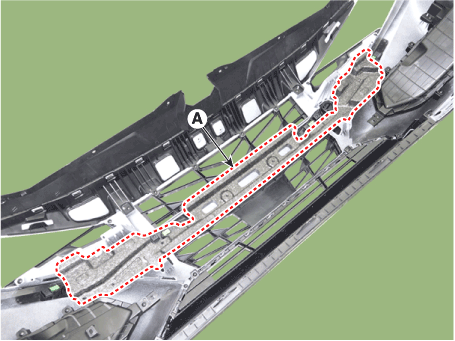
| 3. | Remove the front bumper energy absorber (A).
|
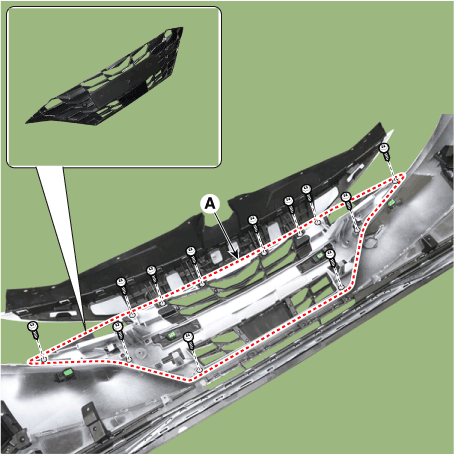
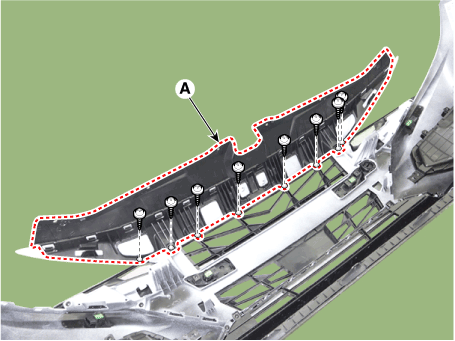
| 4. | Loosen the mounting screws, remove the radiator grill (A).
|
| 5. | To install, reverse the removal procedure.
|

[N Line]
|
|
| 1. | Remove the front bumper assembly. (Refer to Front Bumper - "Front Bumper Assembly") |
| 2. | Detach the wiring (A) mounted on the front bumper assembly and energy absober.
|
| 3. | Remove the front bumper energy absorber (A).
|
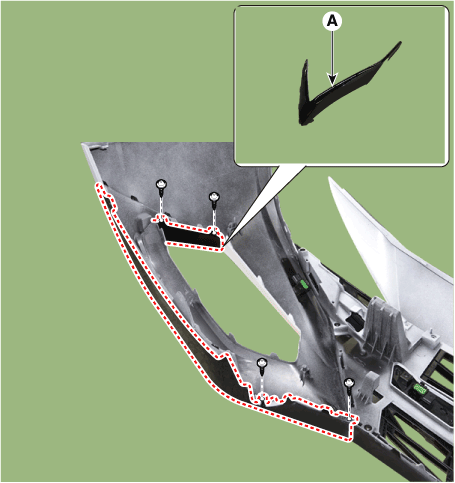
| 4. | Loosen the mounting screws, remove the radiator grill upper cover (A).
|
| 5. | Remove the front bumper lip (A).
|
| 6. | Loosen the mounting screws, remove the front bumper grill (A).
|
| 7. | Loosen the mounting screws, remove the front bumper molding (A).
|
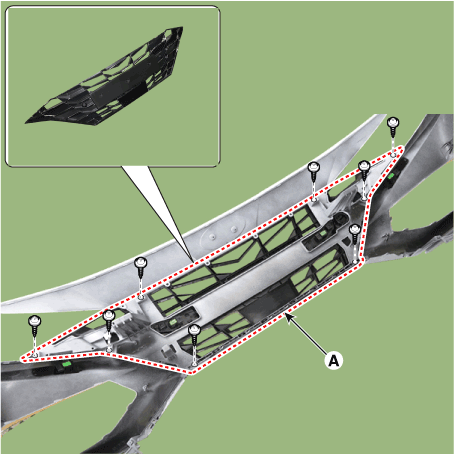
| 8. | Loosen the mounting screws, remove the radiator grill (A).
|
| 9. | To install, reverse the removal procedure.
|
 Front Bumper Assembly
Components and components location
Component Location [General type]1. Front bumper Assembly[N Line]1. Front bumper assembly
Repair procedures
Replacement
•
When removing with a flat-tip screwdriver or remover, wrap protective tape around the tools to prevent damage to components...
 Rear Bumper
..
Other information:
Hyundai Elantra (CN7) 2021-2025 Service Manual: Rear Seat Cushion Cover
Components and components location Component Location [General type]1. Rear seat cushion cover [N Line]1. Rear seat cushion cover Repair procedures Replacement • When removing with a flat-tip screwdriver or remover, wrap protective tape around the tools to prevent damage to components. • Put on gloves to prevent hand i..
Hyundai Elantra (CN7) 2021-2025 Owner's Manual: All Season Tires. Summer Tires. Snow Tires
All Season Tires HYUNDAI specifies all season tires on some models to provide good performance for use all year round, including snowy and icy road conditions. All season tires are identified by ALL SEASON and/or M+S (Mud and Snow) on the tire sidewall. Snow tires have better snow traction than all season tires and may be more appropriate in some areas. Summer Tires HYUNDAI specifies summe..
Categories
- Manuals Home
- 7th Gen Hyundai Elantra Owners Manual
- 7nd Gen Hyundai Elantra Service Manual
- Function settings
- Specifications
- Rear Seats
- Interior Overview
- Dimensions, Engine specification, Bulb Wattage
Air bag collision sensors
1. SRS control module/Rollover sensor
2. Front impact sensors
3. Side impact sensors (acceleration)
4. Side impact sensors (pressure)

Copyright © 2025 www.helantra7.com