Hyundai Elantra (CN7): Rear Bumper / Rear Bumper Assembly
Components and components location
| Component Location |
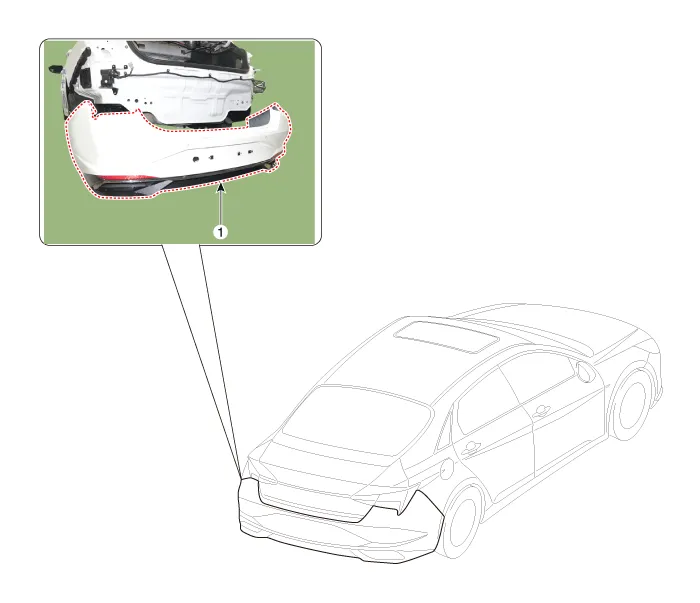
| 1. Rear bumper assembly |
Repair procedures
| Replacement |
|

|

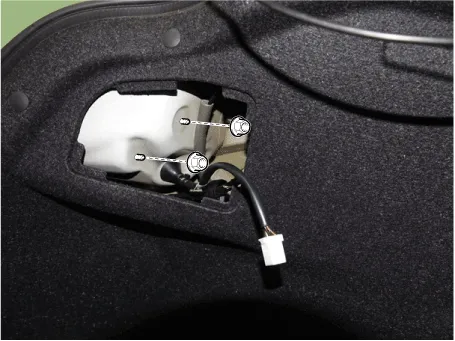
| 1. | Using a screwdriver or remover, remove the service cover (A).
|

| 2. | Detach the rear combination lamp connector (A).
|

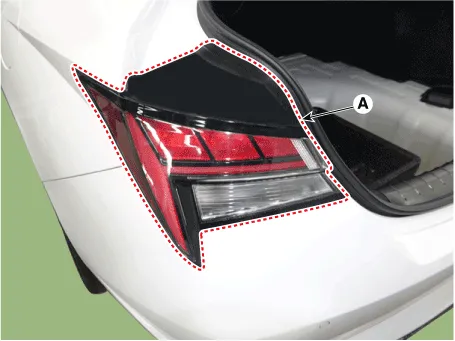
| 3. | Remove the rear combination mounting nuts and remove the rear combination lamp (A).
|
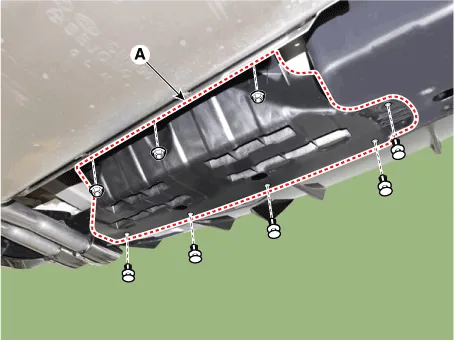
| 4. | Loosen the mounting nuts and clips, remove the rear bumper under cover (A). [General type] [LH]
[RH]
[N Line] [CTR]
[LH]
[RH]
|


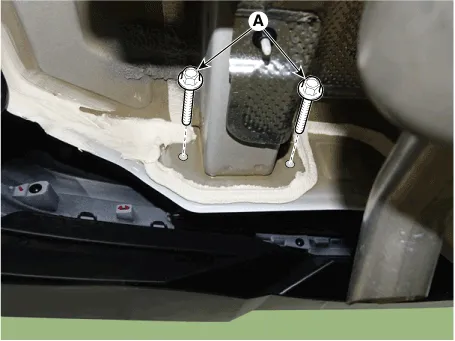
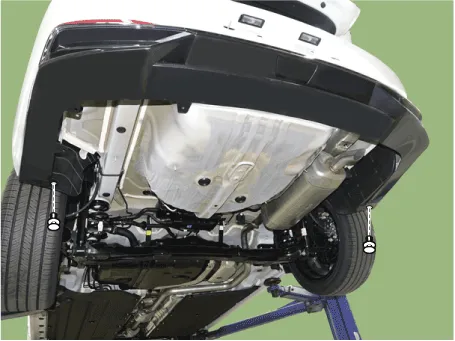
| 5. | Loosen the rear bumper assembly mounting bolts (A). [LH]
[RH]
|

| 6. | Loosen the rear bumper lower mounting clips.
|
| 7. | Remove the rear bumper upper mounting clips and bolts.
|

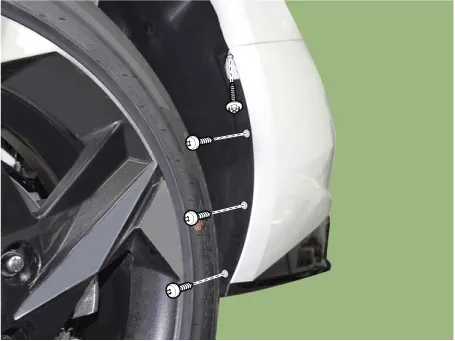
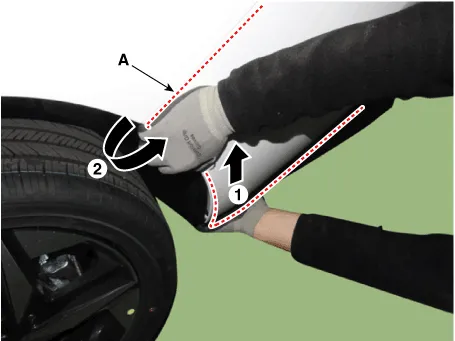
| 8. | Loosen the mounting screws on the side of rear bumper (A), detach the side part of rear bumper.
|
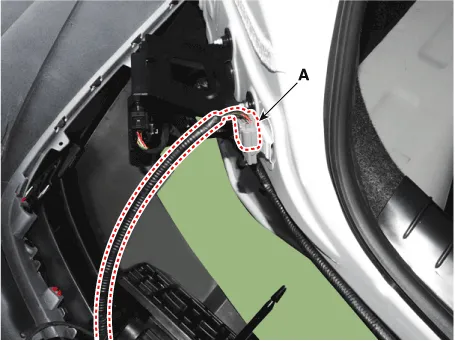
| 9. | Disconnect the rear bumper connector (A).
|
| 10. | Remove the rear bumper assembly (A).
|

| 11. | Install in the reverse order of removal.
|
Component Location [General type]1. Rear bumper assembly2. Rear bumper under cover [LH]3. Rear bumper under cover [RH]4. Rear bumper side bracket[N Line]1.
Components and components location Component Location1. Rear bumper beam assembly Repair procedures Replacement • When removing with a flat-tip screwdriver or remover, wrap protective tape around the tools to prevent damage to components.
Other information:
Hyundai Elantra (CN7) 2021-2025 Service Manual: Evaporator Temperature Sensor
Description and operation DescriptionThe evaporator temperature sensor will detect the evaporator core temperature and interrupt compressor relay power in order to prevent evaporator from freezing by excessive cooling. The evaporator temperature sensor has the Negative Temperature Coefficient (NTC).
Hyundai Elantra (CN7) 2021-2025 Service Manual: Power Mosfet
Description and operation DescriptionIt is installed to the DATC and adjusts the fan rpm by precisely controlling the voltage applied to the blower motor. Repair procedures Inspection1.Manually operate the control switch and measure the voltage of the blower motor.
Categories
- Manuals Home
- Hyundai Elantra Owners Manual
- Hyundai Elantra Service Manual
- Engine Mechanical System
- Restraint
- Engine Electrical System
- New on site
- Most important about car
