Hyundai Elantra: Interior Trim / Rear Package Tray Trim
Hyundai Elantra (CN7) 2021-2025 Service Manual / Body (Interior and Exterior) / Interior Trim / Rear Package Tray Trim
Components and components location
| Component Location |
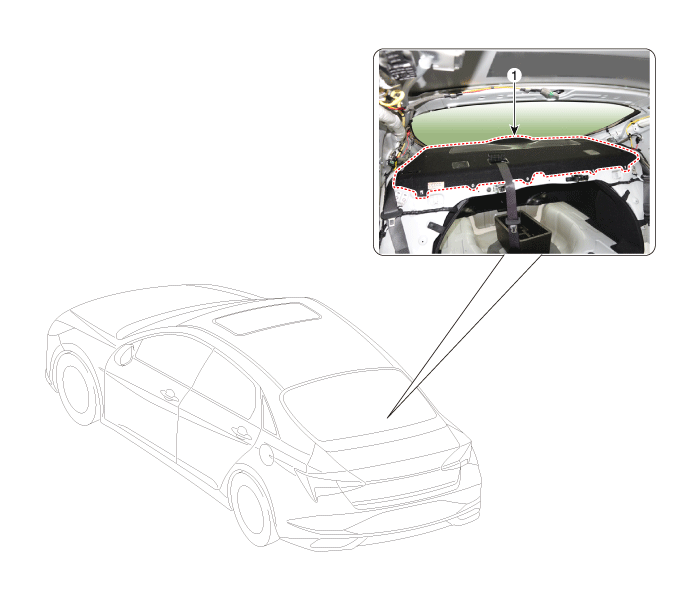
| 1. Rear package tray trim |
Repair procedures
| Replacement |
|

|

| 1. | Remove the rear seat cushion assembly. (Refer to Rear Seat - "Rear Seat Assembly") |
| 2. | Using a screwdriver or remover, remove the rear door scuff trim (A).
|
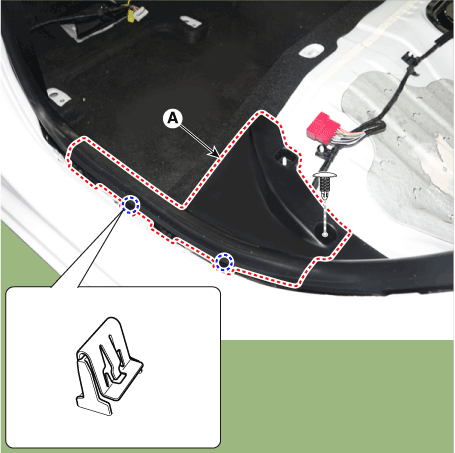
| 3. | Using a screwdriver or remover, remove the rear pillar trim (A).
|

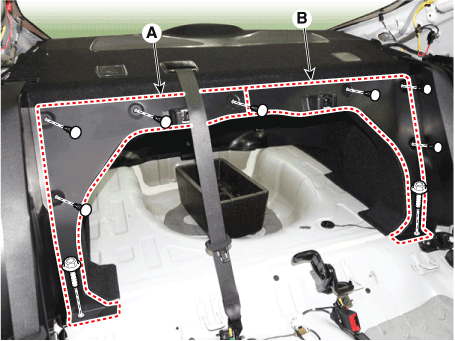
| 4. | Loosen mounting clips and bolts, remove the luggage partition side trim (A) and (B).
|
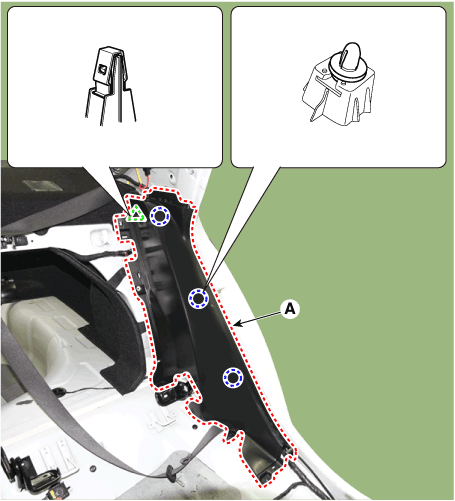
| 5. | After loosening the mounting bolts, remove the rear wheel house trim (A).
|
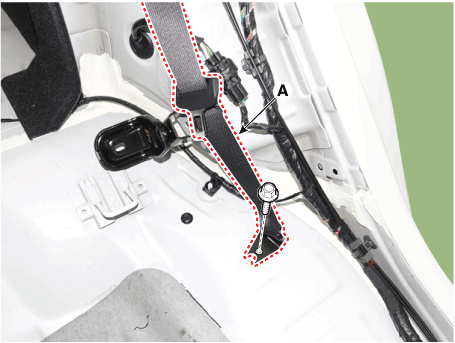
| 6. | Loosen the mounting bolt, remove the rear seat belt lower anchor (A).
[LH]
[CTR]
[RH]
|
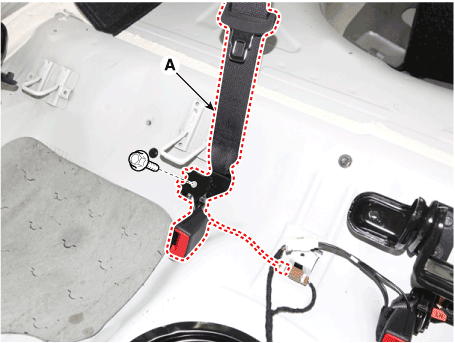
| 7. | Open the rear seat belt cover (A).
|
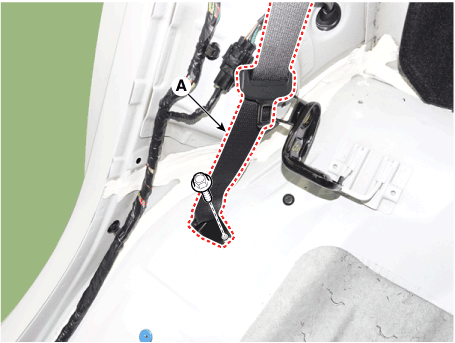
| 8. | Press the lock pin, separate the connector (A).
|
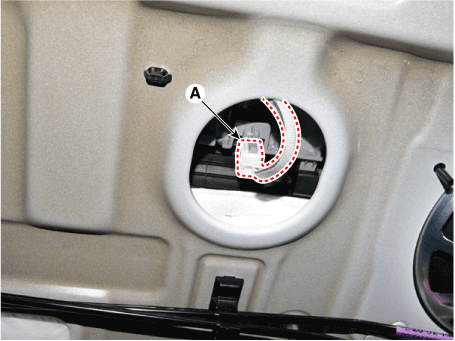
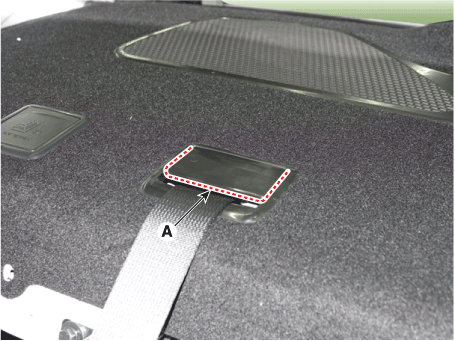
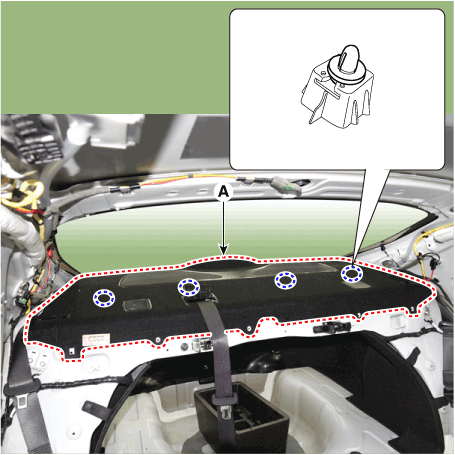
| 9. | Using a screwdriver or remover, remove the rear package tray trim (A).
|
| 10. | To install, reverse the removal procedure.
|

 Rear Wheel House Trim
Components and components location
Component Location 1. Rear wheel house trim
Repair procedures
Replacement
•
When removing with a flat-tip screwdriver or remover, wrap protective tape around the tools to prevent damage to components...
 Rear Transverse Trim
Components and components location
Component Location 1. Rear transverse trim
Repair procedures
Replacement
•
When removing with a flat - tip screwdriver or remover, wrap protective tape around the tools to prevent damage to components...
Other information:
Hyundai Elantra (CN7) 2021-2025 Service Manual: Fuel Sender Assembly
Repair procedures Removal1.Remove the fuel pump. (Refer to Fuel Delivery System - "Fuel Pump")2.Disconnect the fuel pump motor connector (A) and fuel sender connector (B).3.Release the fixing hook (A) and then remove the fuel sender (B).Installation1...
Hyundai Elantra (CN7) 2021-2025 Owner's Manual: Function operation
Function warning Rear Cross-Traffic Safety system will warn the driver when a collision is imminent. Collision Warning To warn the driver of an approaching vehicle from the rear left/right side of your vehicle, the outside rearview mirror will blink and a warning will appear on the cluster...
Categories
- Manuals Home
- 7th Gen Hyundai Elantra Owners Manual
- 7nd Gen Hyundai Elantra Service Manual
- Body Electrical System
- Fuel gauge
- Rear Seats
- Engine Compartment
- Forward Collision–Avoidance Assist (FCA) (sensor fusion)
Manual climate control system
To defog inside windshield
.png)
[A] : Type A, [B] : Type B
1. Select any fan speed except “0” position.
2. Select the desired temperature.
3. Select the .png) or
or
.png) position.
position.

Copyright © 2025 www.helantra7.com