Hyundai Elantra: Rear Door / Repair procedures
Hyundai Elantra (CN7) 2021-2025 Service Manual / Body (Interior and Exterior) / Rear Door / Repair procedures
| Adjustment |
Glass Adjustment
|

| 1. | Remove the rear door trim. (Refer to Rear Door - "Rear Door Trim") |
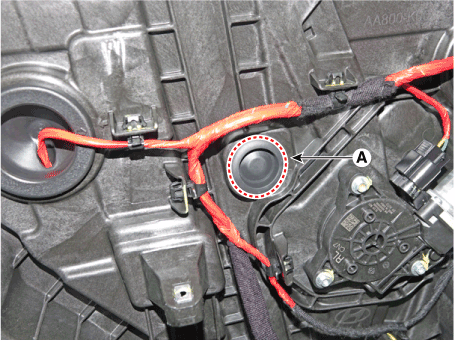
| 2. | Separate the mounting plug hole (A) from the rear door module.
|
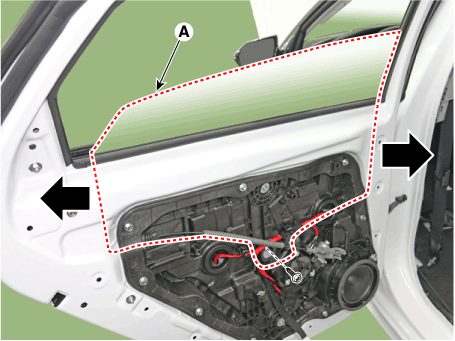
| 3. | After loosening the glass mounting bolts, adjust the spacing of the glass (A) by moving the glass from side to side and then tighten the bolts.
|
| 4. | Check the glass for normal operation. |
Door Striker Adjustment
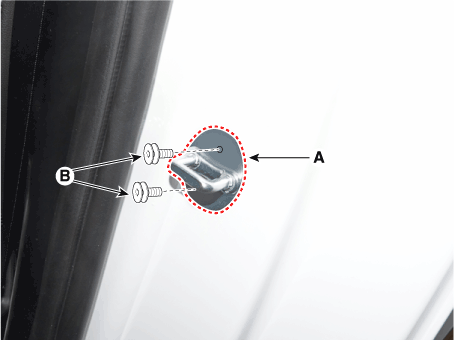
| 1. | After loosening the mounting screw, adjust the striker (A) by moving it forward and backward or from side to side and then tighten the bolts (B).
|
| 2. | Tap on the striker with a plastic hammer to adjust the striker. The striker will not move much, but will give some adjustment. |
| 3. | Hold the outer handle out, and push the door against the body to make sure that the striker fits flush with the body. If the door latches properly, tighten the screws and recheck. |
Door Position Adjustment
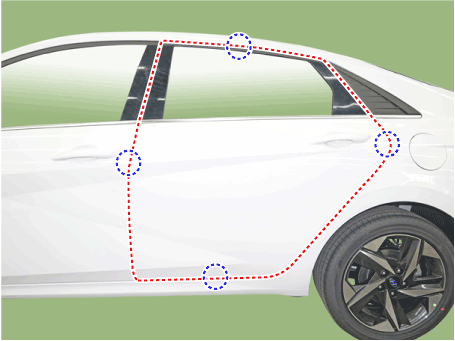
| 1. | Check that the door and body edges are parallel.
|
| 2. | Place the vehicle on a level surface before adjusting the doors. |
| 3. | Adjust the hinges (A) : - Loosen the door mounting bolts slightly, and move the door in or out until it flush with the body. - Loosen the hinge mounting bolts slightly, and move the door backward or forward, up or down as necessary. - Place a shop towel on the jack to prevent damage to the door when adjusting the door.
|
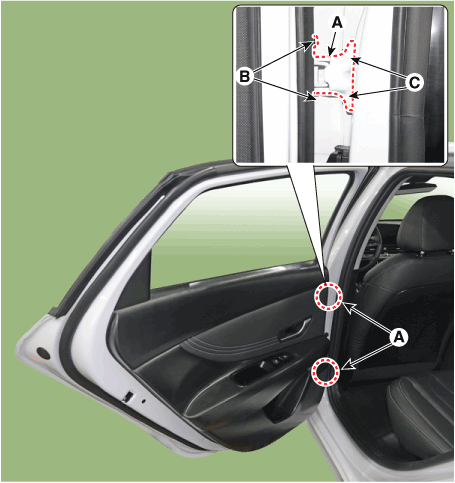
| 4. | Grease the pivot portions of the hinges indicated by the arrows. |
| 5. | Check for water leaks. |
 Components and components location
Components 1. Rear door trim 2. Rear door delta inner cover 3. Rear door belt inside weatherstrip 4. Rear door module 5. Rear door belt outside weatherstrip 6...
 Rear Door Trim
Components and components location
Component Location 1. Rear door trim
Repair procedures
Replacement
•
When removing with a flat - tip screwdriver or remover, wrap protective tape around the tools to prevent damage to components...
Other information:
Hyundai Elantra (CN7) 2021-2025 Service Manual: AVN Antenna
Components and components location Components Repair procedures RemovalRoof Antenna1.Disconnect the negative (-) battery terminal.2.Remove the roof trim.(Refer to Body - "Roof Trim Assembly")3.Disconnect the roof antenna connector (A).4.Remove the roof antenna (A) after loosening a nut (B)...
Hyundai Elantra (CN7) 2021-2025 Service Manual: CVVT Oil Temperature Sensor (OTS)
Description and operation DescriptionContinuous Variable Valve Timing (CVVT) system advances or retards the valve timing of the intake and exhaust valve in accordance with the ECM control signal which is calculated by the engine speed and load.By controlling CVVT, the valve over-lap or under-lap occurs, which makes better fuel economy and reduces exhaust gases (NOx, HC) and improves engine perf..
Categories
- Manuals Home
- 7th Gen Hyundai Elantra Owners Manual
- 7nd Gen Hyundai Elantra Service Manual
- Engine Oil
- Fuel gauge
- Interior Overview
- Engine Mechanical System
- Drive Mode
Tilting the sunroof
.png)
Tilt the sunroof open:
Push the sunroof control lever upward until the sunroof moves to the desired position.
To close the sunroof:
Press the sunroof lever forward until the sunroof moves to the desired position.

Copyright © 2025 www.helantra7.com