Hyundai Elantra (CN7): Sunroof / Repair procedures
Hyundai Elantra (CN7) 2021-2026 Service Manual / Body (Interior and Exterior) / Sunroof / Repair procedures
| Adjustment |
| Inspect Glass Alignment |
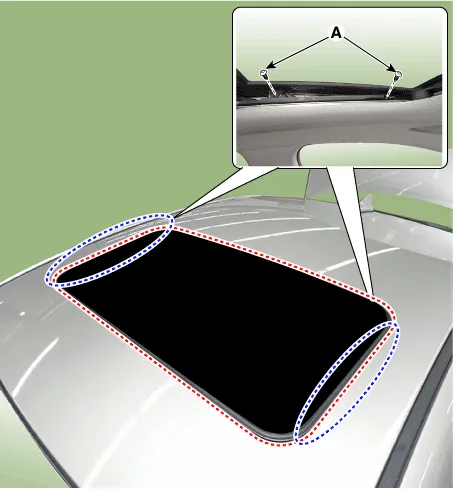
| 1. | Inspect the step height between the roof panel (A) and the glass weatherstrip (B) and then adjust it if necessary.
|

| 2. | Adjust the height of the glass by slighly loosening the screws (A).
|
| When To Initialize The Motor |
| 1. | After initial vehicle assembly. |
| 2. | If the initial value is erased or damaged because of short power electric discharge during operation. |
| 3. | After using the manual handle. |
| Operating The Sunroof Emergency Handle |
| 1. | Use the sunroof emergency handle to close or open the sunroof manually if the sunroof cannot be closed electronically due to motor or controller electrical malfunction.
|

| 2. | If needed, initialize the sunroof according to the initialization method. Whenever the vehicle battery is disconnected or discharged, or you use the emergency handle to operate the sunroof, you have to reset your sunroof system as follows :
|
Components1. Glass panel assembly2. Deflector3. Motor assembly4. Spring base assembly5. Seth plate assembly6. Guide assembly7. Frame sub assembly8. Seal tape9.
Components and components location Components Location1. Sunroof glass Repair procedures Replacement • Put on glove to protect your hands.
Other information:
Hyundai Elantra (CN7) 2021-2026 Service Manual: Components and components location
C
Hyundai Elantra (CN7) 2021-2026 Service Manual: PM Sensor
Description and operation DiscriptionMonitor the air quality inside the vehicle in real time (PM sensor) and display the status on the screen.Automatically operate when fine dust concentration is high (Condition: Bet mode + A/C ON + 3rd speed or higher) Components and components location Components Location1.
Categories
- Manuals Home
- Hyundai Elantra Owners Manual
- Hyundai Elantra Service Manual
- Rear Seats
- Recommended Cold Tire Inflation Pressures
- Components and components location
- New on site
- Most important about car

Copyright © 2026 www.helantra7.com - 0.0141