Hyundai Elantra (CN7): Body (Interior and Exterior) / Roof Trim
Components and components location
| Components |
| [General Type] |
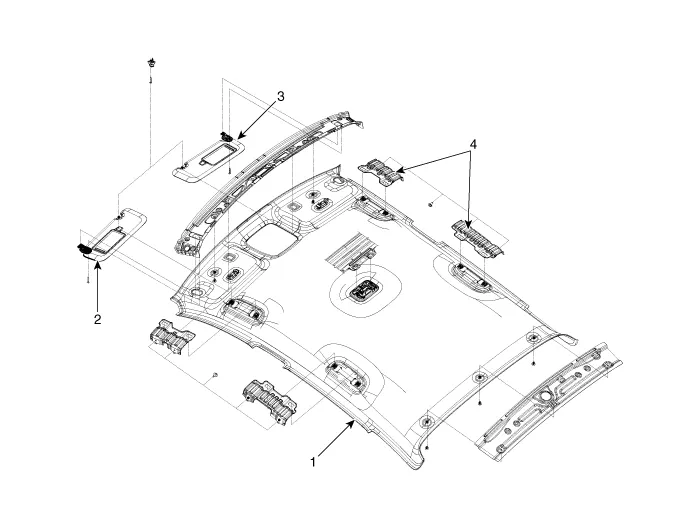
| 1 . Roof trim 2 . Sunvisor [LH] | 3. Sunvisor [RH] 4. Assist handle bracket |
| [Sunroof Type] |
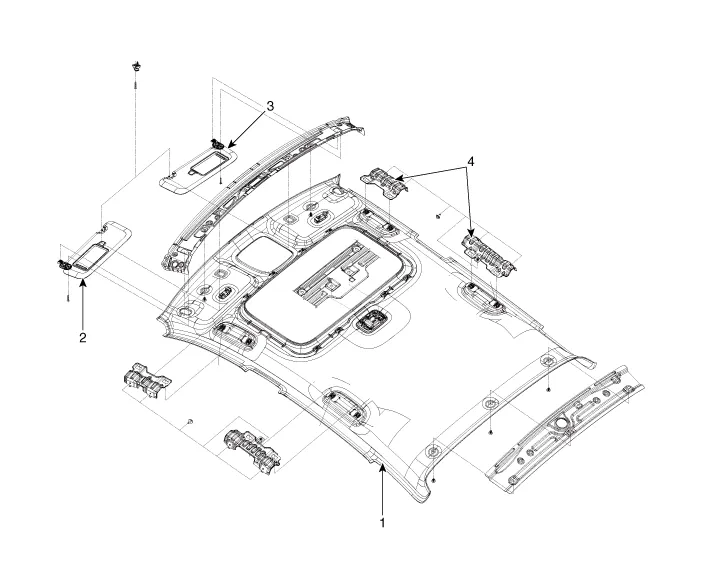
| 1 . Roof trim 2 . Sunvisor [LH] | 3. Sunvisor [RH] 4. Assist handle bracket |
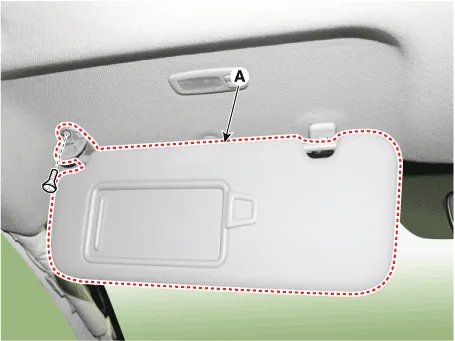
Sunvisor
Components and components location
| Component Location |
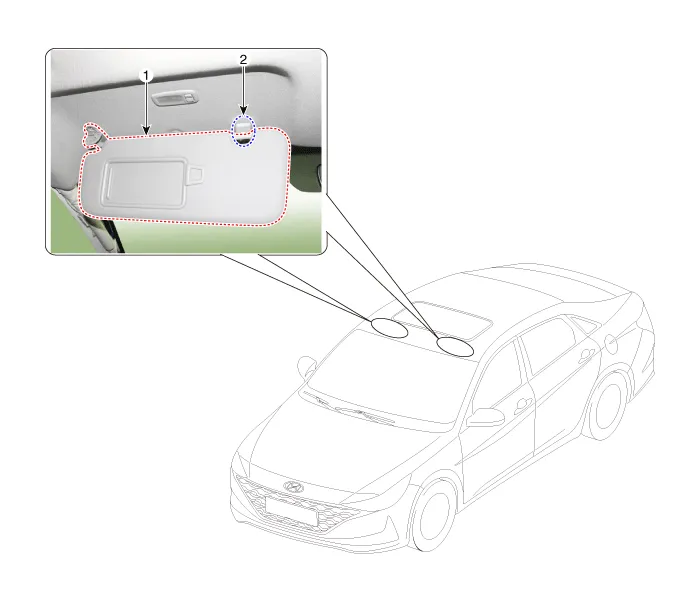
| 1. Sunvisor | 2. Retainer |
Repair procedures
| Replacement |
|

|

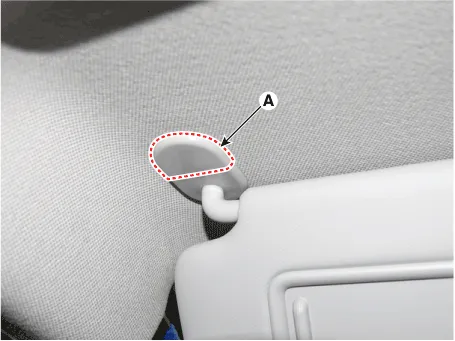
| 1. | Using a screwdriver or remover, remove the sunvisor pivot cover (A).
|
| 2. | Loosen the mounting screws, remove the sunvisor (A).
|
| 3. | Loosen the mounting screw, remove the retainer (A).
|
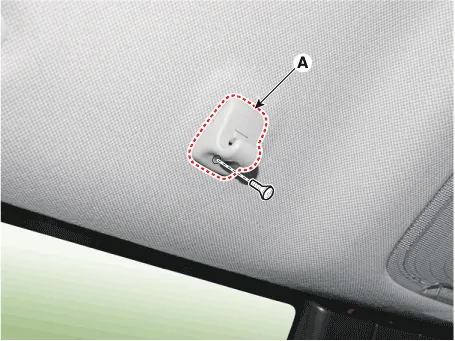
| 4. | Install in the reverse order of removal. |
Assist Handle
Components and components location
| Component Location |
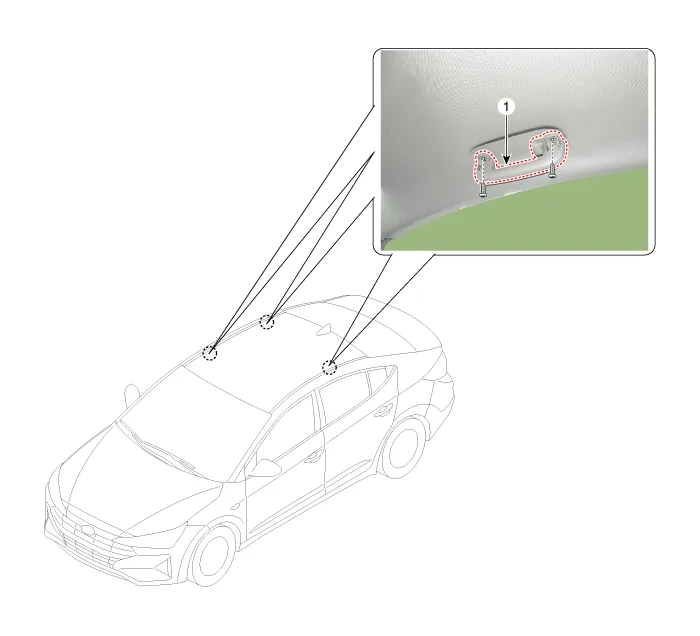
| 1. Assist handle |
Repair procedures
| Replacement |
|
|
| 1. | After lifting up the assist handle caps and loosening the mounting screws, remove the assist handle (A).
|
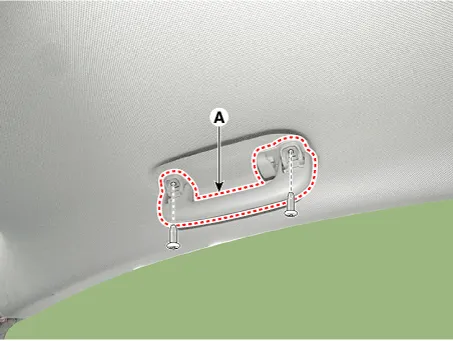
| 2. | To install, reverse the removal procedure. |
Roof Trim Assembly
Components and components location
| Component Location |

| 1. Roof Trim Assembly |
Repair procedures
| Replacement |
|
|
| 1. | Remove the front seat assembly. (Refer to Front Seat - "Front Seat Assembly") |
| 2. | Remove the rear seat assembly. (Refer to Rear Seat - "Rear Seat Assembly") |
| 3. | Remove the front pillar trim. (Rear to Interior Trim - "Front Pillar Trim") |
| 4. | Remove the canter pillar upper trim. (Rear to Interior Trim - "Center Pillar Trim") |
| 5. | Remove the rear pillar trim. (Rear to Interior Trim - "Rear Pillar Trim") |
| 6. | Remove the sunvisor and retainer. (Rear to Roof Trim - "Sunvisor") |
| 7. | Remove the assist handle. (Rear to Roof Trim - "Assist Handle") |
| 8. | Remove the overhead console lamp. (Rear to Body Electrical System - "Overhead Console Lamp") |
| 9. | Remove the room lamp. (Rear to Body Electrical System - "Room Lamp") |
| 10. | Disconnect the rear view mirror connector. (Refer to Body Electrical System - "Electro Chromic Inside Rear View Mirror") |
| 11. | Disconnect the rain sensor connector. (Refer to Body Electrical System - "Rain Sensor") |
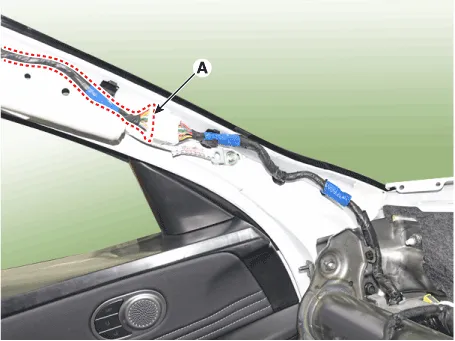
| 12. | Disconnect the roof trim main connector (A) and the mounting clips in the front pillar. [LH]
[RH]
|

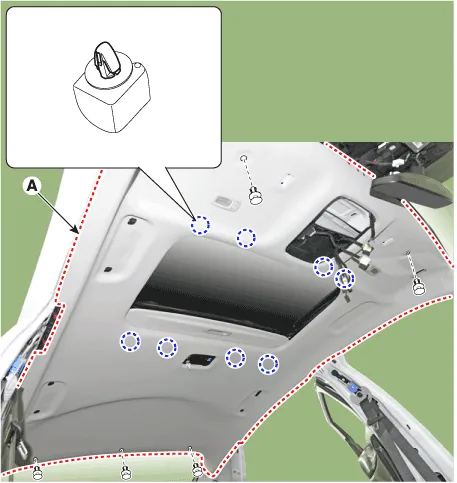
| 13. | Disconnect the sunroof motor connector (A).
|

| 14. | Remove the rear window galss. (Refer to "Windshield Glass") |
| 15. | Remove the roof trim mounting clip and remove the roof trim assembly (A).
|
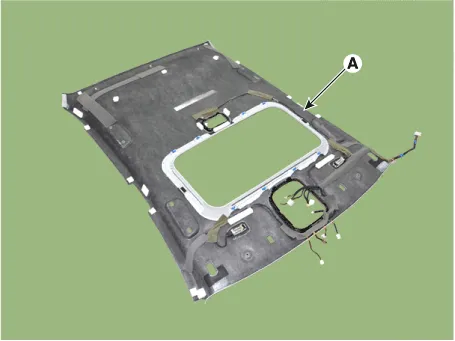
| 16. | Remove roof trim wiring harness (A) from the roof trim.
|

| 17. | To install, reverse the removal procedure.
|
Components and components location Component Location [This illustration shows the LHD type. RHD type is symmetrical.]1. Cowl cross bar assembly Repair procedures Replacement • When removing with a flat - tip screwdriver or remover, wrap protective tape around the tools to prevent damage to components.
Other information:
Hyundai Elantra (CN7) 2021-2026 Service Manual: Description and operating principle
Description and OperationWireless Power Charger SystemDuring ACC or IG ON, battery voltage is supplied to the wireless power charger system to transmit an output of 5 W to mobile phone. Mobile phones certified with the wireless charging standard WPC (Qi 1.
Hyundai Elantra (CN7) 2021-2026 Service Manual: Evaporator Core
Repair procedures Replacement1.Disconnect the negative (-) battery terminal. 2.Remove the heater and blower assembly.(Refer to Heater - "Heater Unit") 3.Remove the heater core cover (A) after loosening the mounting screws.4.Pull out the evaporator core (A) from the heater unit.
Categories
- Manuals Home
- Hyundai Elantra Owners Manual
- Hyundai Elantra Service Manual
- Driver assistance system
- Front Radar Unit
- Auto Hold. Warning messages
- New on site
- Most important about car
