Hyundai Elantra: Manual Transaxle Control System / Shift Lever
Components and components location
| Components |
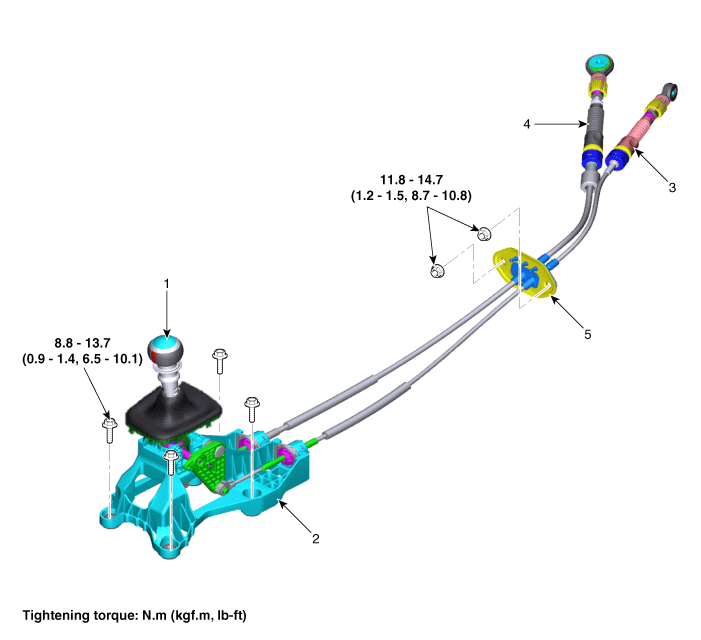
| 1. Shift lever knob & boots 2. Shift lever assembly 3. Select cable | 4. Shift cable 5. Retainer |
Repair procedures
| Removal |
| 1. | Turn OFF ignition switch and disconnect the negative (-) battery cable. |
| 2. | Remove the floor console assembly. (Refer to Body - "Floor Console") |
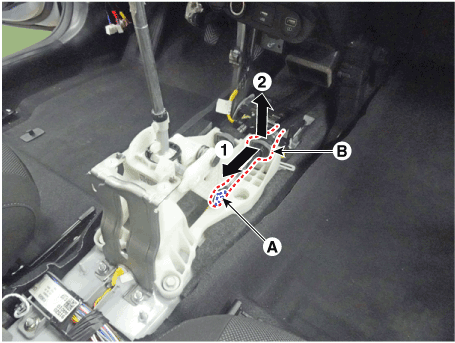
| 3. | Remove the snap pin (A) and then separate the select cable socket (B).
|
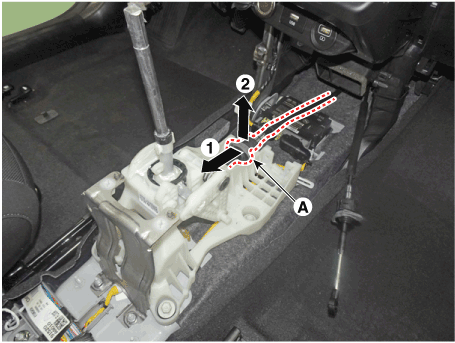
| 4. | Separate the cable socket (A) from the shift lever.
|
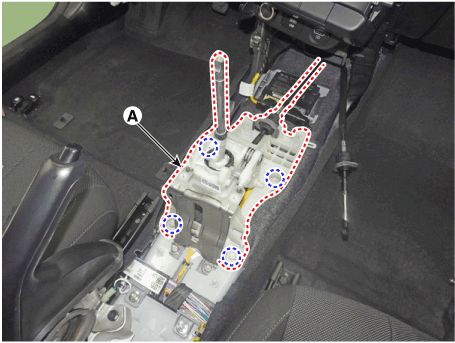
| 5. | Loosen the bolts and then disconnect the shift lever (A).
|
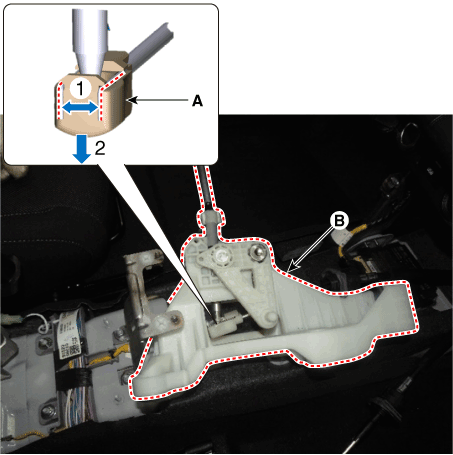
| 6. | Remove the shift cable end (A) and shift lever (B) by spreading the clips on both sides of the cable end.
|
| Installation |
| 1. | To install, reverse the removal procedures. |
|
 Control Cable
Components and components location
Components1. Shift lever knob & boots2. Shift lever assembly3. Select cable4. Shift cable5. Retainer
Repair procedures
Removal1...
Other information:
Hyundai Elantra (CN7) 2021-2025 Owner's Manual: Climate control additional features
Sunroof inside air recirculation When the sunroof is opened, outside (fresh) air will be automatically selected. At this time, if you press the air intake control button, recirculated air position will be selected but will change back to outside (fresh) air after 3 minutes...
Hyundai Elantra (CN7) 2021-2025 Owner's Manual: Ignition Switch
Key Ignition Switch WARNING To reduce the risk of SERIOUS INJURY or DEATH, take the following precautions: NEVER allow children or any person who is unfamiliar with the vehicle to touch the ignition switch or related parts. Unexpected and sudden vehicle movement can occur...
Copyright © 2025 www.helantra7.com



.png)