Hyundai Elantra (CN7): Trunk Lid / Trunk Lid Trim
Components and components location
| Component Location |
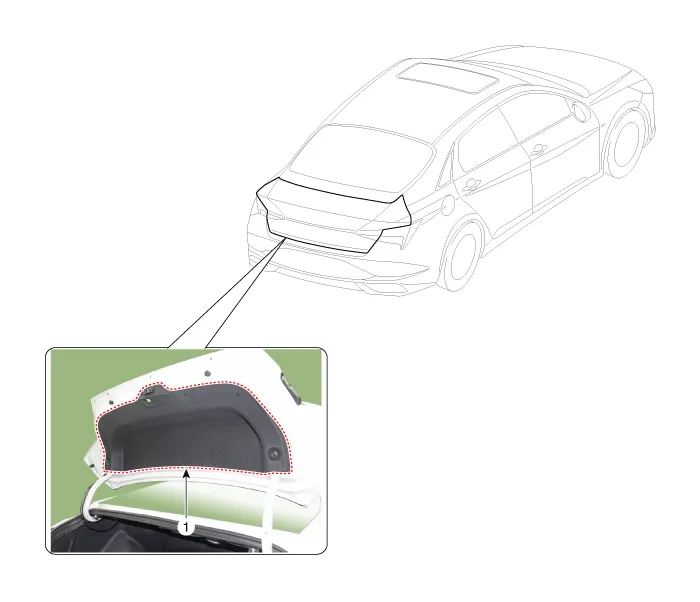
| 1. Trunk lid trim |
Repair procedures
| Replacement |
|

| 1. | After loosening the mounting screw and clips, then remove the trunk lid trim (A).
|
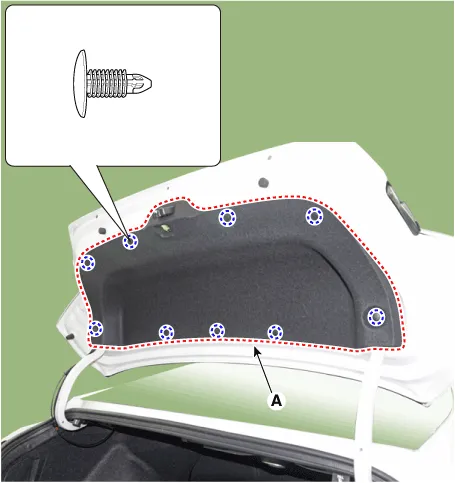
| 2. | To install, reverse the removal procedure.
|

Components and components location Component Location 1. Trunk lid assembly Repair procedures Replacement • When removing and installing the trunk lid, an assistant is necessary.
Repair procedures Replacement[Trunk lid latch] • When removing with a flat - tip screwdriver or remover, wrap protective tape around the tools to prevent damage to components.
Other information:
Hyundai Elantra (CN7) 2021-2026 Service Manual: Wireless Power Charging Unit
Components and positions Components Circuit diagram Circuit Diagram Repair procedures Removal • Handling wireless charging system parts by wet hands may cause electric shock. 1.Disconnect the negative (-) battery terminal.
Hyundai Elantra (CN7) 2021-2026 Service Manual: Mode Control Actuator
Description and operation DescriptionThe mode control actuator is located at the heater unit.It adjusts the position of the mode door by operating the mode control actuator based on the signal of the A/C control unit. Pressing the mode select switch makes the mode control actuator shift in order of Vent → Bi-Level → Floor → Mix.
Categories
- Manuals Home
- Hyundai Elantra Owners Manual
- Hyundai Elantra Service Manual
- Troubleshooting
- Rear Seats
- Front Radar Unit
- New on site
- Most important about car
