Hyundai Elantra: Wireless Power Charger System / Wireless Power Charging Unit
Hyundai Elantra (CN7) 2021-2025 Service Manual / Body Electrical System / Wireless Power Charger System / Wireless Power Charging Unit
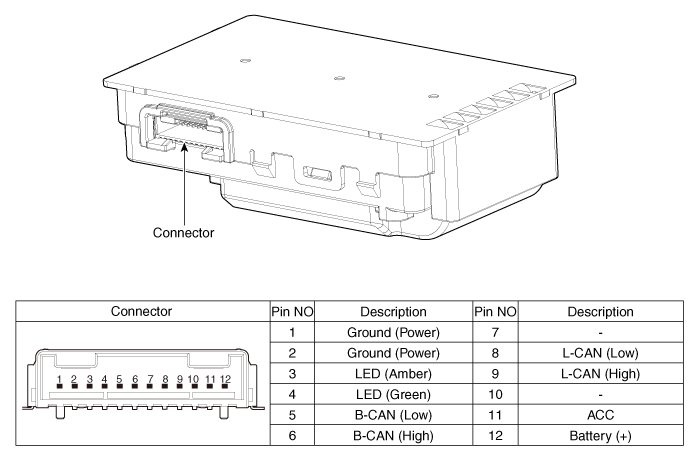
Components and positions
| Components |
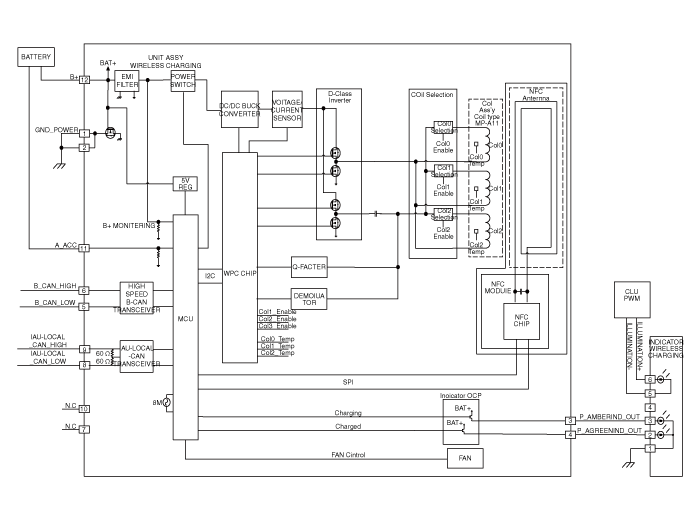
Circuit diagram
| Circuit Diagram |
Repair procedures
| Removal |
|
| 1. | Disconnect the negative (-) battery terminal. |
| 2. | Remove the floor console upper cover assembly. (Refer to Body - "Floor Console Upper Cover") |
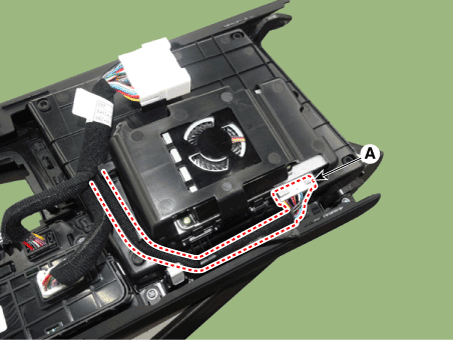
| 3. | Disconnect the connector (A) and remove the wireless power charger unit.
|
| Installation |
| 1. | Install the wireless power charging unit. |
| 2. | Connect the wireless power charging unit connectors. |
| 3. | Install the floor console upper cover. |
| 4. | Connect the negative (-) battery terminal. |
| [Diagnosis With Diagnostic tool] |
| 1. | In the body electrical system, failure can be quickly diagnosed by using the vehicle diagnostic system (Diagnostic tool). The diagnostic system(Diagnostic tool) provides the following information.
|
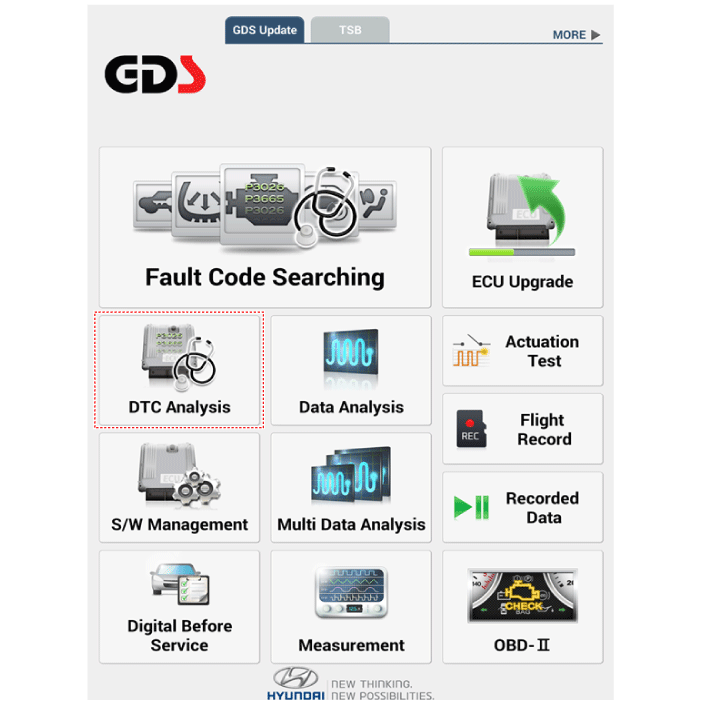
| 2. | If diagnose the vehicle by Diagnostic tool, select "DTC Analysis" and "Vehicle".
|
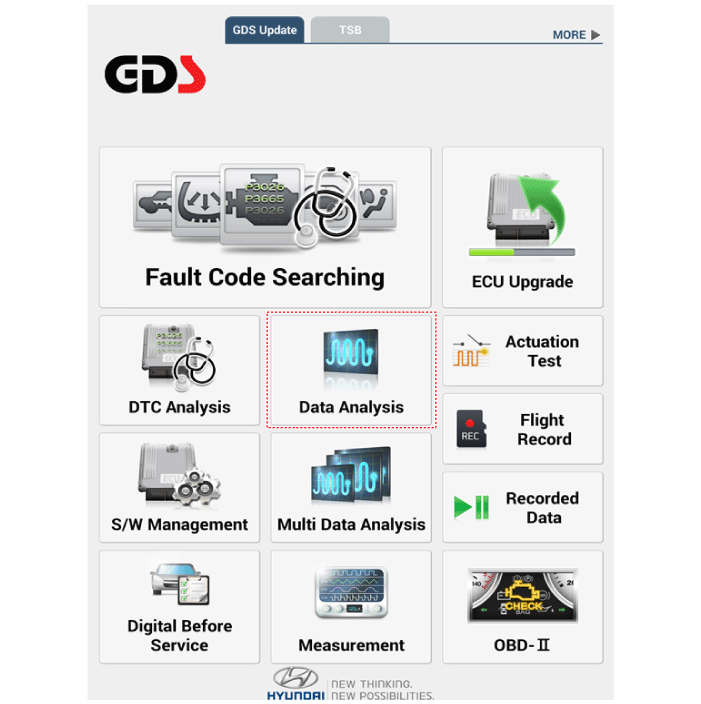
| 3. | If check current status, select the "Data Analysis" .
|
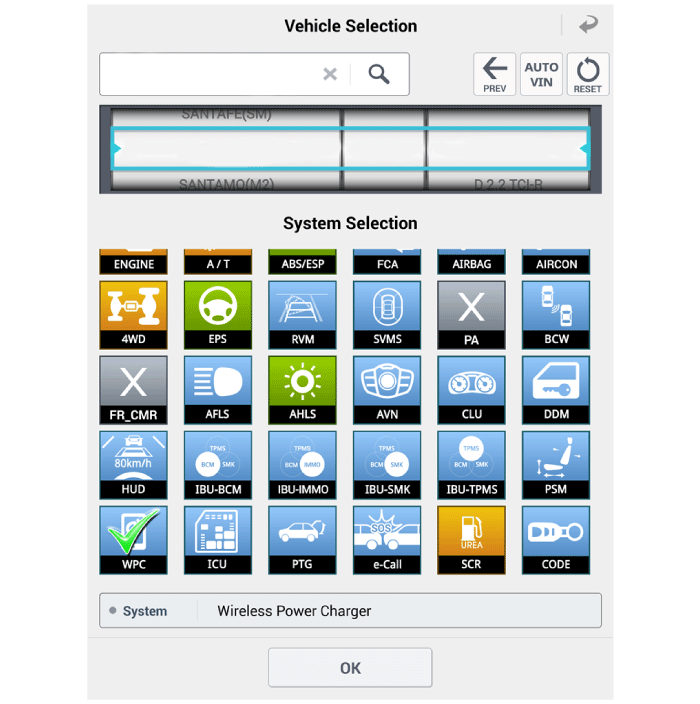
| 4. | Select the 'WPC' to search the current state of the input/output data.
|
 Specification
S..
 Wireless Charging Lamp
Components and positions
Components
Repair procedures
Removal
•
Handling wireless charging system parts by wet hands may cause electric shock...
Other information:
Hyundai Elantra (CN7) 2021-2025 Service Manual: MDPS Column and Housing
Repair procedures Replacement1.Turn the steering wheel so that the front wheels are placed in the straight ahead position. • If the steering wheel and the front tires are not set straight ahead together, it may affect the number of circulation of steering wheel and damage the cable inside the clock spring...
Hyundai Elantra (CN7) 2021-2025 Owner's Manual: Electric Power Steering (EPS)
The system assists you with steering the vehicle. If the vehicle is turned off or if the power steering system becomes inoperative, you may still steer the vehicle, but it will require increased steering effort. Also, the steering effort becomes heavier as the vehicle’s speed increases and becomes lighter as the vehicle’s speed decreases for better control of the steering wheel...
Copyright © 2025 www.helantra7.com


