Hyundai Elantra (CN7): Lubrication System / Oil Pan
Components and components location
| Components |
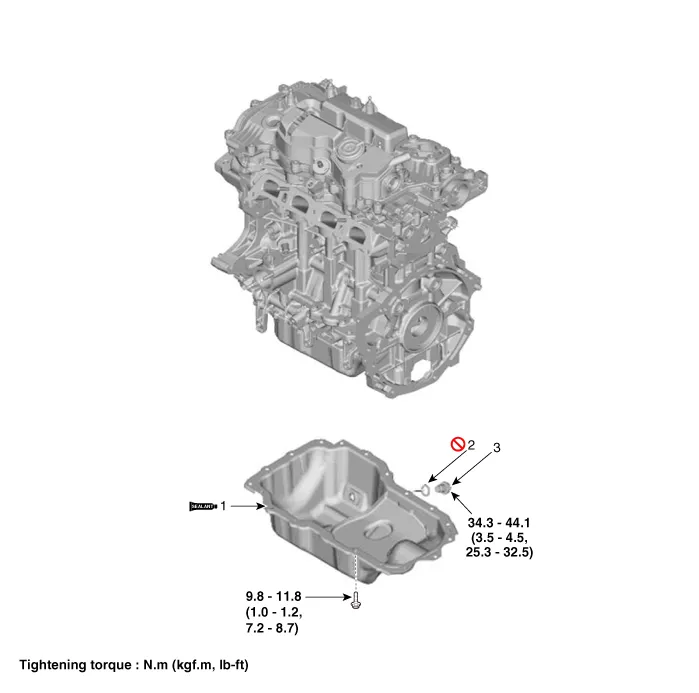
| 1. Oil pan 2. Oil drain plug gasket | 3. Oil drain plug |
Repair procedures
| Removal |
| 1. | Remove the engine room under cover. (Refer to Engine and Transaxle Assembly System - "Engine Room Under Cover") |
| 2. | Drain the engine oil. (Refer to Lubrication System - "Engine Oil") |
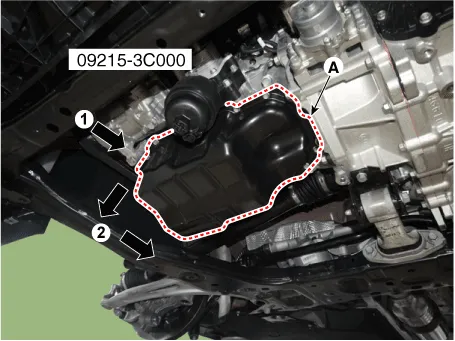
| 3. | Using the SST (09215-3C000) and remove the oil pan (A).
|


| Installation |
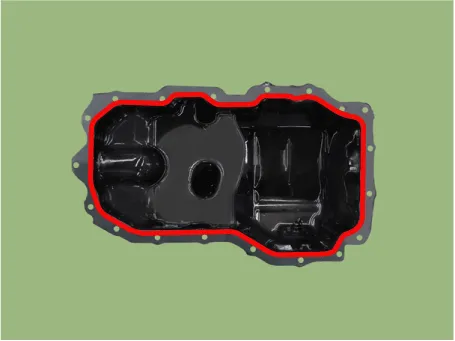
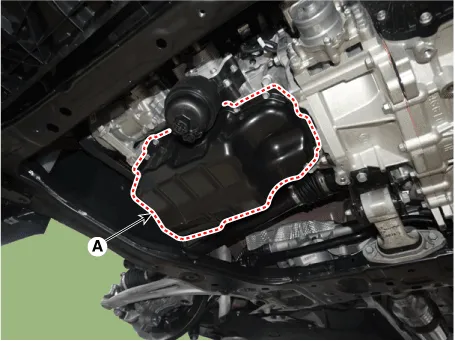
| 1. | Install the oil pan.
|
| 2. | Refill engine oil. (Refer to Lubrication System - "Engine Oil") |
Repair procedures Replacement • Prolonged and repeated contact with mineral oil will result in the removal of natural fats from the skin, leading to dryness, irritation and dermatitis.
Repair procedures Removal and Installation1.Disconnect the battery negative terminal.2.Remove the engine room under cover.(Refer to Engine and Transaxle Assembly - "Engine Room Under Cover") 3.
Other information:
Hyundai Elantra (CN7) 2021-2026 Service Manual: Antenna Coil
Repair procedures Removal1.Disconnect the negative (-) battery terminal.2.Remove the crash pad lower panel.(Refer to Body - "Crash Pad Lower Panel")3.Remove the steering column shroud panel.(Refer to Body - "Steering Column Shroud Panel")4.Disconnect the immobilizer connector (A) and press the locking pin (B) using an awl.
Hyundai Elantra (CN7) 2021-2026 Service Manual: Temperature Control Actuator
Description and operation DescriptionThe temperature control actuator is located at the heater unit. It regulates the temperature by the procedure as follows. The signal from the control unit adjusts the position of the temperature door by operating the temperature switch.
Categories
- Manuals Home
- Hyundai Elantra Owners Manual
- Hyundai Elantra Service Manual
- Engine Mechanical System
- Rear Seats
- General Tightening Torque Table. General information
- New on site
- Most important about car
