Hyundai Elantra (CN7): Power Door Locks / Power Door Lock Module
Components and components location
| Conponents |
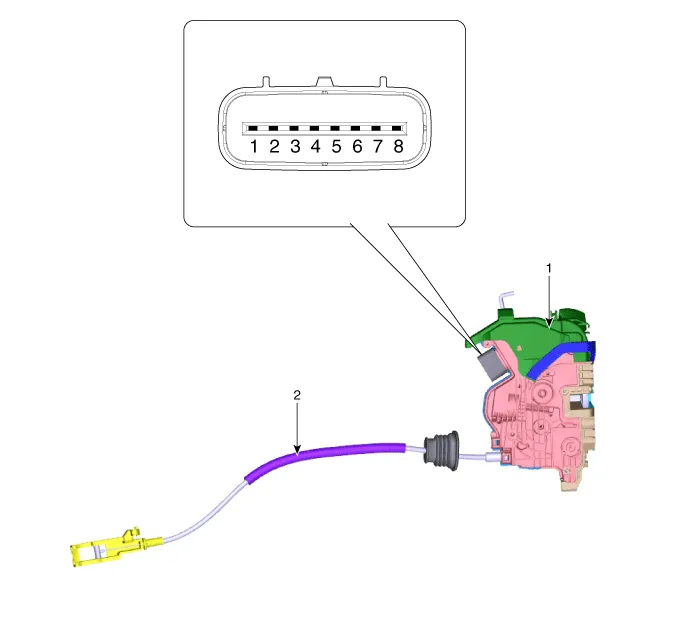
| 1. Door latch assembly | 2. Door latch cable |
Repair procedures
| Inspection |
|

| 1. | Remove the front door trim. (Refer to Body - "Front Door Trim") |
| 2. | Remove the front door module. (Refer to Body - "Front Door Module") |
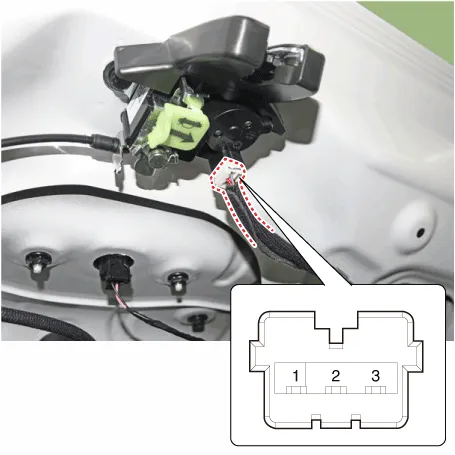
| 3. | Disconnect the connector from the actuator.
| |||||||||||||||||||||||||||||
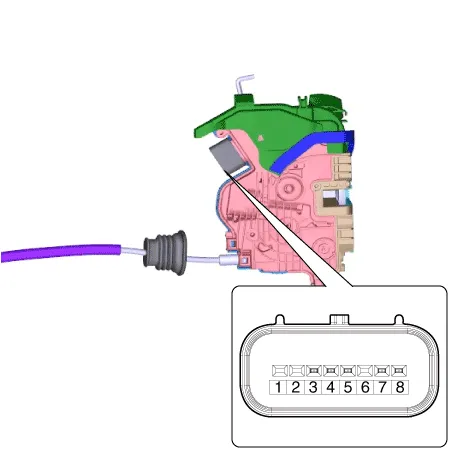
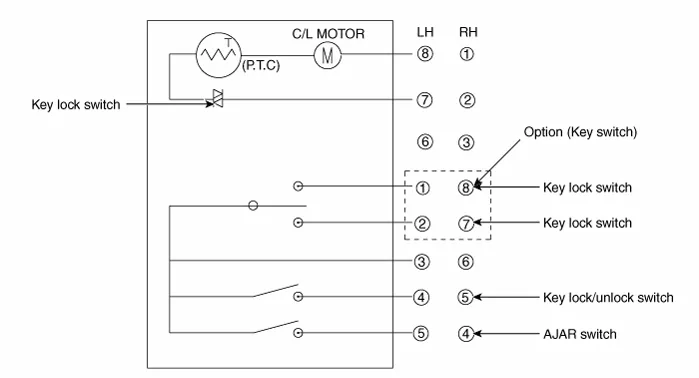
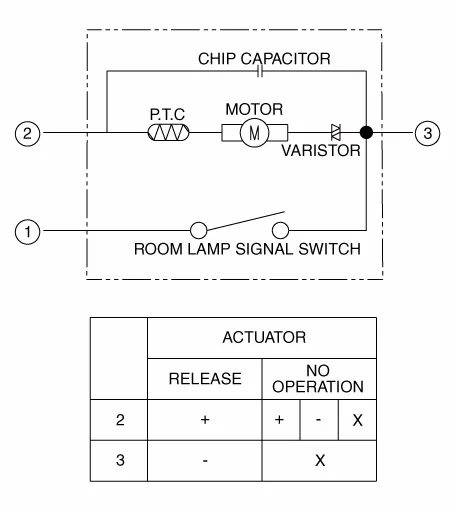
| 4. | Check actuator operation by connecting power and ground according to the table. To prevent damage to the actuator, apply battery voltage only momentarily.
|

| 1. | Remove the rear door trim. (Refer to Body - "Rear Door Trim") |
| 2. | Remove the rear door module. (Refer to Body - "Rear Door Module") |
| 3. | Disconnect the connectors from the actuator.
| |||||||||||||||||||||||||||||
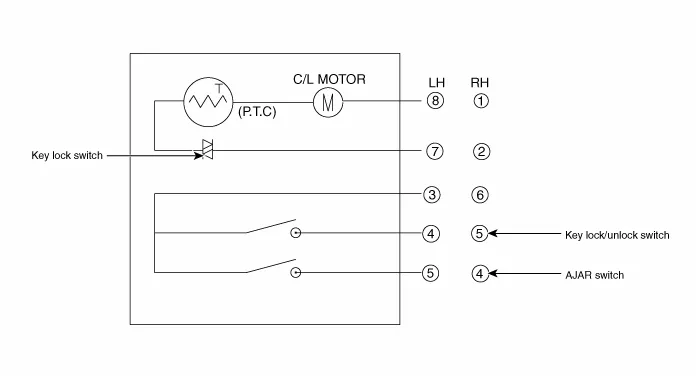
| 4. | Check actuator operation by connecting power and ground according to the table. To prevent damage to the actuator, apply battery voltage only momentarily.
|

| 1. | Remove the trunk lid trim. (Refer to Body - "Trunk Lid Trim") |
| 2. | Disconnect the connector from the actuator
|
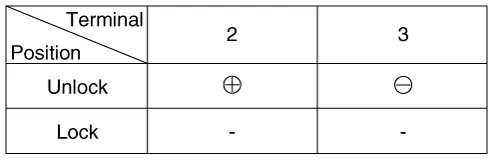
| 3. | Check actuator operation by connecting power and ground according to the table. To prevent damage to the actuator, apply battery voltage only momentarily.
|

| 4. | Checking the trunk of the vehicle power option power refers to the trunk module. |
Component Location1. DDM (Driver Door Module)2. ADM (Assist Door Module)3. Integrated Central Control Unit (ICU)4. Door lock knob5. Trunk lid actuator6.
Repair procedures InspectionPower Door Lock Switch Inspection1.Check for continuity between the terminals. If there is an abnormality, replace the switch.
Other information:
Hyundai Elantra (CN7) 2021-2025 Service Manual: PM Sensor
Description and operation DiscriptionMonitor the air quality inside the vehicle in real time (PM sensor) and display the status on the screen.Automatically operate when fine dust concentration is high (Condition: Bet mode + A/C ON + 3rd speed or higher) Components and components location Components Location1.
Hyundai Elantra (CN7) 2021-2025 Service Manual: Heater Core
Repair procedures Replacement1.Disconnect the negative (-) battery terminal. 2.Remove the heater and blower assembly.(Refer to Heater - "Heater Unit") 3.Remove the heater core cover (A) after loosening the mounting screws.4.Pull out the heater core (A) from the heater unit.
Categories
- Manuals Home
- Hyundai Elantra Owners Manual
- Hyundai Elantra Service Manual
- Vehicle Information
- Exterior Overview
- Tire Specification and Pressure Label, Engine Number
- New on site
- Most important about car