Hyundai Elantra (CN7): Power Door Locks / Power Door Lock Switch
Repair procedures
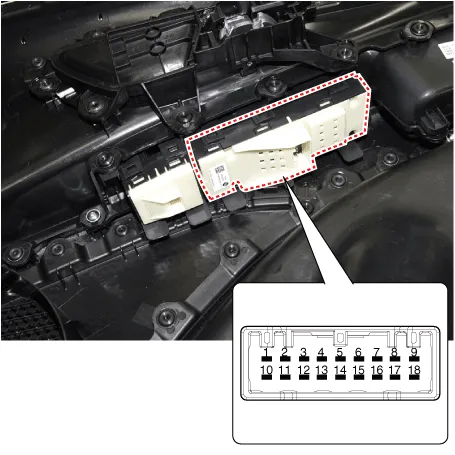
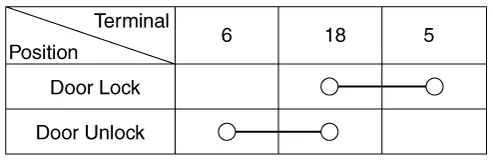
| Inspection |
| 1. | Check for continuity between the terminals. If there is an abnormality, replace the switch.
|
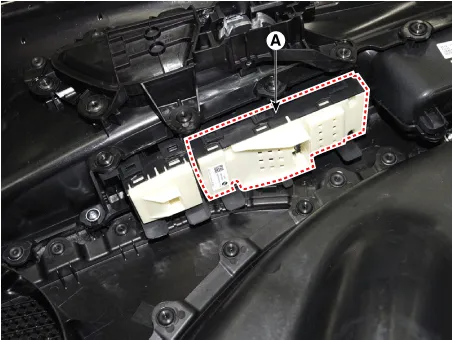
| Removal |
|

| 1. | Disconnect the negative (-) battery terminal. |
| 2. | Remove the front door trim. (Refer to Body - "Front Door Trim") |
| 3. | Remove the power window switch assembly after disengaging the mounting clips.
|
| Installation |
| 1. | Install the power window switch assembly. |
| 2. | Install the front door trim after connect the connector. |
| 3. | Connect the negative (-) battery terminal. |
Components and components location Conponents1. Door latch assembly2. Door latch cable Repair procedures Inspection • Wrap the protective tape on the tool to disassemble with the screwdriver or remover.
Other information:
Hyundai Elantra (CN7) 2021-2025 Service Manual: Wireless Charging Lamp
Components and positions Components Repair procedures Removal • Handling wireless charging system parts by wet hands may cause electric shock. 1.Disconnect the negative (-) battery terminal.2.Remove the floor console upper cover assembly.
Hyundai Elantra (CN7) 2021-2025 Service Manual: Blower Unit
Components and components location Component Location1. Blower unit assemblyComponents1. Blower unit assebmly2. Blower upper cover [LH]3. Duct seal4. Blower upper cover [RH]5. Intake actuator6. Air filter cover7. Intake door8. Air filter9. Blower upper case10.
Categories
- Manuals Home
- Hyundai Elantra Owners Manual
- Hyundai Elantra Service Manual
- Instrument Panel Overview
- Vehicle Identification Number (vin), Vehicle Certification Label
- Instrument Cluster
- New on site
- Most important about car