Hyundai Elantra (CN7): Floor Console / Rear Console Cover
Components and components location
| Component Location |
| [This illustration shows the LHD type. RHD type is symmetrical.] |
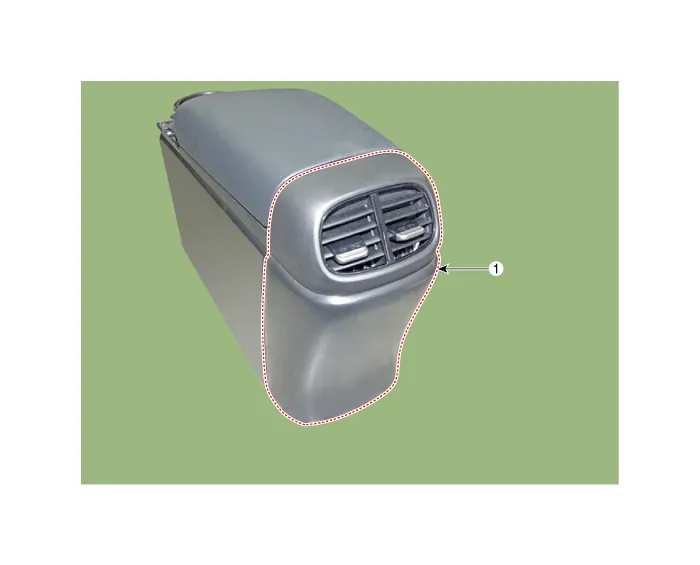
| 1. Rear console cover |
Repair procedures
| Replacement |
|

|

| 1. | Remove the floor console assembly. (Refer to Floor Console - "Floor Console Assembly") |
| 2. | Using a screwdriver or remover, remove the rear console cover (A).
|
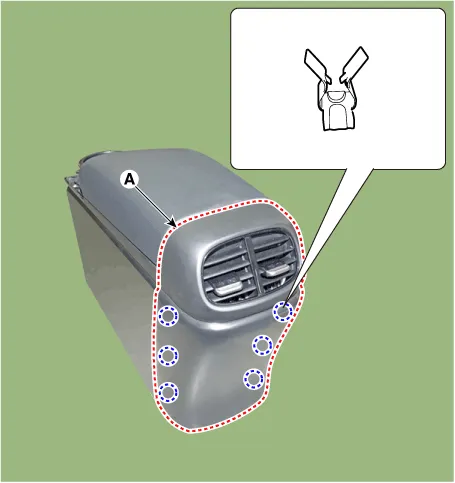
| 3. | To install, reverse the removal procedure.
|

Components and components location Component Location [This illustration shows the LHD type. RHD type is symmetrical.][AT]1. Floor console assembly[MT]1.
Components and components location Component Location [This illustration shows the LHD type. RHD type is symmetrical.]1. Console armrest Repair procedures Replacement • When removing with a flat - tip screwdriver or remover, wrap protective tape around the tools to prevent damage to components.
Other information:
Hyundai Elantra (CN7) 2021-2026 Service Manual: Rear Corner Radar Unit
Specifications Specifications Items Blind-Spot Collision Warning (BCW) Blind-Spot Collision- Avoidance Assist-Rear (BCA-R) Rated voltageDC 12VOperating voltage9V - 16VOperating speed30 km/h - 255 km/h60 km/h - 180 km/hSensible distance70m Curvature radiusStart : More
Hyundai Elantra (CN7) 2021-2026 Service Manual: Troubleshooting
TroubleshootingDiagnosis with Diagnostic tool1.In the body electrical system, failure can be quickly diagnosed by using the vehicle diagnostic system (Diagnostic tool).The diagnostic system (Diagnostic tool) provides the following information.1)Fault Code Searching : Checking failure and code number (DTC)2)Data Analysis : Checking the system input/
Categories
- Manuals Home
- Hyundai Elantra Owners Manual
- Hyundai Elantra Service Manual
- Rear Seats
- Body Electrical System
- Driver assistance system
- New on site
- Most important about car
