
Hyundai Elantra (CN7): Windshield Glass / Repair procedures
Hyundai Elantra (CN7) 2021-2026 Service Manual / Body (Interior and Exterior) / Windshield Glass / Repair procedures
| Removal |
|

|

| 1. | Remove the roof side molding. (Refer to Body Side Moldings - "Roof Side Molding") |
| 2. | Remove the front pillar trim. (Refer to Interior Trim - "Front Pillar Trim") |
| 3. | Remove the inside rear view mirror assembly. (Refer to Mirror - "Inside Rear View Mirror") |
| 4. | Remove the cowl top cover. (Refer to "Cowl Top Cover") |
| 5. | Remove the A pillar garnish. (Refer to Body Side Moulding - "A Pillar Garnish") |
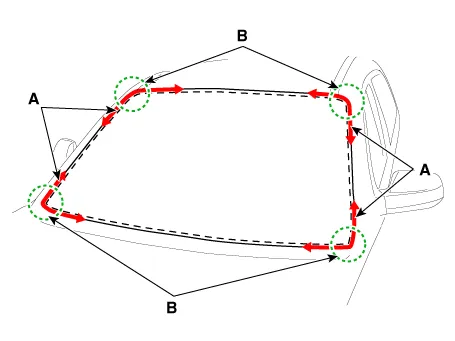
| 6. | Cut off the sealant on the edge (B) while pulling the piano wire (A) to the left and right.
|
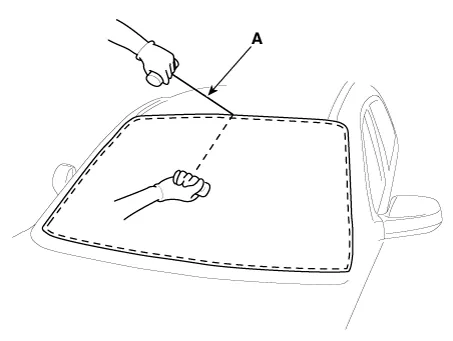
| 7. | Put in a piano wire (A) through the corner of the windshield glass and insert wire grips into both ends of the wire.
|
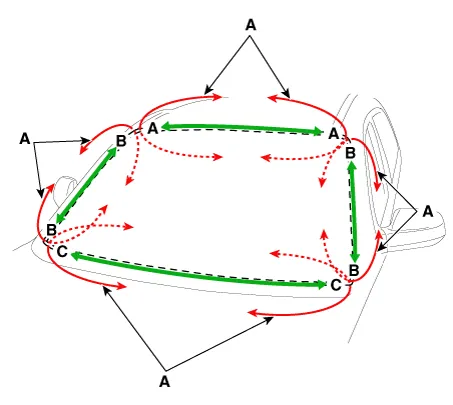
| 8. | Cut off the sealant on (A-A), (B-B), (C-C), while pulling a piano wire (A) to the left and right.
|
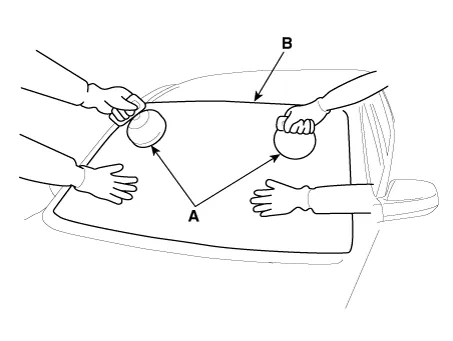
| 9. | Remove the windshield glass (B) carefully using the glass holder (A).
|
| Installation |
| 1. | Using a knife, scrape the remaining sealant around the body panel leaving about 2mm-thick sealant (0.0079 in.) on the bonding surface. If installing a new windshield glass, make alignment marks on the windshield glass and the body.
|

| 2. | Clean the edges of body panel and windshield glass with alcohol. Apply glass primer to the edges of windshield glass and attach the molding onto the edges. |
| 3. | Apply a glass primer to the side of the windshield glass edge and attach the moulding. |
| 4. | Fit a spacer (A) and attach the windshield glass (B) to center and mark (C).
|

| 5. | Apply the body primer to the bonding surface of body panel.
|
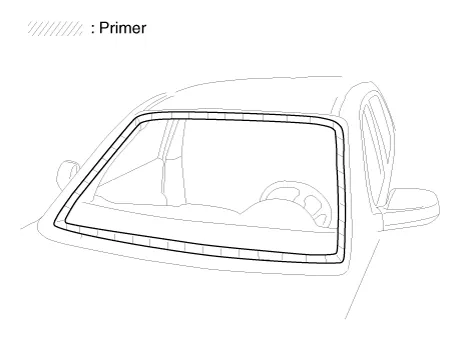
| 6. | Apply the glass primer to the outer edge of windshield glass.
|
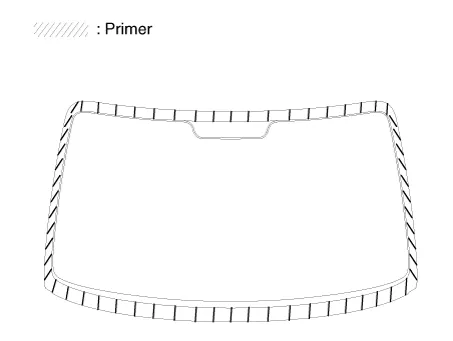
| 7. | Apply a bead of sealant (B) around the windshield glass (A).
|
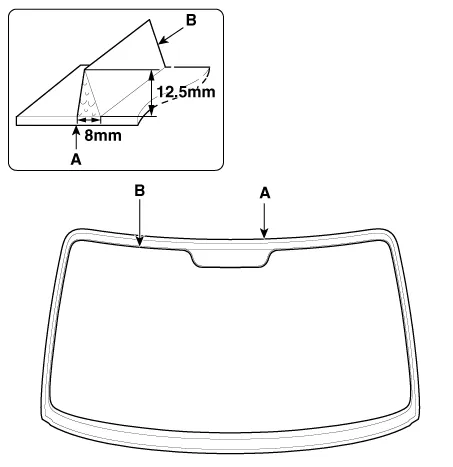
| 8. | Using the glass holder (A), adjust the windshield glass (B) to fit the alignment marks (C) on the body and lightly push the windshield glass to make the edges fully seated on the bonding surface of body.
|
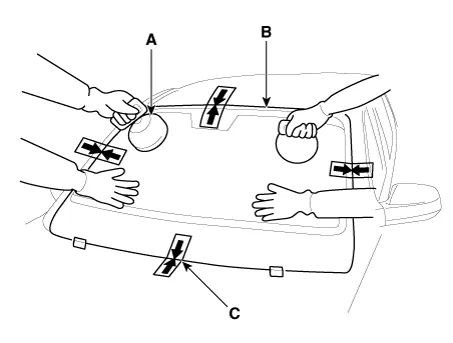
| 9. | Install the A pillar garnish. (Refer to Body Side Molding - "A Pillar Garnish") |
| 10. | Install the cowl top cover. (Refer to "Cowl Top Cover") |
| 11. | Install the roof side molding. (Refer to Body Side Moldings - "Roof Side Molding |
| 12. | Conduct a leak testing.
|
| 13. | In case of water leaks, apply sealant to the water-leaking area.
|
| 14. | Install the inside rear view mirror assembly. (Refer to Mirror - "Inside Rear View Mirror")
|
| 15. | Install the front pillar trim. (Refer to Interior Trim - "Front Pillar Trim") |
Components1. Windshield glass
Other information:
Hyundai Elantra (CN7) 2021-2026 Service Manual: General safety information and caution
Instructions (R-134a)When Handling Refrigerant1.R-134a liquid refrigerant is highly volatile. A drop on the skin of your hand could result in localized frostbite. When handling the refrigerant, be sure to wear gloves. 2.It is standard practice to wear goggles or glasses to protect your eyes, and gloves to protect your hands.
Hyundai Elantra (CN7) 2021-2026 Service Manual: Desctiprion and operation
DescriptionADAS_PRK is a unit that controls the functions required for ADAS parking. If the ADAS_PRK is applied, the parking distance warning function is also controlled by the ADAS_PRK.System FunctionParking Collision-Avoidance Assist (PCA)PCA is a parking safety system that assists in collision warning and emergency braking in the event of a coll
Categories
- Manuals Home
- Hyundai Elantra Owners Manual
- Hyundai Elantra Service Manual
- Specifications
- Front Bumper
- Maintenance
- New on site
- Most important about car

Copyright © 2026 www.helantra7.com - 0.0206