Hyundai Elantra: Crash Pad / Crash Pad Side Cover
Hyundai Elantra (CN7) 2021-2025 Service Manual / Body (Interior and Exterior) / Crash Pad / Crash Pad Side Cover
Components and components location
| Component Location |
| [This illustration shows the LHD type. RHD type is symmetrical.] |
[LH]
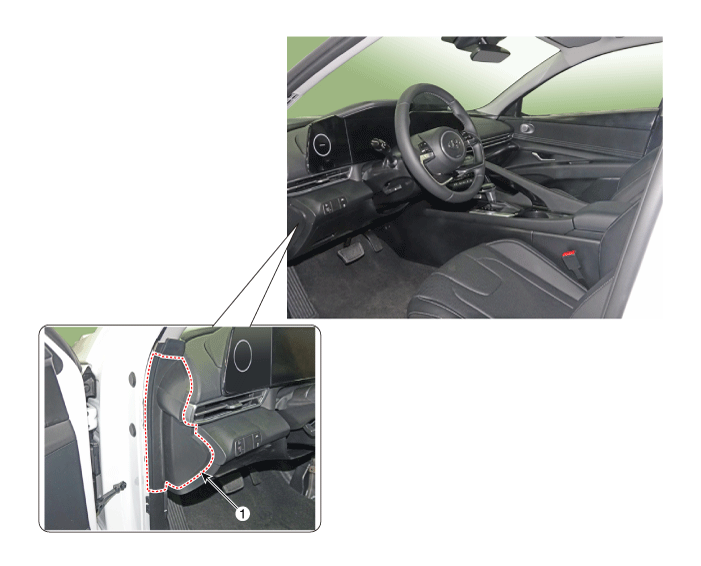
| 1. Crash pad side cover [LH] |
[RH]
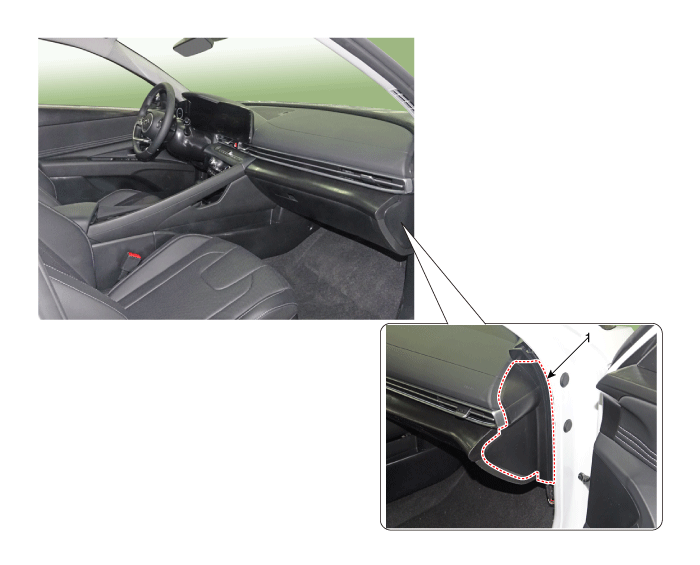
| 1. Crash pad side cover [RH] |
Repair procedures
| Replacement |
|
|
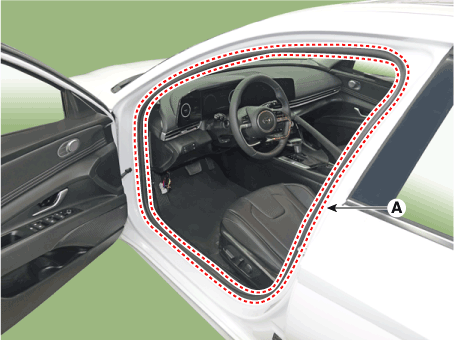
| 1. | Detach the clips, then remove the front door body side weatherstrip (A). [LH]
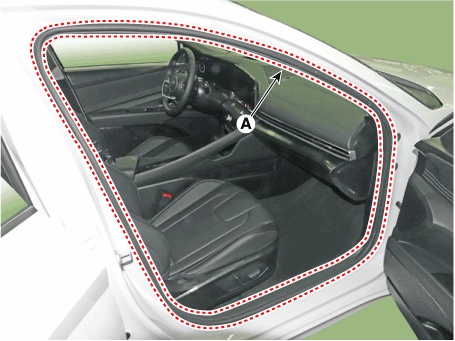
[RH]
|
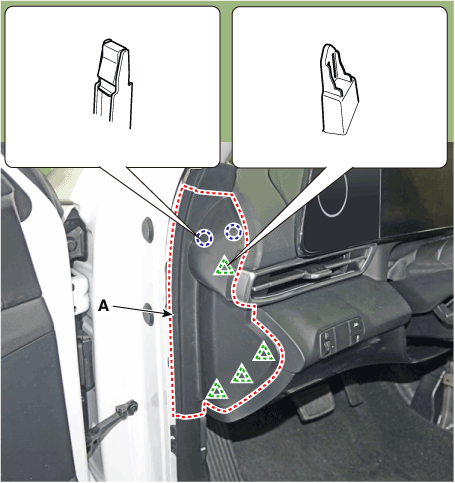
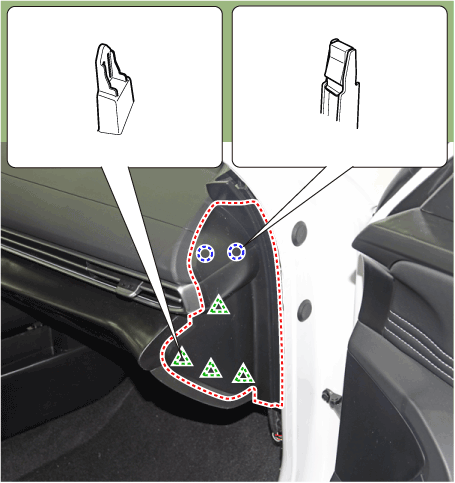
| 2. | Using a screwdriver or remover, remove the crash pad side cover (A). [LH]
[RH]
|
| 3. | To install, reverse the removal procedure.
|
 Crash Pad Air Vent
Components and components location
Component Location [This illustration shows the LHD type. RHD type is symmetrical.]1. Crash pad air vent [LH]2. Crash pad air vent [RH]
Repair procedures
Replacement[LH]
•
When removing with a flat - tip screwdriver or remover, wrap protective tape around the tools to prevent damage to components...
 Crash Pad Center Panel
Components and components location
Component Location [This illustration shows the LHD type. RHD type is symmetrical.]1. Crash pad center panel
Repair procedures
Replacement
•
When removing with a flat - tip screwdriver or remover, wrap protective tape around the tools to prevent damage to components...
Other information:
Hyundai Elantra (CN7) 2021-2025 Service Manual: Relay Box (Passenger Compartment)
Repair procedures Fuse Inspection1.Check that the fuse holders are loosely held and that the fuses are securely fixed by the holders.2.Check that each fuse circuit has the exact fuse capacity.3.Check the fuses for any damage. • If a fuse is to be replaced, be sure to use a new fuse of the same capacity...
Hyundai Elantra (CN7) 2021-2025 Service Manual: Repair procedures
InspectionInspecion Item• Battery efficiency inspection• Battery voltage inspection• Charging voltage insptection• General inspection• Terminal tightening state inspection• Engine/ transaxle ground state inspection• Wiring hareness ground state i..
Copyright © 2025 www.helantra7.com



.png)
.png)