Hyundai Elantra: Front Seat / Front Seat Frame Assembly
Hyundai Elantra (CN7) 2021-2025 Service Manual / Body (Interior and Exterior) / Front Seat / Front Seat Frame Assembly
Components and components location
| Component Location |
| 1. Front seat back frame assembly | 2. Front seat cushion frame assembly |
Repair procedures
| Replacement |
|

|

| 1. | Remove the front seat back cover. (Refer to Front Seat - "Front Seat Back Cover") |
| 2. | Remove the front seat cushion cover. (Refer to Front Seat - "Front Seat Cushion Cover") |
| 3. | Remove the side airbag (SAB) module. (Refer to Airbag Module - "Side Airbag (SAB) Module") |
| 4. | Remove the lumbar support assembly. (Refer to Body Electrical System - "Lumbar Support Unit") |
| 5. | After loosening the mounting bolts, detach the front seat back frame assembly (A) from the front seat cushion frame assembly (B).
|
| 6. | To install, reverse the removal procedure.
|

 Front Seat Cushion Cover
Components and components location
Component Location[General type]1. Front seat cushion cover [N Line]1. Front seat cushion cover
Repair procedures
Replacement
•
When removing with a flat-tip screwdriver or remover, wrap protective tape around the tools to prevent damage to components...
 Rear Seat
..
Other information:
Hyundai Elantra (CN7) 2021-2025 Service Manual: Airbag Module Disposal
Description and operation Airbag Disposal When you scrap a vehicle equipped with an airbag, you must deploy it first.When you deploy an airbag, you need to have a skilled mechanic do the work. The used airbag should not be reinstalled in another vehicle for reuse. • Upon deployment, the explosion will create a loud noise, so you have to do it in a prop..
Hyundai Elantra (CN7) 2021-2025 Service Manual: Electric WGT Control Actuator
Description and operation DesrcriptionThe Electric Waste Gate Actuator(EWGA) is installed on the turbocharger. EWGA operates vain in west gate turbocharger and controls the compressed air by PWM signal of ECM. Specifications SpecificationEWGA Position Sensor [integrated into EWGA] Position Output Voltage [V] ..
Categories
- Manuals Home
- 7th Gen Hyundai Elantra Owners Manual
- 7nd Gen Hyundai Elantra Service Manual
- Engine Mechanical System
- Integrated Thermal Management Module (ITM)
- Body Electrical System
- Rear Seats
- Vehicle Information
Tachometer
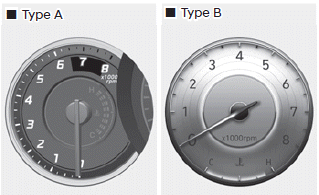
The tachometer indicates the approximate number of engine revolutions per minute (RPM).
Use the tachometer to select the correct shift points and to prevent lugging and/ or over-revving the engine.
NOTICE
Do not operate the engine within the tachometer's RED ZONE. This may cause severe engine damage.

Copyright © 2025 www.helantra7.com