Hyundai Elantra: Crash Pad / Glove Box
Components and components location
| [This illustration shows the LHD type. RHD type is symmetrical.] |

Repair procedures
| •
| When removing with a flat - tip screwdriver or remover, wrap protective tape around the tools to prevent damage to components. |
| •
| Put on gloves to prevent hand injuries. |
|
| •
| Take care not to bend or scratch the trim and panels. |
|
| 1. | Open the glove box (A). 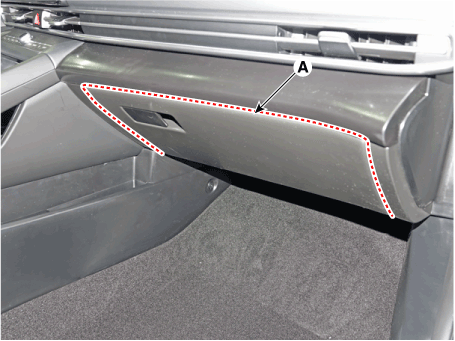
|
| 2. | Press the side of the glove box and remove the glove box (A). 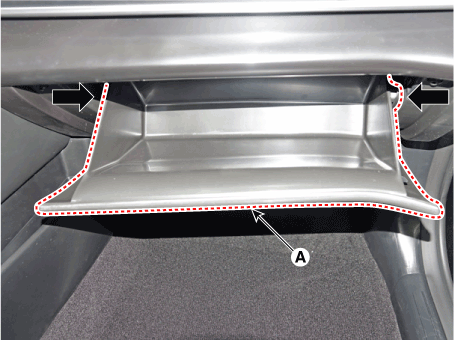
|
| 3. | Install in the reverse order of removal. | •
| Replace any damaged clips (or pin - type retainers). |
|
|
Components and components location
Component Location [This illustration shows the LHD type. RHD type is symmetrical.]1. Crash pad lower panel
Repair procedures
Replacement
•
When removing with a flat - tip screwdriver or remover, wrap protective tape around the tools to prevent damage to components...
Components and components location
Component Location [This illustration shows the LHD type. RHD type is symmetrical.]1. Glove box housing cover
Repair procedures
Replacement
•
When removing with a flat - tip screwdriver or remover, wrap protective tape around the tools to prevent damage to components...
Other information:
Repair procedures
Removal1.Disconnect the negative (-) battery terminal.2.Remove the front bumper.(Refer to Body - "Front Bumper Cover")3.Remove the head lamp.4.Remove the bulb socket (A) and turn signal lamp bulb (B) from the lamp assembly.Replacement1...
Components and components location
Component Location 1. Outside rear view mirror
Repair procedures
Replacement
•
When removing with a flat - tip screwdriver or remover, wrap protective tape around the tools to prevent damage to components...


 Crash Pad Lower Panel
 Glove Box Housing Cover