Hyundai Elantra: Crash Pad / Crash Pad Lower Panel
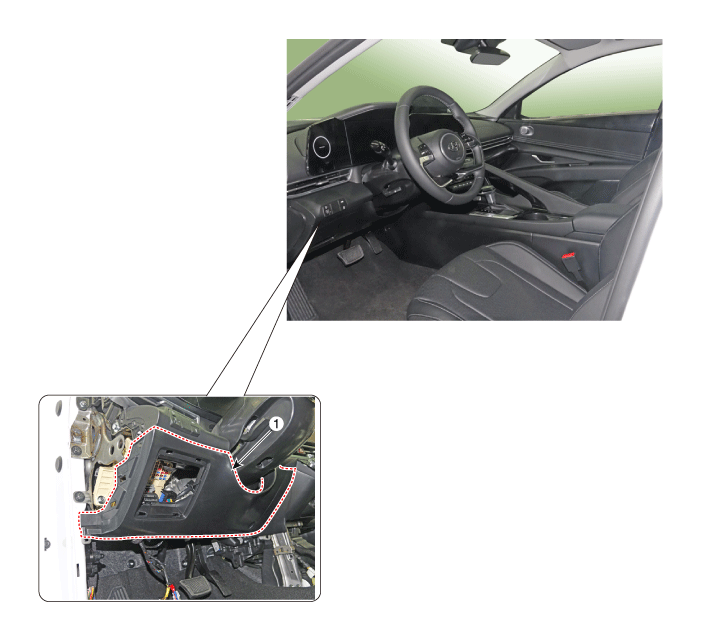
Components and components location
| [This illustration shows the LHD type. RHD type is symmetrical.] |
Repair procedures
| •
| When removing with a flat - tip screwdriver or remover, wrap protective tape around the tools to prevent damage to components. |
| •
| Put on gloves to prevent hand injuries. |
|
| •
| Take care not to bend or scratch the trim and panels. |
|
| 1. | Remove the cowl side trim. (Refer to Interior Trim - "Cowl Side Trim") |
| 2. | Detach the clips, then remove the front door body side weatherstrip (A). 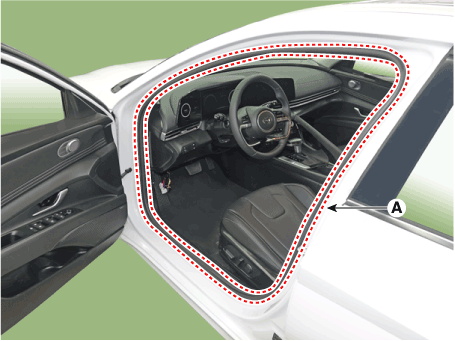
|
| 3. | Using a screwdriver or remover, remove the crash pad side cover [LH] (A). 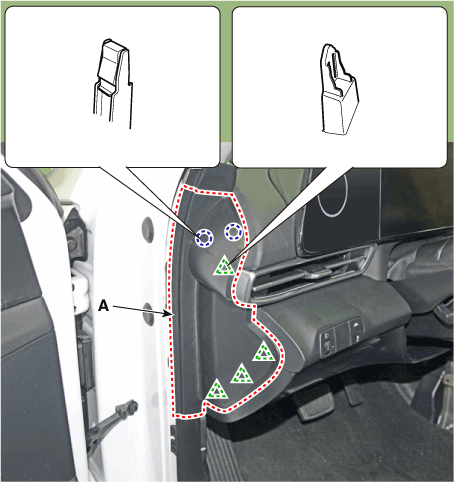
|
| 4. | Loosen the mounting screws and remove the crash pad lower panel (A). 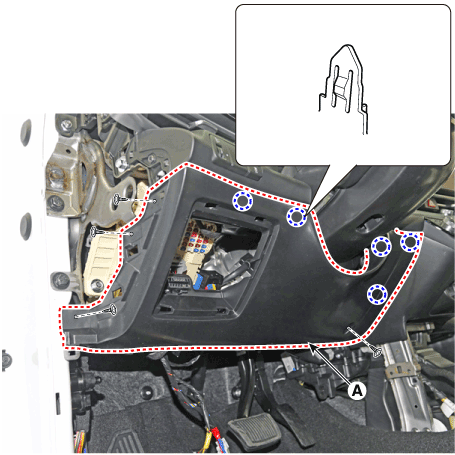
|
| 5. | Press the lock pin, separate diagnosis connector (A). 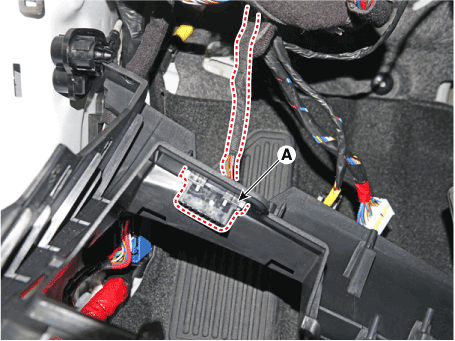
|
| 6. | To install, reverse the removal procedure. | •
| Make sure the connector are connected in properly. |
| •
| Replace any damaged clips (or pin - type retainers). |
|
|
Components and components location
Components Location[This illustration shows the LHD type. RHD type is symmetrical.]1. Crash pad garnish [LH]3. Crash pad garnish [CTR]2...
Components and components location
Components Location[This illustration shows the LHD type. RHD type is symmetrical.]1. Glove box
Repair procedures
Replacement
•
When removing with a flat - tip screwdriver or remover, wrap protective tape around the tools to prevent damage to components...
Other information:
Repair procedures
Replacement1.Remove the crankshaft damper pulley.(Refer to Drive Belt System - "Crankshaft Damper Pulley")2.Remove the front oil seal (A).3.Using the SST (0K231-2C200), install a new front oil seal.
•
Always use a new front oil seal...
Special Service Tools
Tool (Number and name)
Illustration
Use
09880 - 4F000Hog ring clip installerHog ring clip installation..

 Crash Pad Garnish
 Glove Box


.png)