Hyundai Elantra: Crash Pad / Crash Pad Garnish
Hyundai Elantra (CN7) 2021-2025 Service Manual / Body (Interior and Exterior) / Crash Pad / Crash Pad Garnish
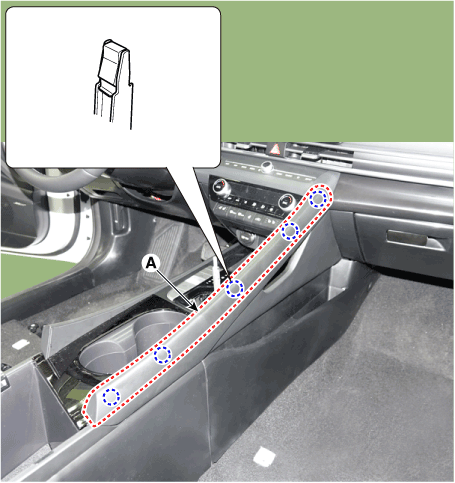
Components and components location
| Components Location |
| [This illustration shows the LHD type. RHD type is symmetrical.] |
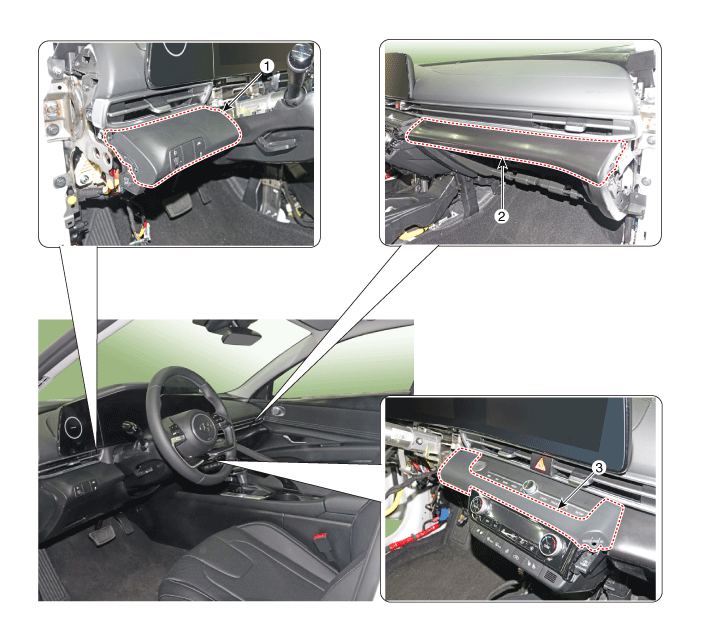
| 1. Crash pad garnish [LH] 3. Crash pad garnish [CTR] | 2. Crash pad garnish [RH] |
Repair procedures
| Replacement |
|

|

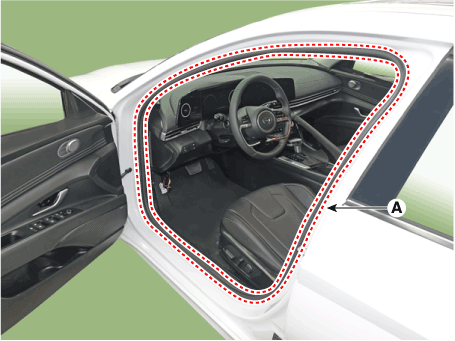
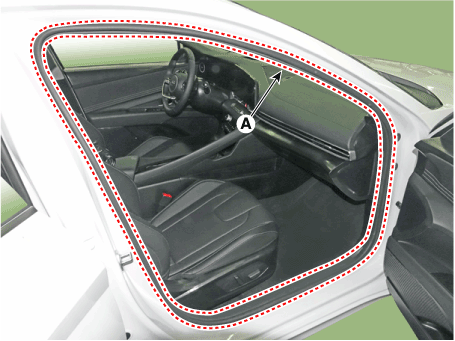
| 1. | Detach the clips, then remove the front door body side weatherstrip (A). [LH]
[RH]
|
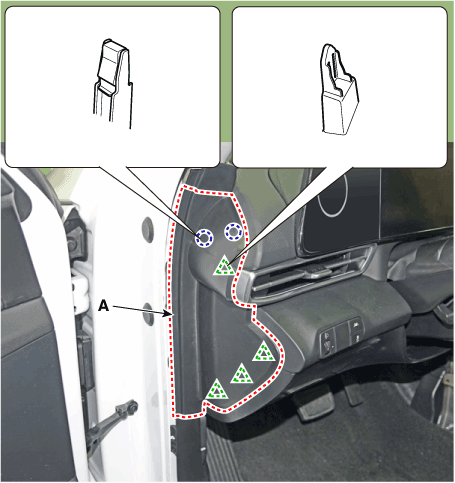
| 2. | Using a screwdriver or remover, remove the crash pad side cover (A). [LH]
[RH]
|
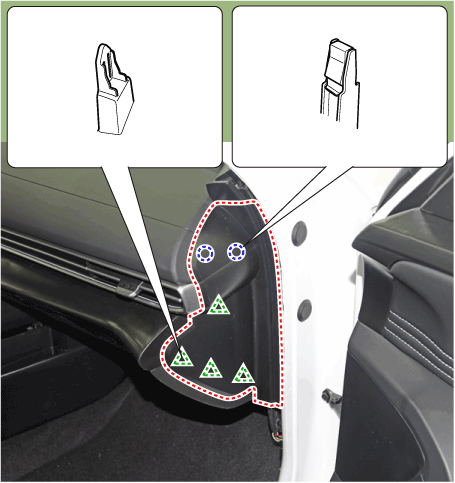
| 3. | Remove the crash pad garnish [LH]
[RH]
[CTR]
|

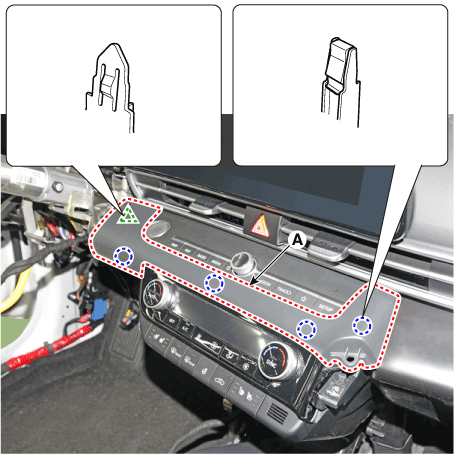
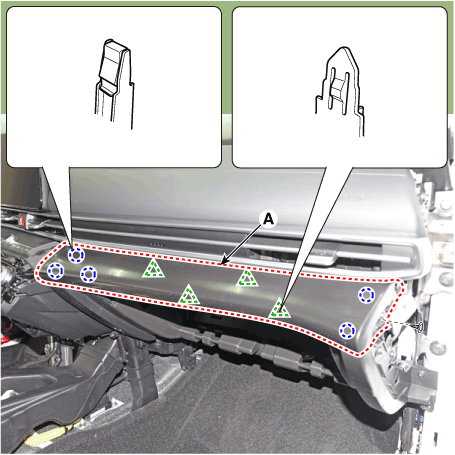
| 4. | Install in the reverse order of removal.
|

 Cluster Fascia Panel
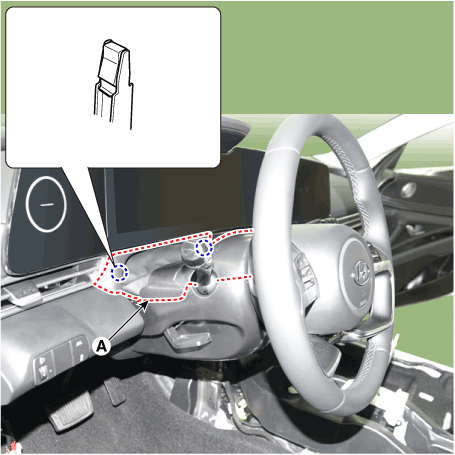
Components and components location
Components Location[This illustration shows the LHD type. RHD type is symmetrical.]1. Center fascia panel
Repair procedures
Replacement
•
When removing with a flat - tip screwdriver or remover, wrap protective tape around the tools to prevent damage to components...
 Crash Pad Lower Panel
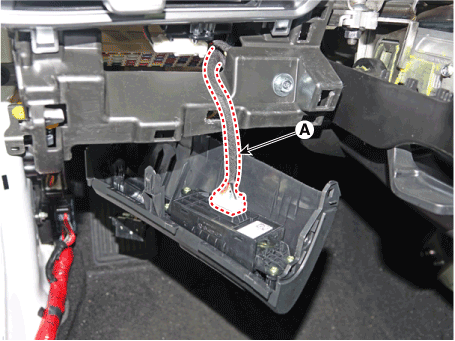
Components and components location
Component Location [This illustration shows the LHD type. RHD type is symmetrical.]1. Crash pad lower panel
Repair procedures
Replacement
•
When removing with a flat - tip screwdriver or remover, wrap protective tape around the tools to prevent damage to components...
Other information:
Hyundai Elantra (CN7) 2021-2025 Owner's Manual: Function settings
Setting Turning the function ON/OFF With the engine on, shortly press the Lane Driving Assist button located on the steering wheel to turn on Lane Following Assist. The white or green indicator light will illuminate on the cluster. Press the button again to turn off the system...
Hyundai Elantra (CN7) 2021-2025 Service Manual: Description and operation
DescriptionSystem OverviewThe System offers the following features:– Human / machine interface through a 1-stage button, for terminal switching and engine start.– Control of external relays for ACC / IGN1 / IGN2 terminal switching and STARTER, without use of mechanical ignition switch...
Categories
- Manuals Home
- 7th Gen Hyundai Elantra Owners Manual
- 7nd Gen Hyundai Elantra Service Manual
- System operation
- Specifications
- Recommended Lubricants and Capacities
- Forward Collision–Avoidance Assist (FCA) (sensor fusion)
- Interior Overview
Tilting the sunroof
.png)
Tilt the sunroof open:
Push the sunroof control lever upward until the sunroof moves to the desired position.
To close the sunroof:
Press the sunroof lever forward until the sunroof moves to the desired position.

Copyright © 2025 www.helantra7.com