Hyundai Elantra (CN7): Body (Interior and Exterior) / Hood
Repair procedures
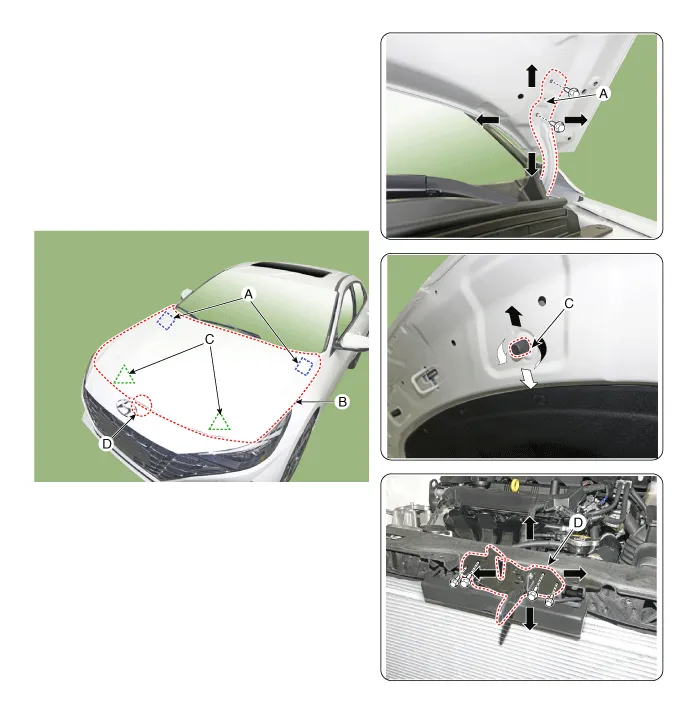
| Adjustment |
| 1. | After loosening the hinge (A) mounting bolt, adjust the hood (B) by moving it up and down or from side to side and tighten the bolt. |
| 2. | Adjust the hood height by moving the hood overslam bumpers (C) up and down. |
| 3. | After loosening the hood latch (D) mounting bolts, adjust the latch by moving it up and down or from side to side.
|
Hood Assembly
Components and components location
| Component Location |

| 1. Hood assembly |
Repair procedures
| Replacement |
|

|

| 1. | After loosening the hood hinge (A) mounting bolts, remove the hood assembly (B).
|
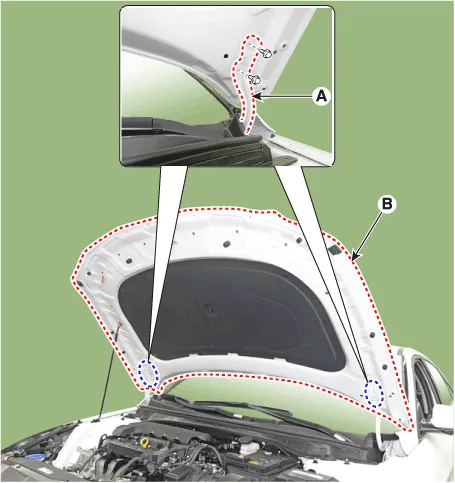
| 2. | To install, reverse the removal procedure.
|
Hood Insulator Pad
Repair procedures
| Replacement |
|
| 1. | Using a clip remover, remove the clips and then the hood insulator pad (A).
|

| 2. | To install, reverse the removal procedure.
|
Hood Latch Release Handle
Components and components location
| Component Location |
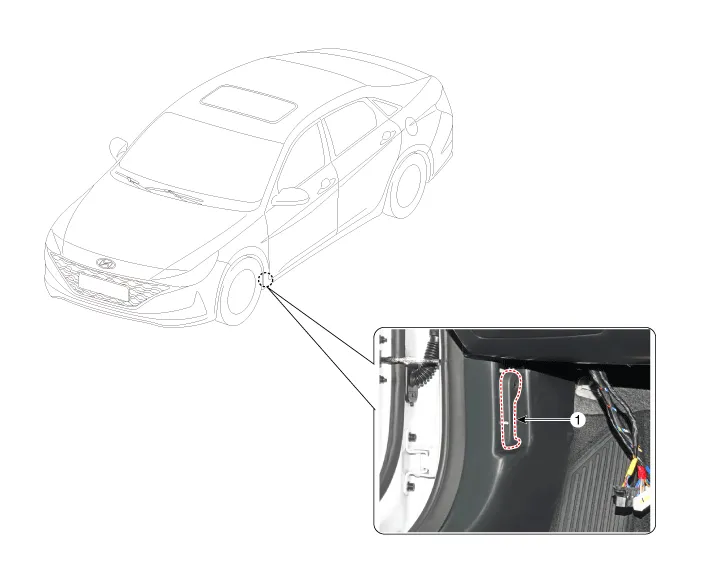
| 1. Hood latch release handle |
Repair procedures
| Replacement |
| 1. | Using screw driver or remover, remove the hood release handle (A).
|
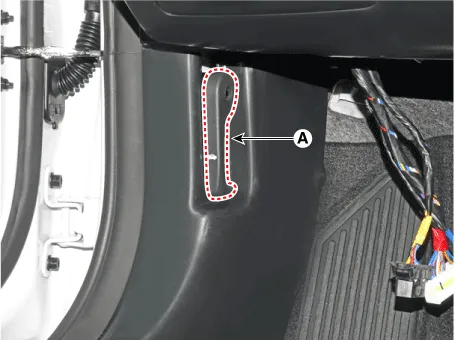
| 2. | To install, reverse the removal procedure.
|
Hood Latch
Components and components location
| Component Location |

| 1. Hood latch assembly |
Repair procedures
| Replacement |
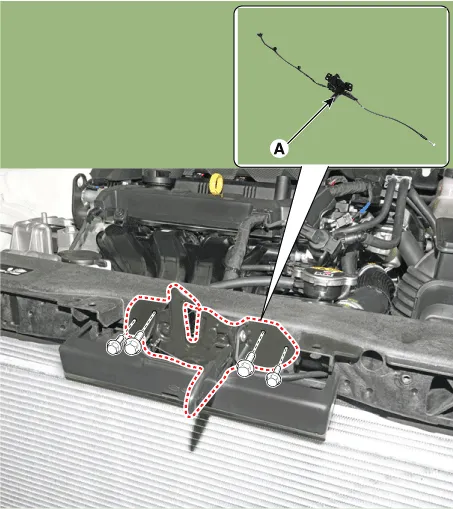
| 1. | Remove the front bumper. (Refer to Front Bumper - "Front Bumper Assembly") |
| 2. | Disconnect the connector (A), then remove the wiring mounting clips.
|

| 3. | Disconnect the hood latch release cable (A).
|

| 4. | Loosen the mounting bolts and remove the hood latch assembly (A).
|
| 5. | To install, reverse the removal procedure.
|
Hood Weatherstrip
Repair procedures
| Replacement |
| 1. | Remove the hood weatherstrip (A).
|
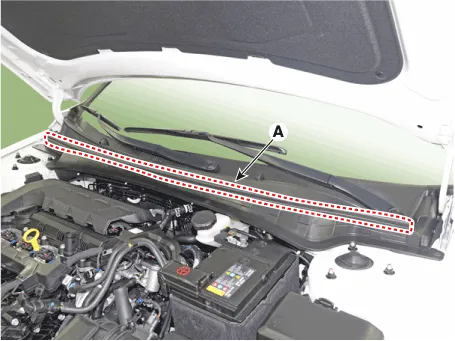
| 2. | To install, reverse the removal procedure. |
Components and components location Component Location1. Fender assembly Repair procedures Replacement • When removing the fender, wrap protective tape around a screwdriver or remover not to damage components• Put on gloves to prevent hand injuries1.
Other information:
Hyundai Elantra (CN7) 2021-2026 Service Manual: General safety information and caution
Instructions (R-134a)When Handling Refrigerant1.R-134a liquid refrigerant is highly volatile. A drop on the skin of your hand could result in localized frostbite. When handling the refrigerant, be sure to wear gloves. 2.It is standard practice to wear goggles or glasses to protect your eyes, and gloves to protect your hands.
Hyundai Elantra (CN7) 2021-2026 Service Manual: Ambient Temperature Sensor
Description and operation DescriptionThe ambient temperature sensor is located at the front of the condenser and detects ambient air temperature. It is a negative type thermistor; resistance will increase with lower temperature, and decrease with higher temperature.
Categories
- Manuals Home
- Hyundai Elantra Owners Manual
- Hyundai Elantra Service Manual
- Specifications
- Steering System
- Rear Seats
- New on site
- Most important about car
