Hyundai Elantra: Cooling System / Radiator
Components and components location
| Components |
| 1. Radiator 2. Radiator upper hose 3. Radiator lower hose 4. Filler neck assembly | 5. Radiator upper mounting bracket 6. Radiator lower mounting insulator 7. Radiator air guard |
Repair procedures
| Removal and Installation |
| 1. | Disconnect the battery negative terminal. |
| 2. | Remove the engine room under cover. (Refer to Engine and Transaxle Assembly - "Engine Room Under Cover") |
| 3. | Drain the coolant. (Refer to Cooling System - "Coolant") |
| 4. | Remove the cooling fan assembly. (Refer to Cooling System - "Cooling Fan") |
| 5. | Disconnect the radiator lower hose (A).
|
| 6. | Disconnect the radiator upper hose (A)
|
| 7. | Remove the front bumper. (Refer to Body (Interior and Exterior) - "Front Bumper") |
| 8. | Remove the air guard (A).
|
| 9. | Remove the side air guard (A).
[RH]
[LH]
|
| 10. | Loosen the intercooler mounting bolts (A).
[RH]
[LH]
|
| 11. | Remove the radiator upper mounting bracket bolts (A).
[RH]
[LH]
|
| 12. | Separate the A/C condenser from the radiator and then remove the radiator (A) from the vehicle.
|
| 13. | Install in the reverse order of removal. |
| 14. | Fill with engine coolant. (Refer to Cooling System - "Coolant")
|

| 15. | Start engine and check for leaks. |
| Inspection |
Radiator Leakage Test
| 1. | Wait for the engine to cool. Carefully remove the coolant reservoir tank cap and fill the radiator with engine coolant. Then, install it on the pressure tester. |
| 2. | Apply a pressure tester to the radiator and apply a pressure of 125.3 - 154.7 kPa (1.28 - 1.58 kgf/cm², 22.44 - 18.17 psi). |
| 3. | Inspect for engine coolant leaks and a drop in pressure. |
| 4. | Remove the tester and reinstall the radiator cap.
|
 Cooling Fan
Components and components location
Components1. Cooling fan2. Fan motor3. Cooling fan shroud
Repair procedures
Removal and InstallationCooling Fan Assembly1...
 Integrated Thermal Management Module (ITM)
Components and components location
Components1. Integrated thermal management module (ITM)2. Heater pipe3. Heater hose4. Turbo charger coolant hose5...
Other information:
Hyundai Elantra (CN7) 2021-2025 Service Manual: Drive Belt Tensioner
Repair procedures Removal and Installation1.Remove the drive belt.(Refer to Drive Belt System - "Drive Belt")2.Remove the drive belt tensioner (A). Tightening torque Bolt (B) : 18.6 - 23.5 N.m (1.9 - 2.4 kgf.m, 13.7 - 17.4 lb-ft)Bolt (C) : 34...
Hyundai Elantra (CN7) 2021-2025 Owner's Manual: Brake System
Power Brakes Your vehicle has power-assisted brakes that adjust automatically through normal usage. If the engine is not running or is turned off while driving, the power assist for the brakes will not work. You can still stop your vehicle by applying greater force to the brake pedal than typical...
Categories
- Manuals Home
- 7th Gen Hyundai Elantra Owners Manual
- 7nd Gen Hyundai Elantra Service Manual
- Dimensions, Engine specification, Bulb Wattage
- Body Electrical System
- Rear Seats
- Recommended Lubricants and Capacities
- Engine Mechanical System
Odometer
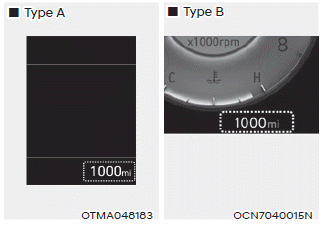
The odometer indicates the total distance that the vehicle has been driven and should be used to determine when periodic maintenance should be performed.

Copyright © 2025 www.helantra7.com