
Hyundai Elantra (CN7): Front Door / Front Door Trim
Components and components location
| Component Location |

| 1. Front door trim |
Repair procedures
| Replacement |
|

| 1. | Using a screwdriver or remover, remove the front door quadrant inner cover (A).
|

| 2. | After loosening the mounting screws, remove the lower part of the front door trim (A) using a flat - tip screwdriver.
|

| 3. | Remove the front door inside handle cage (A).
|
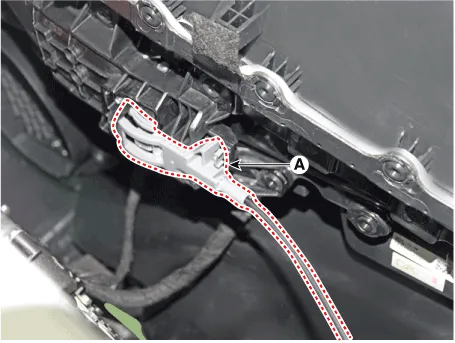
| 4. | Press the lock pin, separate the connectors (A).
|
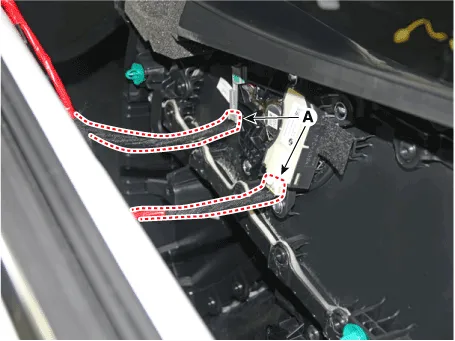

| 5. | To install, reverse the removal procedure.
| ||||||||||||||||||


AdjustmentGlass Adjustment • Check the glass run channel for damage or deterioration, and replace it if necessary.
Repair procedures Removal1.Remove the front door trim.(Refer to Front Door - "Front Door Trim")2.Cut the heat-welded part with a knife and loosen the mounting screw (B).
Other information:
Hyundai Elantra (CN7) 2021-2026 Service Manual: High Mounted Stop Lamp
Repair procedures Removal1.Disconnect the negative (-) battery terminal.2.Remove the rear package tray trim.(Refer to Body - "Rear Package Tray Trim")3.Loosen the mounting screws and remove the high mounted stop lamp (A).Installation1.Install the high mounted stop lamp.
Hyundai Elantra (CN7) 2021-2026 Service Manual: Immobilizer Control Unit
Components and components location Components (1)With Smart KeyConnector Pin Information Pin no Connector A Connector B Connector C Connector D Connector E 1ESCL
Categories
- Manuals Home
- Hyundai Elantra Owners Manual
- Hyundai Elantra Service Manual
- Engine Control / Fuel System
- Specifications
- General Tightening Torque Table. General information
- New on site
- Most important about car
