Hyundai Elantra (CN7): Front Door / Repair procedures
| Adjustment |
|

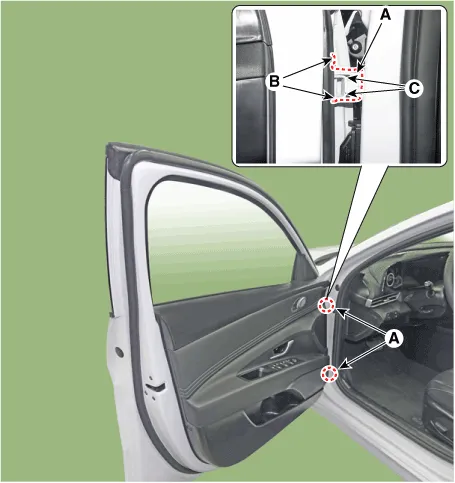
| 1. | Remove the front door trim. (Refer to Front Door - "Front Door Trim") |
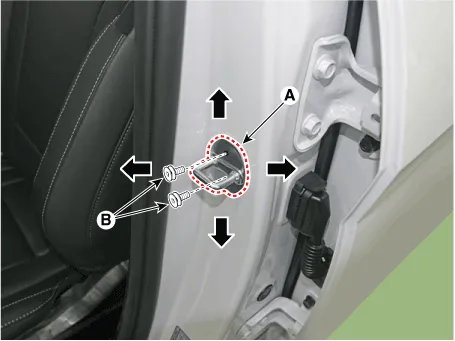
| 2. | Separate the mounting plug hole (A) from the front door module.
|
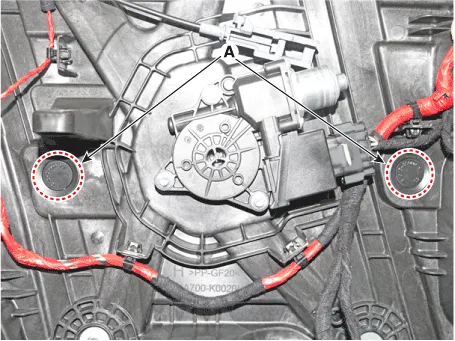
| 3. | After loosening the glass mounting bolts, adjust the spacing of the glass (A) by moving the glass from side to side and then tighten the bolts.
|

| 4. | Check the glass for normal operation. |
| 1. | After loosening the mounting screw, adjust the striker (A) by moving it forward and backward or from side to side and then tighten the bolts (B).
|
| 2. | Tap on the striker with a plastic hammer to adjust the striker. The striker will not move much, but will give some adjustment. |
| 3. | Hold the outer handle out, and push the door against the body to be sure the striker allows a flush fit. If the door latches properly, tighten the screws and recheck. |
| 1. | Check that the door and body edges are parallel.
|
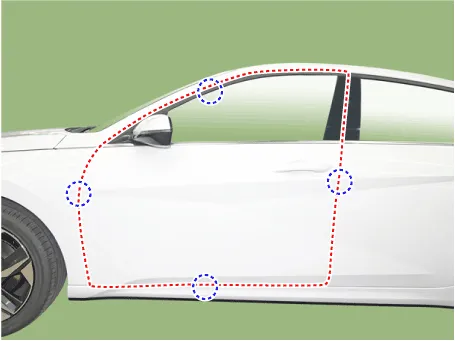
| 2. | Place the vehicle on a level surface before adjusting the doors. |
| 3. | Adjust the hinges (A) : - Loosen the door mounting bolts slightly, and move the door in or out until it flush with the body. - Loosen the hinge mounting bolts slightly, and move the door backward or forward, up or down as necessary. - Place a shop towel on the jack to prevent damage to the door when adjusting the door.
|
| 4. | Grease the pivot portions of the hinges indicated. |
| 5. | Check for water leaks. |
Components 1.Front door trim 2. Front door quadrant inner cover3. Front door belt inside weatherstrip4. Front door module5. Front door belt outside weatherstrip6.
Components and components location Component Location 1. Front door trim Repair procedures Replacement • When removing with a flat - tip screwdriver or remover, wrap protective tape around the tools to prevent damage to components.
Other information:
Hyundai Elantra (CN7) 2021-2026 Service Manual: Blower Resistor (Manual)
Repair procedures Inspection1.Measure the resistance between the terminals.2.The measured resistance is not within specification, the blower resistor must be replaced. (After removing the resistor)Replacement1.Disconnect the negative (-) battery terminal.
Hyundai Elantra (CN7) 2021-2026 Service Manual: Desctiprion and operation
DescriptionADAS_PRK is a unit that controls the functions required for ADAS parking. If the ADAS_PRK is applied, the parking distance warning function is also controlled by the ADAS_PRK.System FunctionParking Collision-Avoidance Assist (PCA)PCA is a parking safety system that assists in collision warning and emergency braking in the event of a coll
Categories
- Manuals Home
- Hyundai Elantra Owners Manual
- Hyundai Elantra Service Manual
- Front Bumper
- Maintenance
- Front Radar Unit
- New on site
- Most important about car
