
Hyundai Elantra (CN7): Cylinder Block / Rear Oil Seal
Components and components location
| Components |
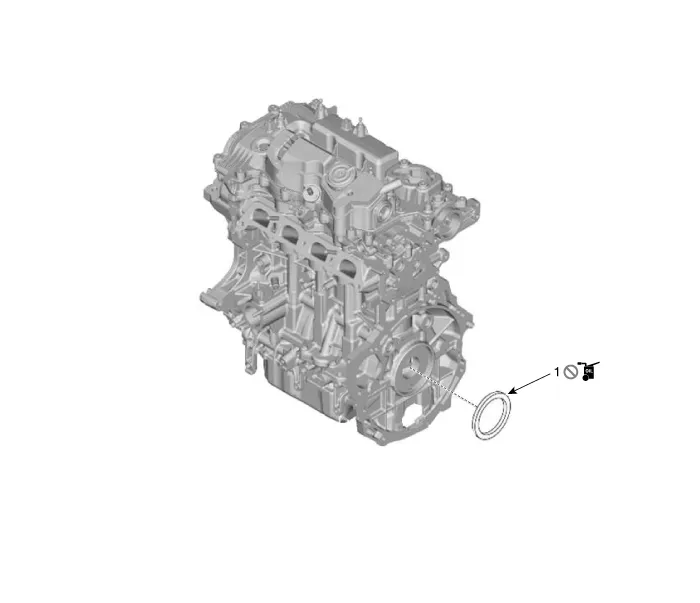
| 1. Rear oil seal |
Repair procedures
| Replacement |
| 1. | Remove the drive plate. (Refer to Cylinder Block - "Drive Plate") |
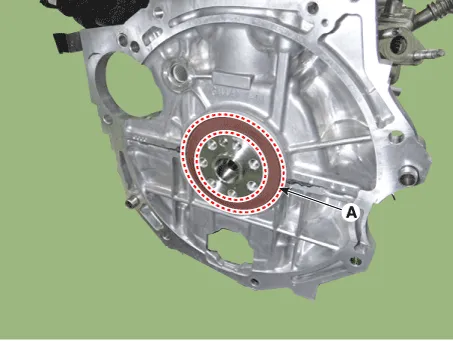
| 2. | Remove the rear oil seal (A).
|
| 3. | Apply engine oil on the edge of new rear oil seal. |
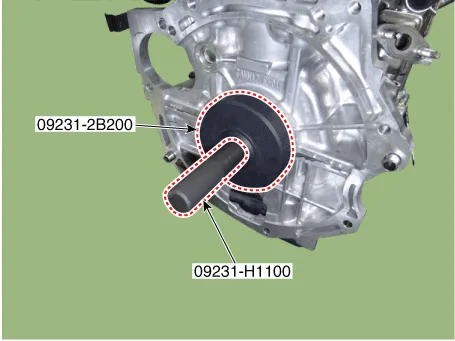
| 4. | Using SSTs (09231-H1100, 09231-2B200), install the new rear oil seal. When assembling, the surface of the oil seal shall coincide with the surface of the cylinder block.
|

| 5. | Install the other parts in the reverse order of removal. |
Repair procedures Removal and Installation1.Remove the automatic transaxle. (Refer to Manual Transaxle System - "Manual Transaxle")(Refer to DCT (Dual Clutch Transmission) System - "Dual Clutch Transmission Assembly")2.
Repair procedures Disassembly • Use fender covers to avoid damaging painted surfaces.• To avoid damage, unplug the wiring connectors carefully while holding the connector portion.
Other information:
Hyundai Elantra (CN7) 2021-2026 Service Manual: Repair procedures
Refrigerant System Service Basics (R-134a)Refrigerant Recovery Use only service equipment that is U.L-listed and is certified to meet the requirements of SAE J2210 to remove HFC-134a(R-134a) from the air conditioning system. • Air conditioning refrigerant or lubricant vapor can irritate your eyes, nose, or
Hyundai Elantra (CN7) 2021-2026 Service Manual: Blower Motor
Repair procedures Inspection1.Connect the battery voltage and check the blower motor rotation.Replacement1.Disconnect the negative (-) battery terminal.2.Disconnect the blower motor connector (A) and then remove the blower motor (B) after loosening the screws.
Categories
- Manuals Home
- Hyundai Elantra Owners Manual
- Hyundai Elantra Service Manual
- Integrated Thermal Management Module (ITM)
- Instrument Panel Overview
- Body (Interior and Exterior)
- New on site
- Most important about car
