
Hyundai Elantra (CN7): Interior Trim / Rear Pillar Trim
Components and components location
| Component Location |
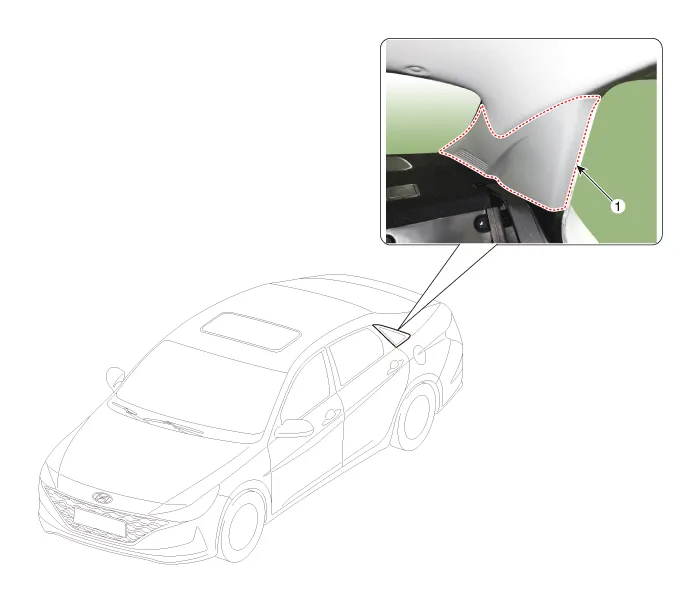
| 1. Rear pillar trim |
Repair procedures
| Replacement |
|

|

| 1. | Remove the rear door body side weatherstrip. (Refer to Rear Door - "Rear Door Side Weatherstrip") |
| 2. | Using screwdriver or remover, remove the rear pillar trim (A).
|
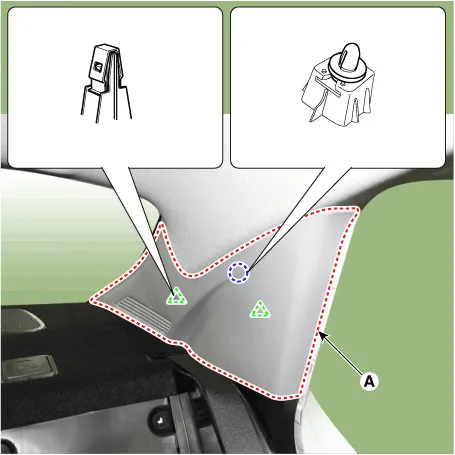
| 3. | To install, reverse the removal procedure.
|

Components and components location Component Location 1. Center pillar lower trim2.Center pillar upper trim Repair procedures Replacement[Center pillar lower trim] • When removing with a flat - tip screwdriver or remover, wrap protective tape around the tools to prevent damage to components.
Components and components location Component Location 1. Rear wheel house trim Repair procedures Replacement • When removing with a flat-tip screwdriver or remover, wrap protective tape around the tools to prevent damage to components.
Other information:
Hyundai Elantra (CN7) 2021-2026 Service Manual: Head Lamp Leveling Device
Components and components location Component Location1. Head lamp leveling actuator2. Head lamp leveling switch Head Lamp Leveling Switch Schematic diagrams Schematic Diagrams Repair procedures Replacement1.Disconnect the negative (-) battery terminal.
Hyundai Elantra (CN7) 2021-2026 Service Manual: Receiver-Drier
Repair procedures Replacement1.Remove the condenser.2.Remove the cap (A) on the bottom of the condenser with a L wrench. Tightening torque : 9.81 - 14.71 N.m (1.0 - 1.5 kgf.m, 7.2 - 10.8 lb-ft) 3.Remove the receiver-drier (A) from condenser using a long nose plier.
Categories
- Manuals Home
- Hyundai Elantra Owners Manual
- Hyundai Elantra Service Manual
- Function settings
- Maintenance
- Driver assistance system
- New on site
- Most important about car
